Sugarworks Blog
Untidying Up: Bringing yesterday's joy back into the kitchen
By now I'm sure you've all heard about the Netflix sensation Tidying Up with Marie Kondo, wherein Ms. Kondo helps us all organize and declutter our lives by letting go of objects that no longer spark joy. And while most of us these days can certainly use a little less clutter in our lives, there's a glorious byproduct of all this tidying up for those of us with a love of retro/vintage gear-
The thrift stores are overflowing with everyone's tidied-out gear!
Now, those of us of a certain age probably grew up with a Mirro Cooky Press in our homes. (Most of my pals I've shown this to have lit up and exclaimed "Hey! My mom had one of those when I was a kid!" Everyone's mom had one of these...) In fact, my mom still had one of these... until 2 months ago, when it finally broke.
But this thing lasted 40 years in my mom's kitchen! And that was 40 years of wear and tear- we made spritz cookies with this press every Christmas my entire life (including this last one), we made them at Easter, for school bake sales, for birthdays, and just when we were bored and wanted cookies. We put a lot of miles on this thing and I was super bummed when it finally broke.
Now, I don't want to give the impression that I'm so sentimental I won't replace a broken tool- the fact is you can't get these anymore. Not new, anyway. I feel old just typing this- but they literally don't make them like they used to. Mirro stopped making these around the late 70s / early 80s. Modern presses use a little different design and all the ones I've seen have at least some component of plastic to them. Maybe I'm just a stodgy old curmudgeon, but I just can't imagine the new presses I've seen lasting 40+ years.
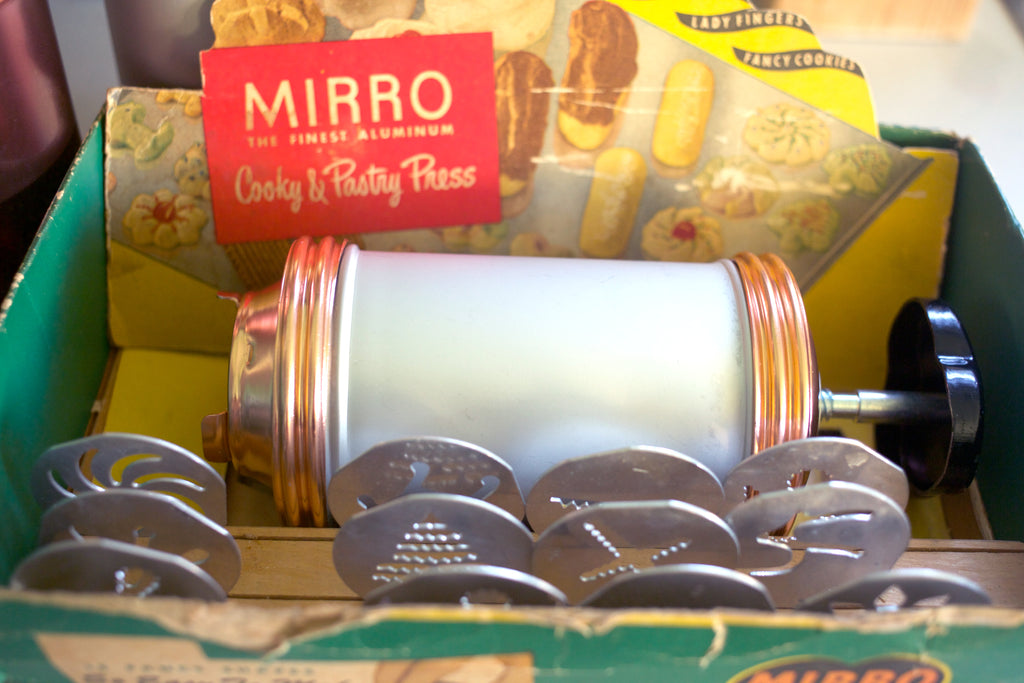
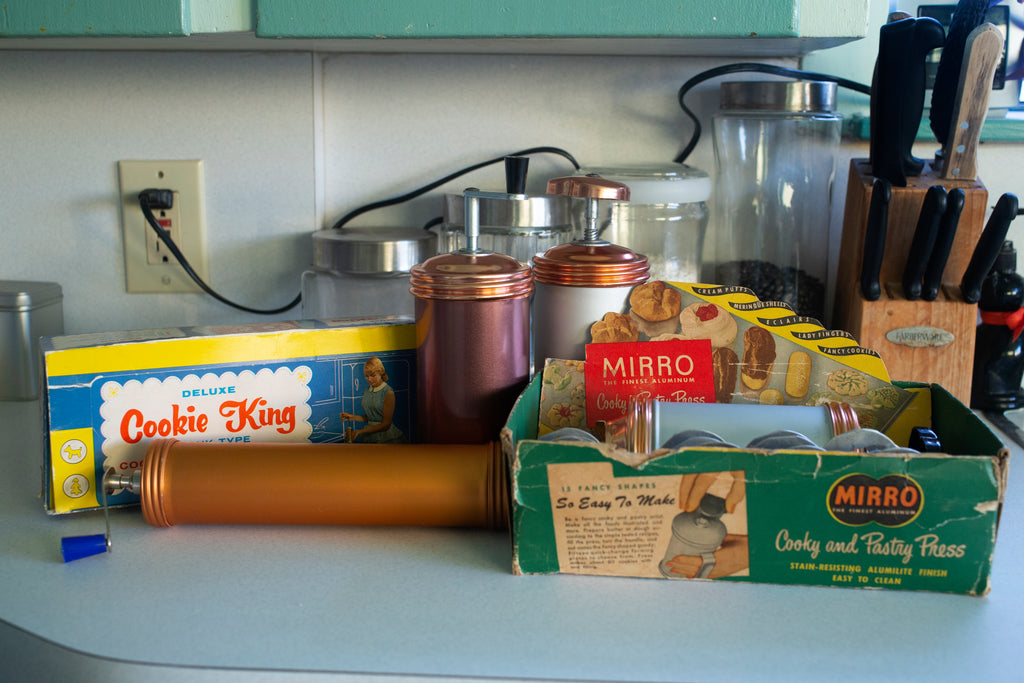
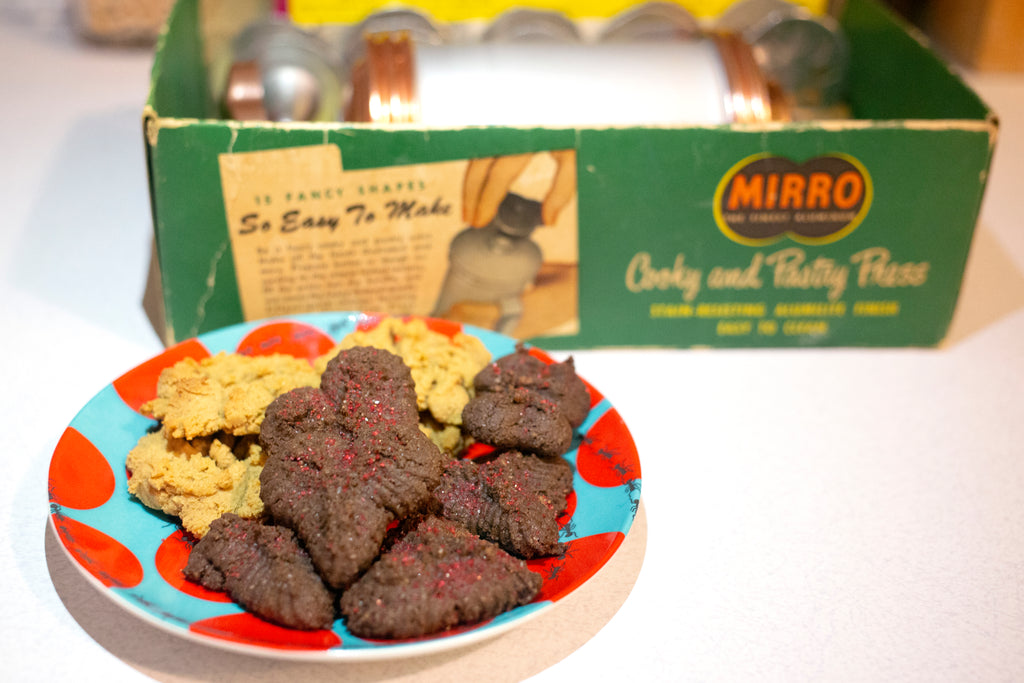
Which brings us back to the thrift store. There, on the shelf, still in its decades-old cardboard box, was a pristine Mirro Cooky Press, just like Mom's! Why yes, this DOES spark joy!! (To be clear- the press was in pristine condition, the box was battered as heck.)
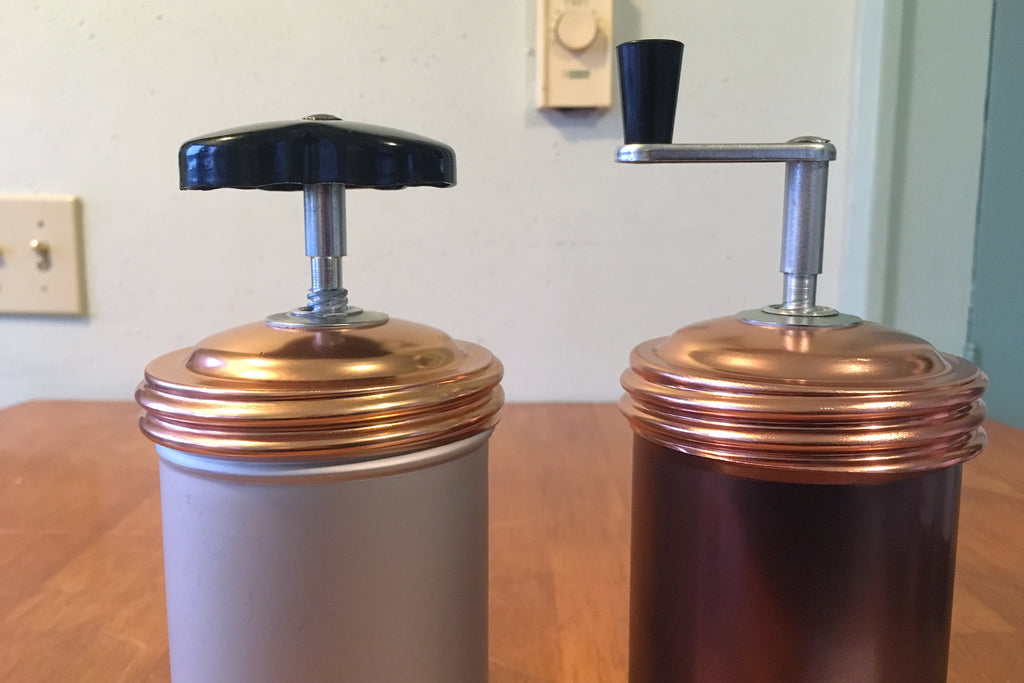
But wait- there's more! A little further down the aisle, another cookie press! Clearly a Mirro, but not in its box. This one was in a plastic bag, but included all of its shape plates and nozzles. And, get this- it had a crank-handle top. I'd never seen a Mirror with that! For $5 a piece, I totally snagged both. (You gotta try all the options, right?)
But wait, there's more. Further still down the aisle, another vintage cookie press! This one wasn't a Mirro; it's called Cookie King and was apparently made by Nordic Ware. It's narrower than the Mirro and uses a crank-handle, but still all aluminum and definitely from the same era. This one, also, was still in it's original box. Another $5, another cookie press.
And now, home to test them all.
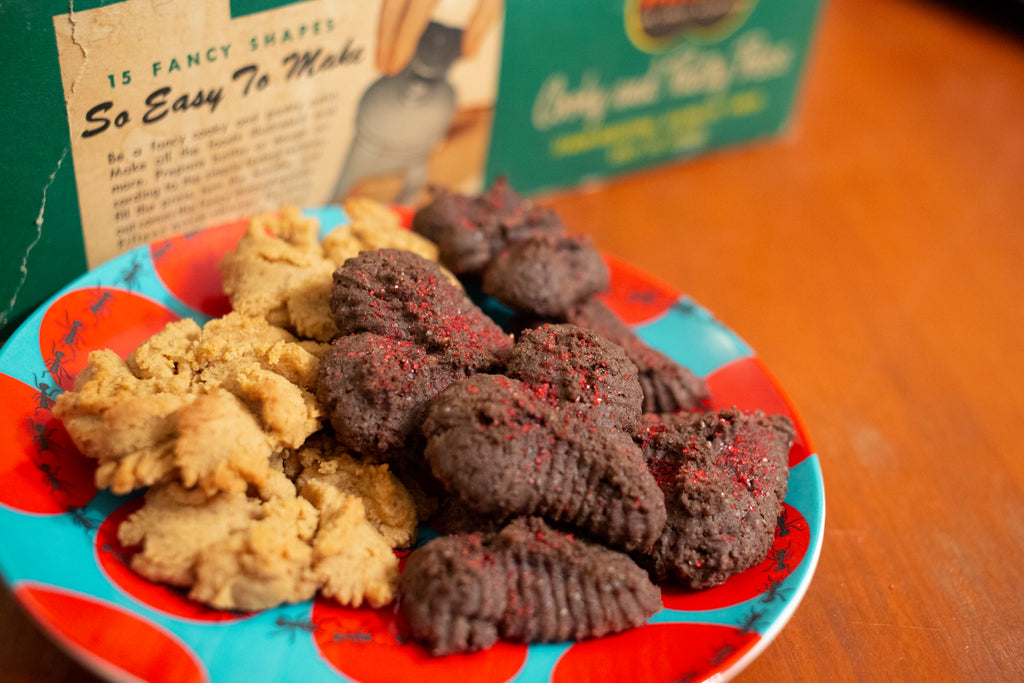
The Mirro that was in its box even still had the little recipe book that came with it. There are tons of different press cookie recipes you can make, but I made my own recipe to cater to our food-sensitive household. Here's what I did:
Vegan Gluten-Free Peanut Butter Press Cookies
- 1/2 cup Earth Balance vegan spread
- 1/2 cup creamy natural peanut butter
- 1 cup organic brown sugar
- 1/2 cup organic powdered sugar
- 1 tbsp molasses
- 2 tbsp agave nectar
- 1 tsp salt
- 1/2 tsp baking soda
- 1/4 cup vanilla soymilk
- 2 1/4 cup gluten-free 1:1 baking flour
- **optional** 4 tbsp cocoa (for chocolate peanut butter cookies)
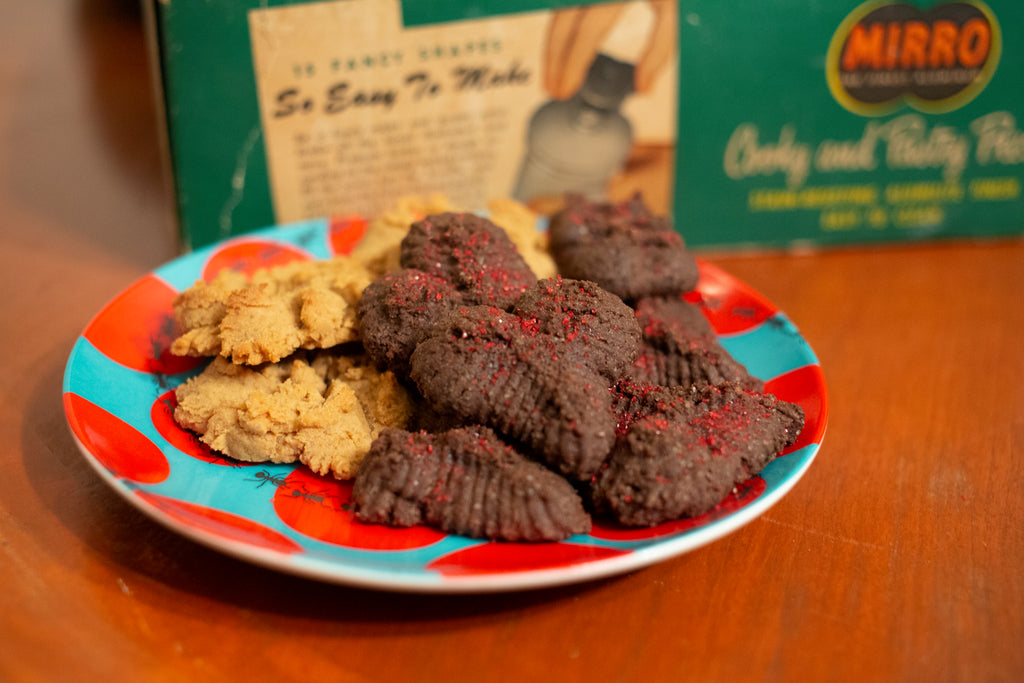
I tried out the Cookie King first. It came with 10 shape plates. Most of them were clearly derived from the Mirro set, but it had a few unique pieces so I opted for those. I tried out the snowman and the person.
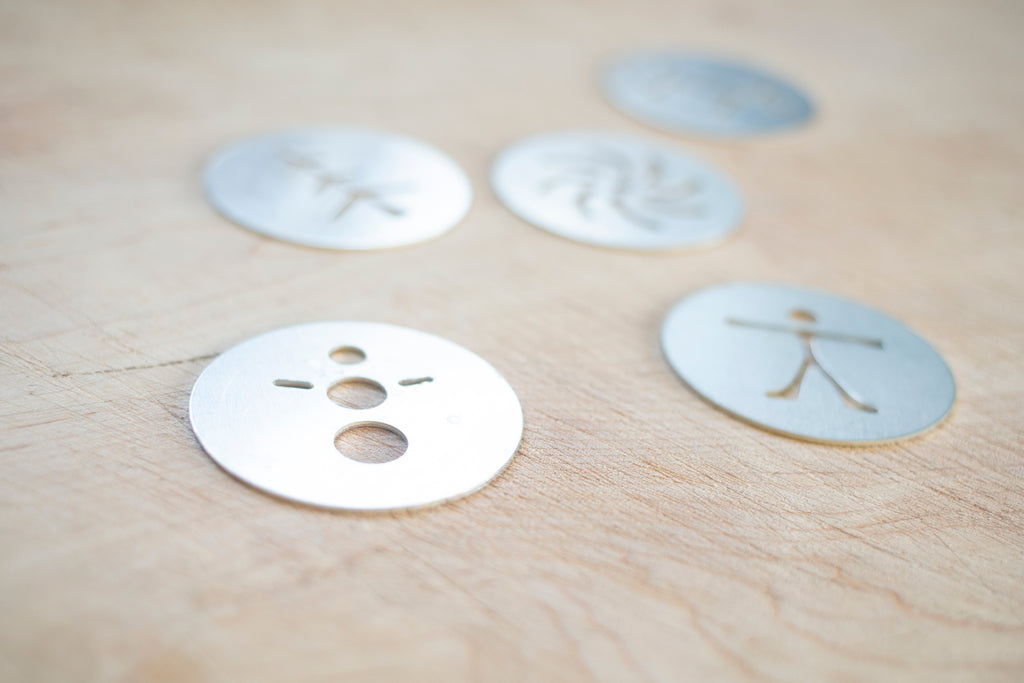
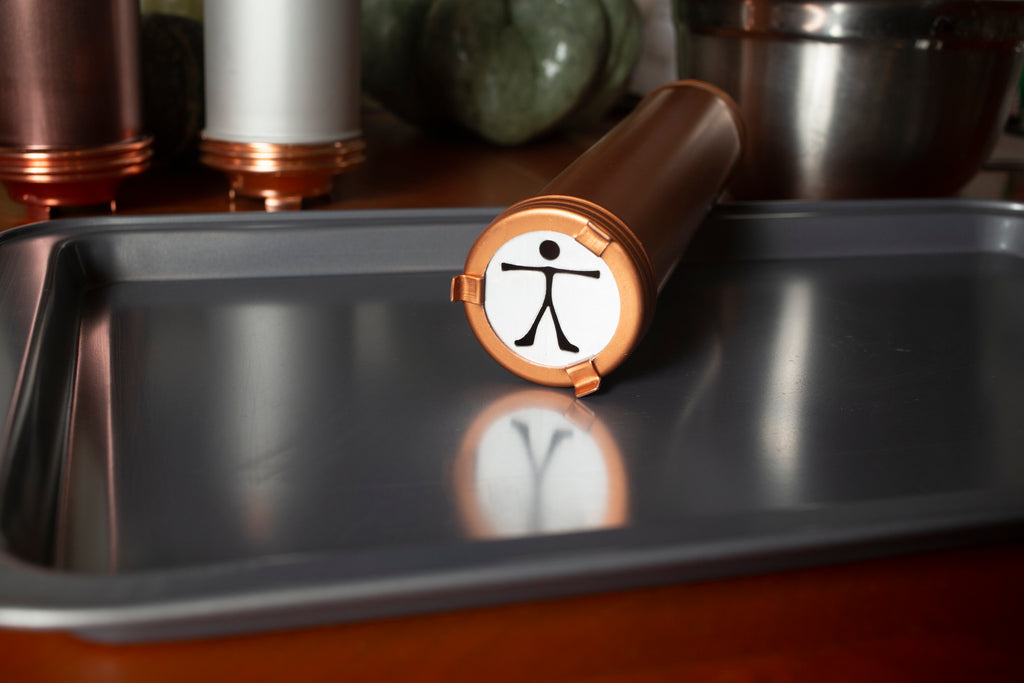
The press worked pretty well. The hand-crank felt less intuitive to use than the knob of the Mirro I grew up with, but it worked. The dough didn't seem to come away from the press as easily as the Mirror I was used to, but I wasn't sure at this point if that was a mark of the press, or the dough recipe I'd used. I used a knife to help it out a little.
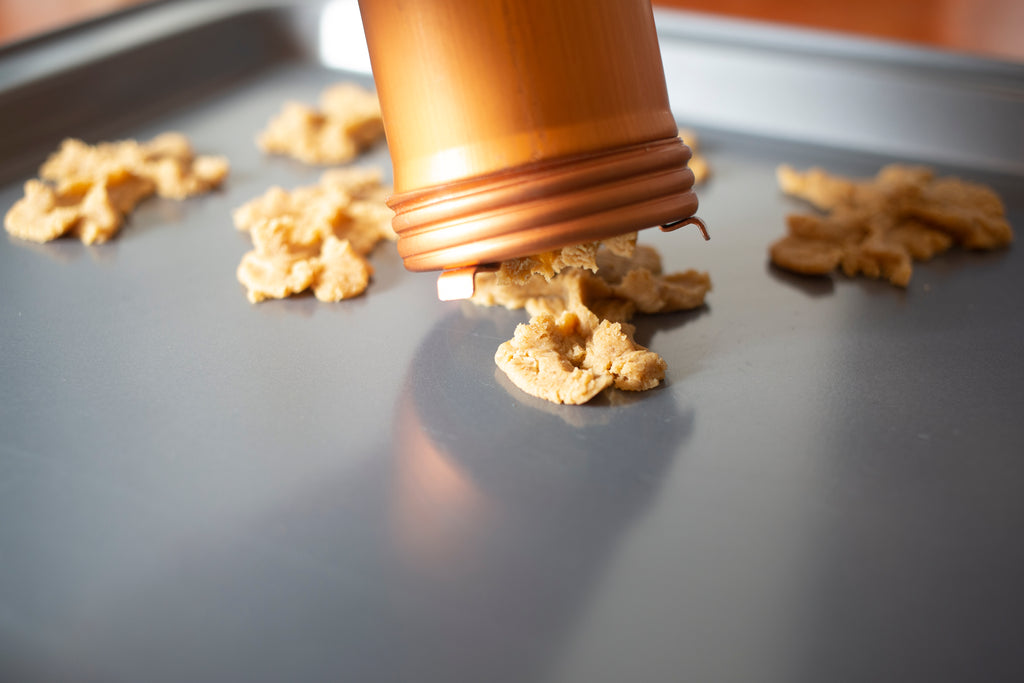
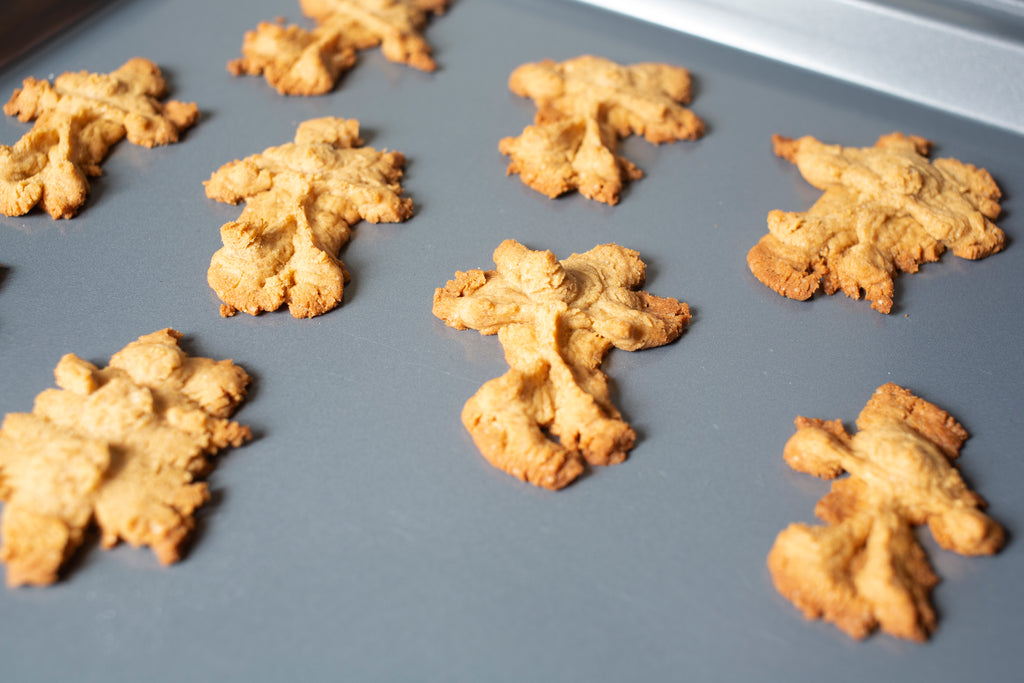
The cookies wound up looking a bit rough. To be fair, I think I chose the 2 hardest shapes to get nice looking cookies with. But I definitely don't recommend this for cute holiday snowmen cookies.
Next up, I went with the Mirro with the hand-crank. This was the worst design innovation Mirro ever did. The crank top worked out OK with the Cookie King, but possibly because the Mirro is wider and you're pressing more dough with a broader surface, it was just a pain. It was hard to turn, and kind of killed the fun of pressing out cookies.
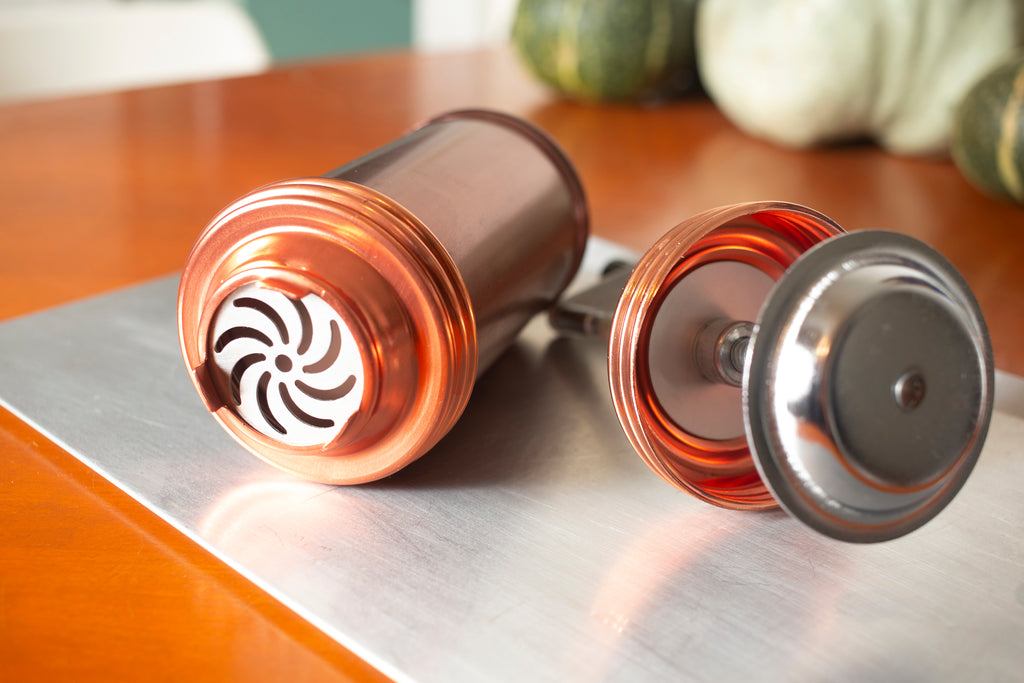
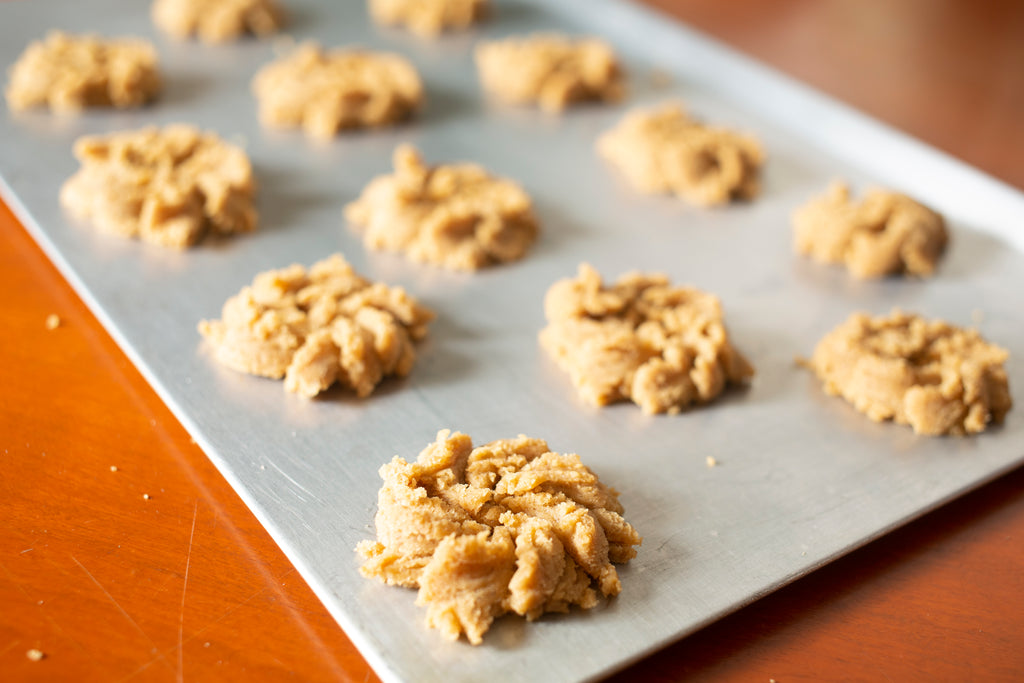
I stuck with the classic pinwheel shape for this one. When I got the right amount of dough pushed through, it came away nice and clean, but the crank required so much force that I kept picking up the press too early so the cookies got a bit sloppy.
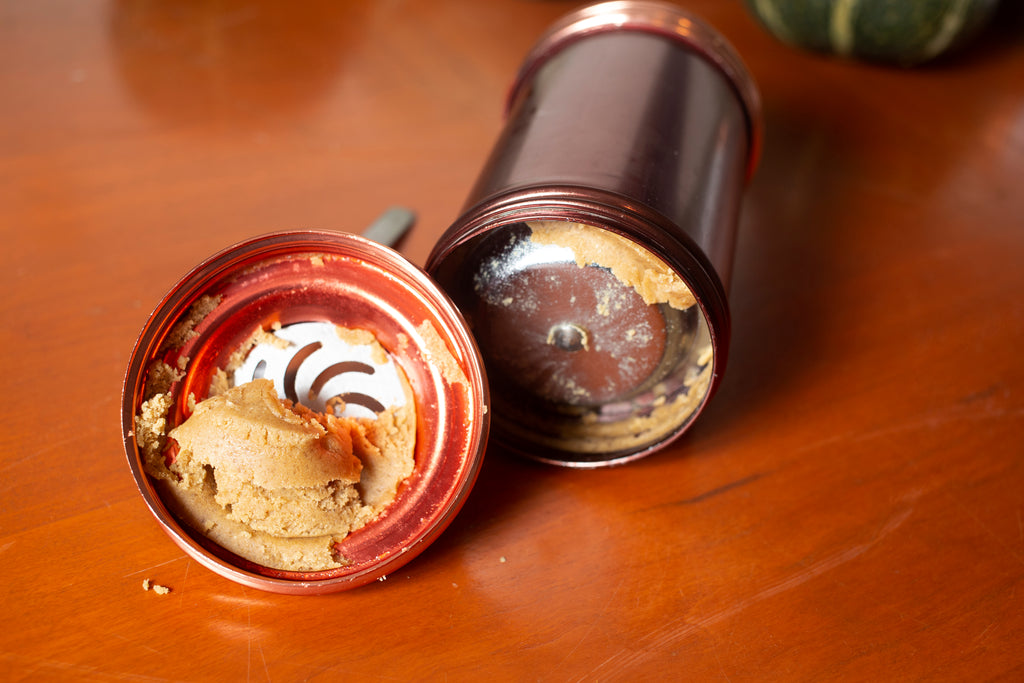
As with all cookie presses, a bit of dough is left in the press at the end of the batch. Because of the wider design of the Mirro, you get a lot more leftover dough in their press. I suspect Nordic Ware deliberately designed their for less waste, but personally... I live for that leftover dough! This alone could keep me in the Mirro camp.
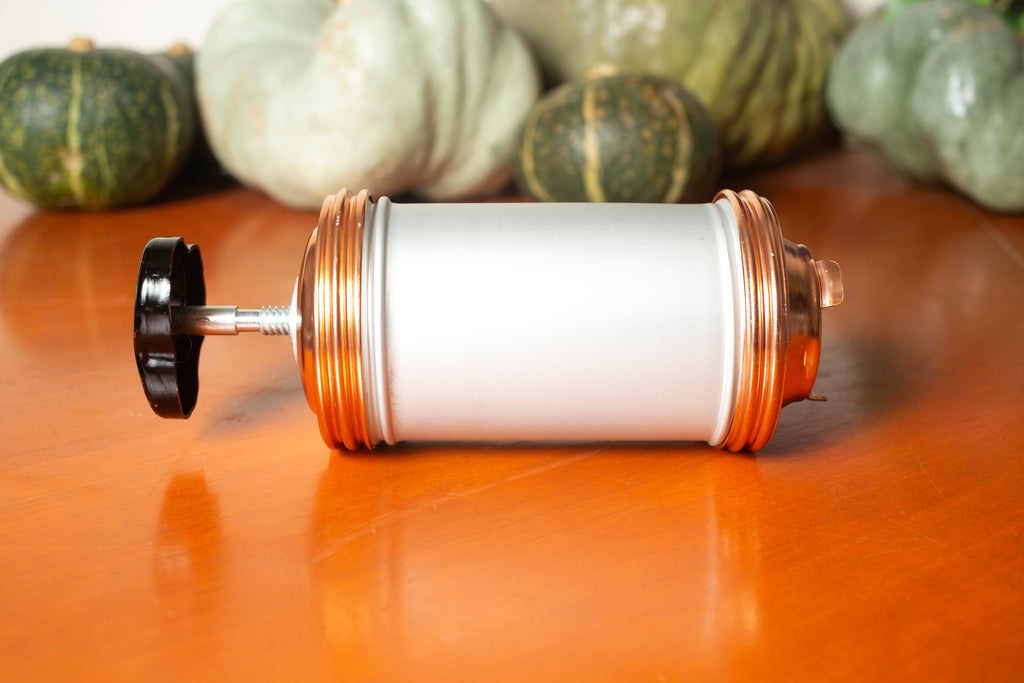
Last but not least, the clear winner- the classic Mirro knob-topped press. Easy to turn, easy to use, and super fun.
Growing up, we mostly used the pinwheel, flower, and Christmas tree plates. Some of the others I've always kind of wondered about. Like this one.
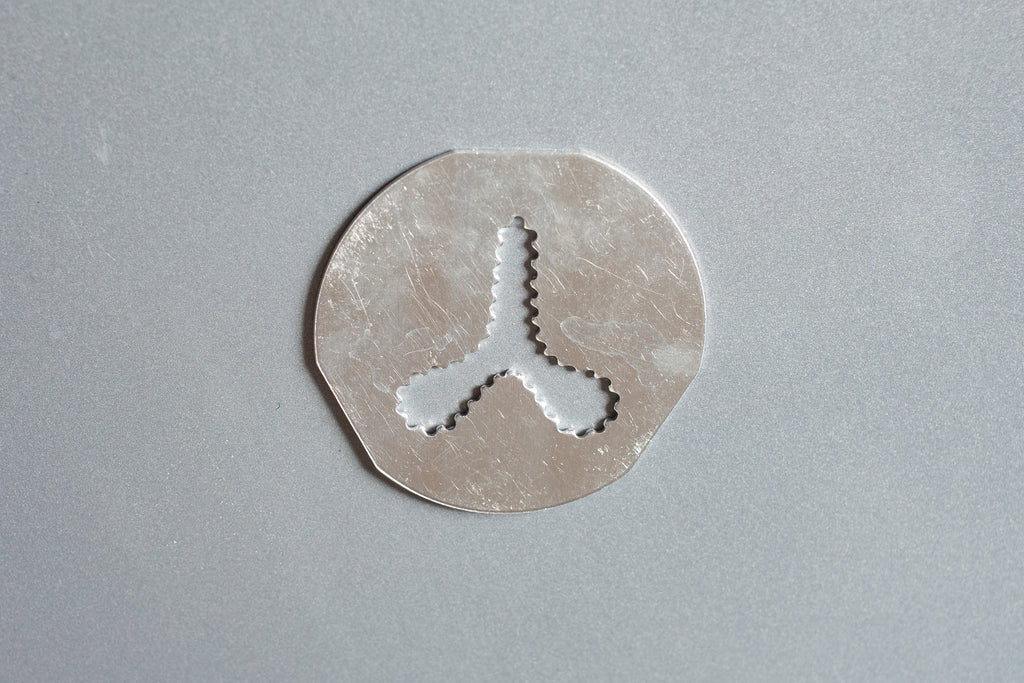
It's not exactly obvious, is it? But I had to know...
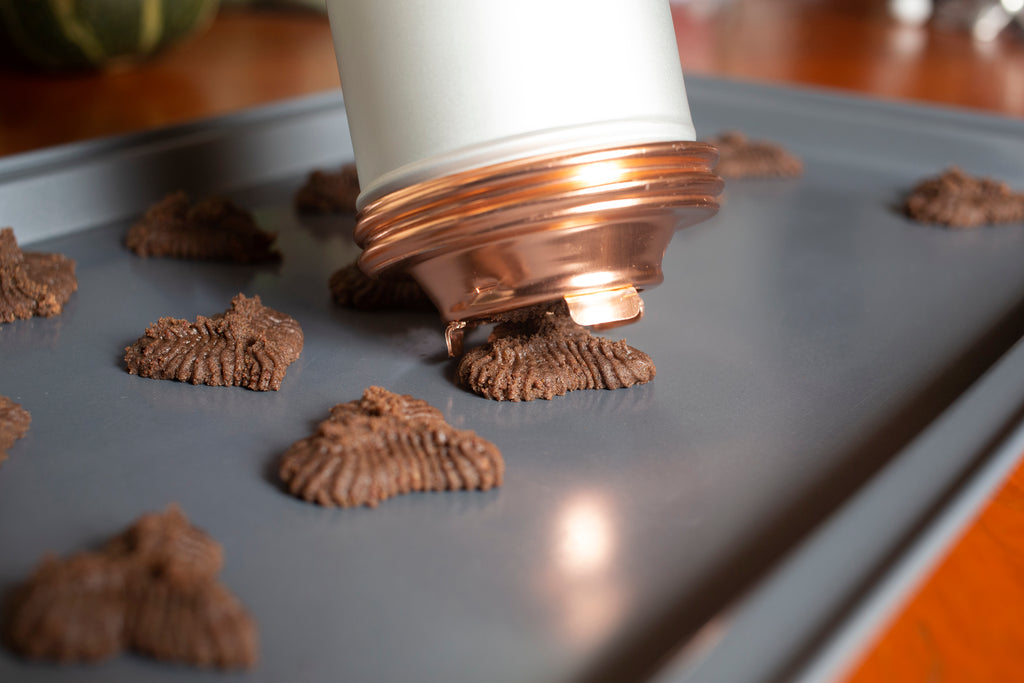
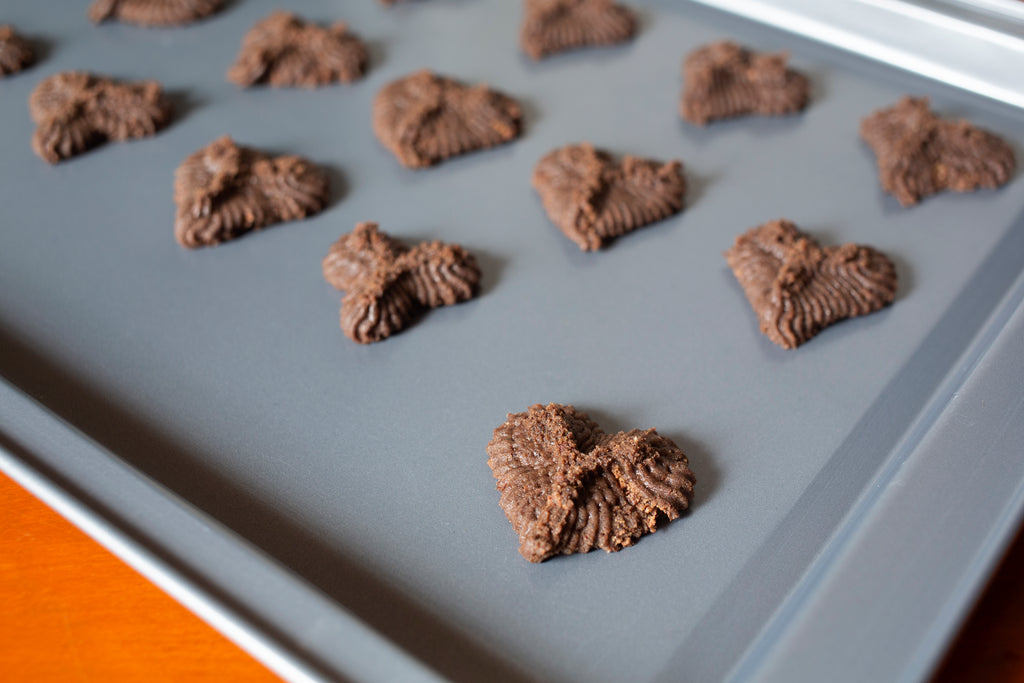
It's a heart, you guys! It's totally a heart!
Now, why didn't I see that right from the start?
So, the verdict is- the vintage Mirro Cooky Press with the knob top is still the best cookie press that ever lived. It is now nestled in my baking accessory drawer where it will hopefully continue to spark joy for decades to come. The other Mirro and the Cookie King are on display above my refrigerator in all their vintage-packaged glory, sparking a different type of joy.
Thanks, Marie Kondo!
SugarNova's Lemon Cream Eclairs
New year, new kitchen!
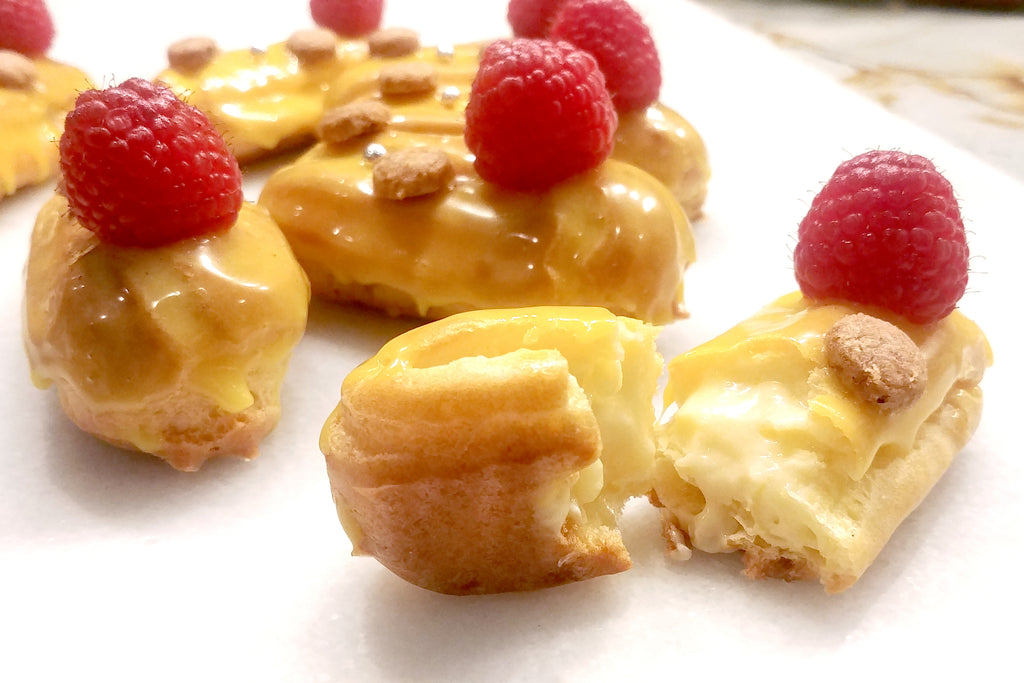
Sugarnova Cakes, founded by Sugarworks' US ambassador Jamie Louks just put the final, finishing touches on their sizzling new kitchen! Jamie celebrated the completion by breaking in her new set-up with a batch of Lemon Cream Eclairs topped with Hazelnut Streusel Buttons and fresh Raspberries!
These eclairs use a vanilla pâte à choux, tart lemon cream, and a white chocolate glaze. If you've never made pâte à choux, check out the time-lapse video below. Recipe at the bottom!
Pâte à Choux
- 150ml Water
- 150ml Whole Milk
- 160g Unsalted Butter
- 8ml Vanilla Extract
- 7ml Granulated Sugar
- 3ml Salt
- 160g All-Purpose Flour
- 5 Eggs
These eclairs were as delicious as they look! But don't just take our word on it; give 'em a try!
And if you want to keep up with SugarNova's newest creations, follow them online:
Facebook: SugarNova Cakes
Instagram: @jamienicolecakes
Kaysie's Killer Bacon Cheddar Scones
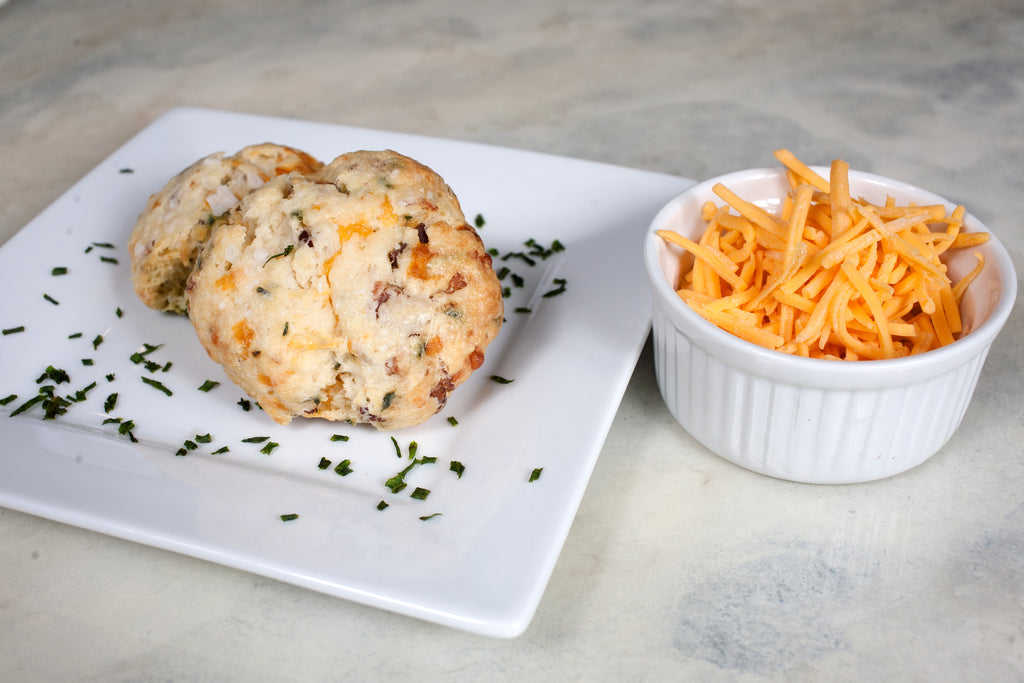
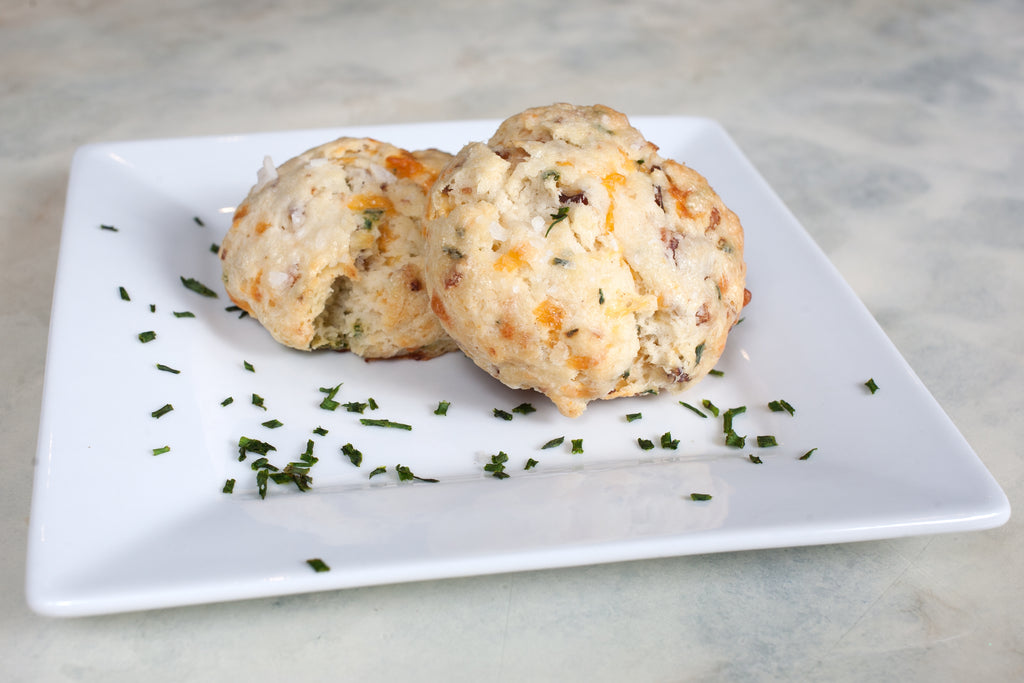
We give you a lot of recipes for sweets, desserts, and confections (for obvious reasons...), but sometimes you just crave something savory, yet still rich and indulgent. Clearly, bacon must be involved. So today we're giving you Kaysie Lackey's to-die-for Bacon Cheddar Scones. Breakfast just got dangerous.
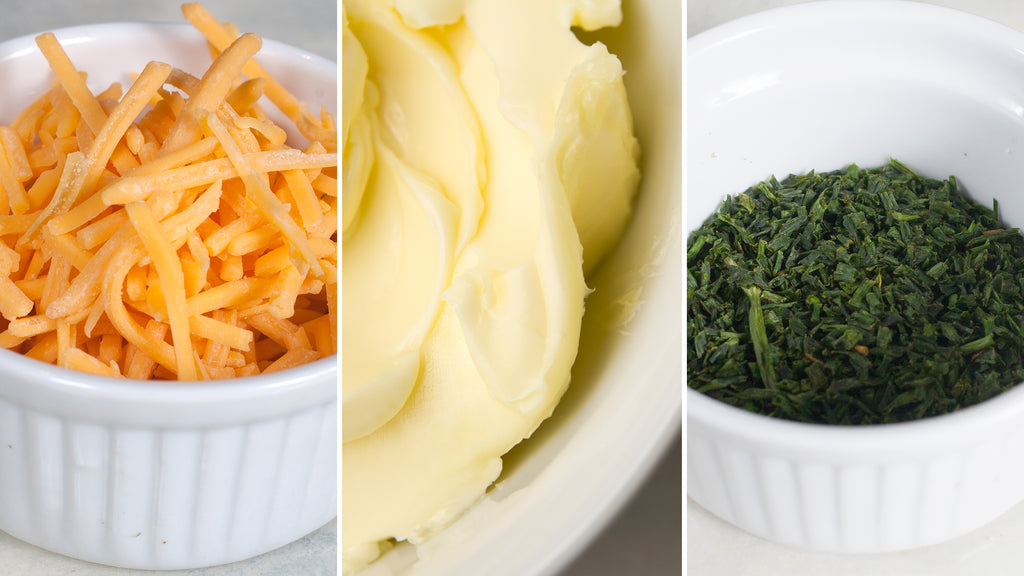
Ingredients
- 1 3/4 cups all-purpose flour
- 3 teaspoons baking powder
- 1/2 teaspoon salt
- 5 tablespoons unsalted butter (frozen)
- 1/2 cup buttermilk
- 1/4 cup sour cream
- 1 egg
- 1 tablespoon milk
- 1/4 chives
- 12 pieces of bacon, cooked & chopped
- 3/4 cup extra sharp cheddar, with additional to sprinkle over tops
Directions
Preheat the oven to 400 degrees F (200 degrees C).
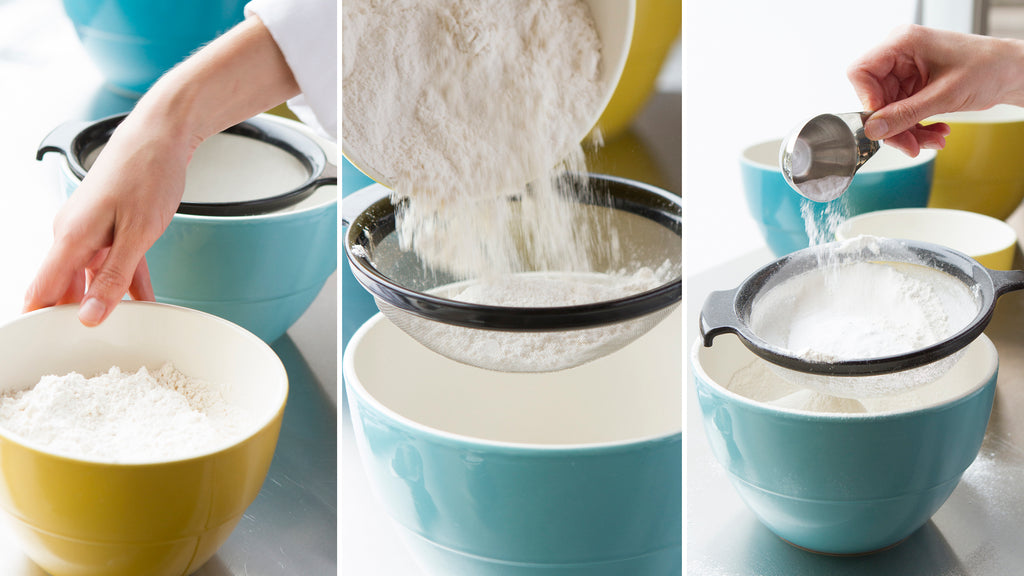
Sift the flour, baking powder, and salt into a large bowl. Take the frozen butter and grate it into the dry ingredients. Combine using a pastry blender or rubbing between your fingers until it is in pea sized lumps. Cut in cheese.
Place back in freezer while preparing the fillings and wet ingredients.
Mix together 1/2 cup buttermilk, sour cream, and chives in a bowl. Pour all at once into the dry ingredients, and stir gently until well blended. Fold in Bacon.
You want your dough well-blended, but don't overdo it. Overworking the dough results in terrible scones!
With floured hands, pat scone dough into balls 2 to 3 inches across, depending on what size you want. Place onto a greased baking sheet, and flatten lightly. Let the scones barely touch one another.
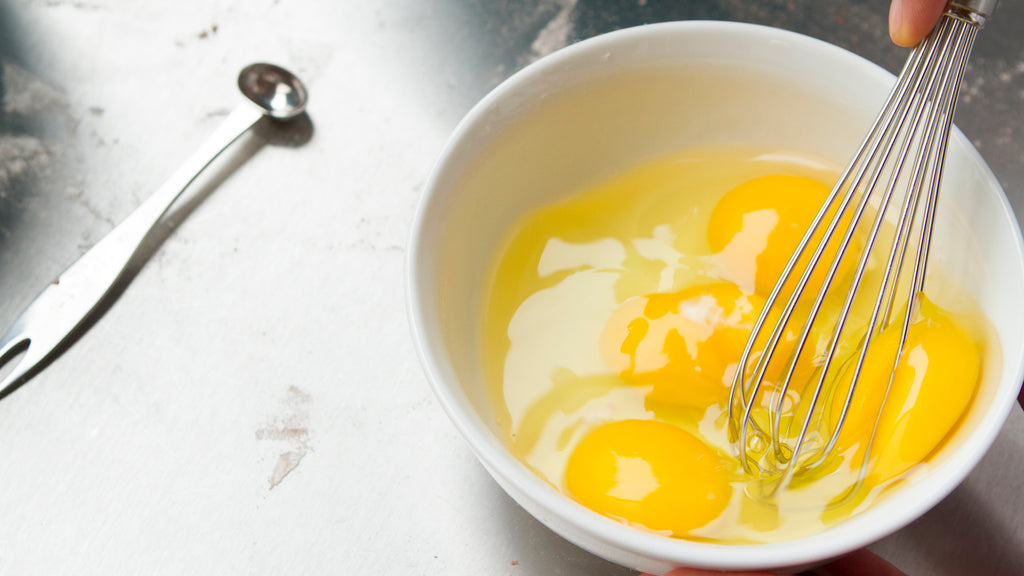
Whisk together the egg and 1 tablespoon of milk. Brush the tops of the scones with the egg wash and sprinkle with cheese if desired. Let them rest for about 10 minutes.
Bake for 10 to 15 minutes in the preheated oven, until the tops are golden brown, not deep brown.
Now sit back and enjoy this decadent, savory delight.
Autumn Spiced Creme Brulee Tart with Wine Poached Pears
Are you tired of bringing pumpkin pie to Thanksgiving dinner every year? Or are you just tired of finding 5 pumpkin pies on the dessert table because everyone has brought pumpkin pie?
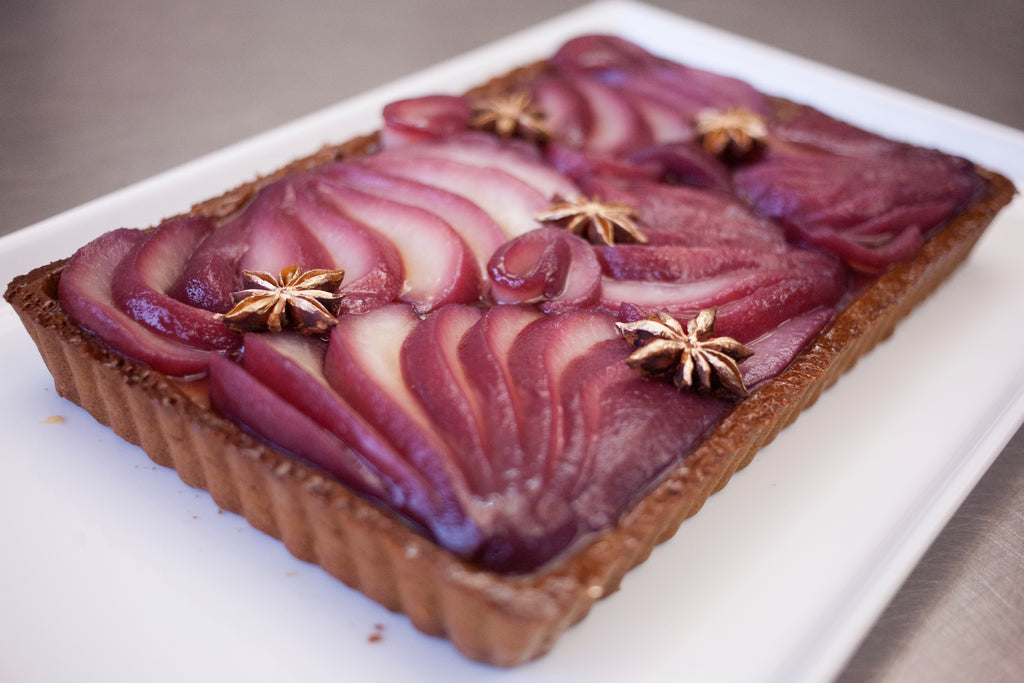
Well, Kaysie Lackey has cooked up an amazing solution to your T-Day dilemma- Autumn Spiced Creme Brulee Tart in a Gingerbread Crust topped with Mulled Wine Poached Pears! Let her show you how to one-up everyone at this year's holiday dinner!

It's my favorite time of year! Autumn and the holidays mean taking a break from the cakes and focusing on breads, rolls, pies, and, my new favorite- tarts! This tart in particular is full of all the fall flavor staples- cinnamon, cloves, anise, ginger... plus wine! (It is the holidays after all!)
All the elements can be made ahead of time and then assembled day of for a show-stopping holiday dessert that will "Wow!" your guests. And as an added bonus, you can either reduce the pear poaching liquid to a decadent dessert sauce... or just reheat and drink it! I think I will do the latter :)
There are three things you'll need to make for this tart- the wine-poached pears, the tart crust, and the creme brulee. Let's start with the pears.

Mulled Wine-Poached Pears
- 2 cups zinfandel wine
- 1/3 cup sugar
- 1 orange, juiced (about 1/2 cup)
- 3-4 1 by 3-inch strip orange zest
- 1 cinnamon stick
- 2 cloves
- 2 whole star anise
- 1/2 inch knob of fresh ginger, peeled and coarsely chopped
- 1 bunch thyme
- 3 firm, ripe pears (I prefer green d'anjou)
In a 3- to 4-qt. saucepan, combine wine, orange juice, zest strips, sugar, and spices. simmer until sugar has combined. Peal, halve, and core pears. Add pears to poaching liquid. Reduce heat and place a plate on top of pears to submerge them in liquid. Cook, covered, until pears are tender when pierced, about 15 minutes. Remove from heat, add thyme sprigs and cool to room temperature. Store in poaching liquid overnight to get a deep ruby color.
Now let's move on to the Creme Brulee.

Autumn Spiced Creme Brulee
- 3 cups whipping cream
- 1/2 of a vanilla bean, split
- 1 cinnamon stick, broken in half
- 2 whole star anise
- 4 whole cloves
- 1/2 inch knob of fresh ginger, peeled and coarsely chopped
- 1/4 teaspoon ground nutmeg
- 6 large egg yolks
- 1/2 cup sugar
Place cream in a heavy saucepan. Take the vanilla bean and scrap the inside seeds into the cream. Place the scraped bean into the cream as well.
Add the cinnamon stick, nutmeg, cloves, star anise and chopped ginger. Bring cream to simmer. Turn heat off and cover with a lid or a piece of foil and let the spices steep in the mixture for two hours (or overnight)
Whisk yolks and sugar in large bowl to blend. Gradually whisk in cream mixture. Strain into a large mixing bowl or pitcher to remove the ginger and other spices.

As if this Autumn Spiced Creme Brulee doesn't have enough of the taste of the season for you, we're going to put it in a gingerbread crust. It's like eating a French confectionary delicacy out of your favorite Christmas cookie.

Gingerbread Tart Crust
- 1 1/4 cups (150 grams) all-purpose flour (plus more for rolling)
- 1 1/4 cups (150 grams) cake flour (plus more for rolling)
- 2 teaspoons ground cinnamon
- 1 teaspoon grated fresh ginger
- 1 teaspoon ground white pepper
- ½ teaspoon freshly grated nutmeg
- ¼ teaspoon ground cloves
- ¼ teaspoon ground ginger
- 1½ teaspoon salt
- ½ cup (115 grams) unsalted butter, cubed and chilled
- ½ cup (175 grams) molasses
In the bowl of a food processor, pulse together flour, spices, and salt. Sprinkle butter cubes over the top and pulse until they are roughly the size of peas. Drizzle in molasses and pulse until mixture comes together into a ball. Turn out onto plastic wrap, shape into a disc, wrap, and refrigerate for at least 1 hour or overnight.

Roll dough into a 13x10 inch rectangle on a lightly floured surface, then transfer to a 8x11 inch tart pan. Trim dough so there is a ½-inch overhang, then fold the overhang inward, creating a double thick side. Use a paring knife to trim the top edge of the dough so it is flat. Poke the crust all over the bottom with a fork.

Freeze for 30 minutes. Meanwhile, preheat oven to 350°F.
Place the tart pan on a baking sheet. Press foil, shiny side down, tightly against the crust. Fill with dry beans or pie weights.

Bake for 15 minutes, remove foil and beans, then bake for another 5 minutes uncovered.
Remove tart shell from oven and reduce temperature to 300°F.

Put tart shell (in pan) in a 4-sided sheet pan. Put in oven, then pour custard into shell. Bake until just set but still slightly wobbly in center, 40 to 45 minutes (custard will continue to set as it cools).

Remove tart from sheet pan and cool on a rack 30 minutes. Remove side of pan and cool to room temperature. Place in the refrigerator to firm up for about 1 hour more.
Remove the pears from the liquid and drain on paper or kitchen towels before slicing and topping the tart with them.

Arrange the pears on top of the filling. Because it’s hard to move the pears once they’re on the filling, you may want to practice your pattern on an empty sheet pan before placing it on the tart.
Place some apple jelly in a small saucepan. Simmer and whisk to form a smooth glaze. Allow to cool slightly.

Brush it on the exposed pears, being careful not to pull up the cream filling from below. For a final visual touch, brush some star anise pods with gold luster dust (made into a liquid paint) and place on tart.

Refrigerate the tart until ready to serve.


And there you have it! A stunning holiday dessert that is most decidedly not pumpkin pie.
Bon appetit!
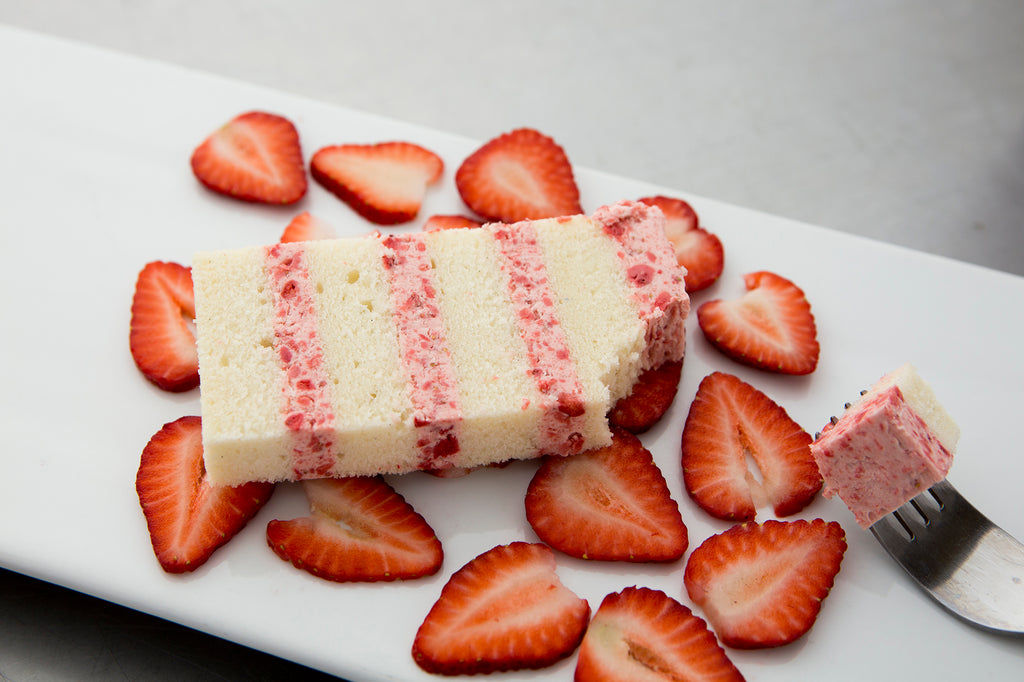
Kaysie Lackey's Vanilla Bean Cake
We bet you've heard the word "vanilla" used disparagingly to mean bland, boring, or common. In our kitchen, there are few greater insults than suggesting that vanilla can't be exciting and exceptional! If, like us, you believe vanilla is as unique and mouth-watering a flavor as any other, you're going to love Kaysie Lackey's delicious Vanilla Bean Cake!

Ingredients
- 1/2 cup butter (unsalted)
- 1 1/2 cup sugar
- 1/2 tsp salt
- 3/4 tsp vanilla paste
- 1/2 tsp vanilla extract
- 4 egg whites
- 1 1/4 cup cake flour
- 1 1/8 cup all-purpose flour
- 1 tsp baking powder
- 6 oz. whole milk

Preparation
Pre-heat your oven to 325ºf.
Grease and flour, or parchment line one 9"round cake pan. If you're making cupcakes, line a one dozen-cupcake tin.
Process
In a mixing bowl, cream the butter and sugar until light and fluffy. Add the salt and both types of vanilla.

Slowly incorporate the egg white, scraping the bowl regularly. Sift the dry ingredients and alternate additions of dries and milk. (Begin and end with dries.) Scrape well and beat on medium for about 20 seconds. Bake until the top edges start to golden and a toothpick comes out clean.

We hope you enjoy this Vanilla Bean Cake! It's a delicious and versatile flavor that pairs as well with fruit as it does with chocolate! You can even add sprinkles for a fun-fetti effect!

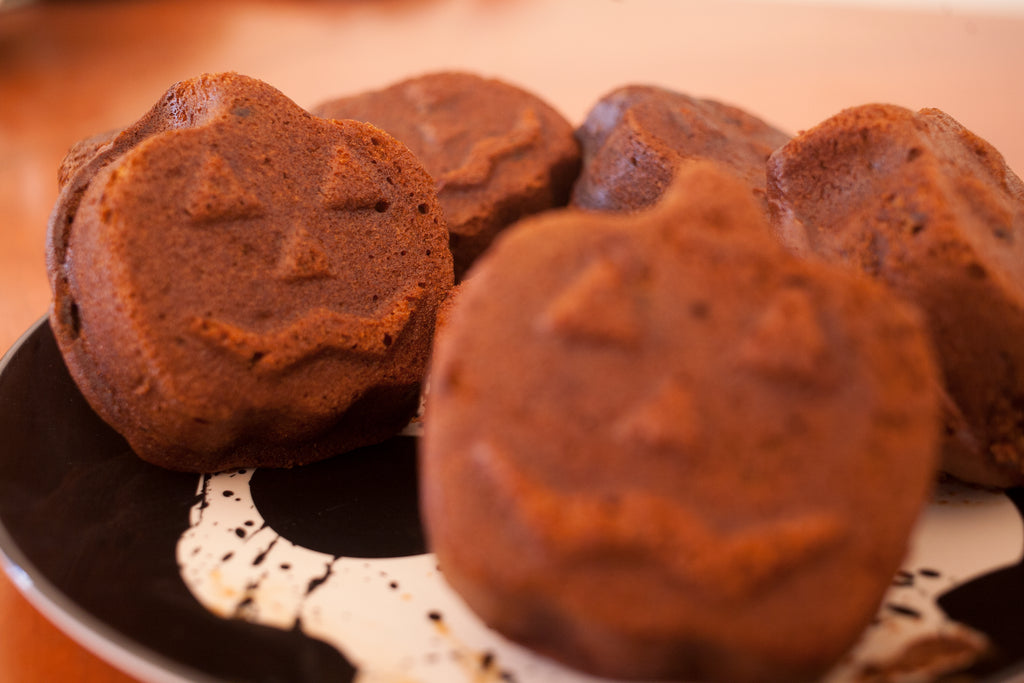
Pumpkin Muffins from the Sugarworks Kitchen
It's that time of year again- time for all things pumpkin! And while we concede that maaaybe the pumpkin spice fad has gotten a leeetle bit out of hand (pumpkin spice toothpaste? what?), we can't deny that we love a good homemade pumpkin bread. Sweet and moist and wafting that cinnamon-spice scent all through the house... no autumn is complete without at least one batch!
So today we're serving up our household recipe for perfect pumpkin muffins! We even baked them in pumpkin-shaped muffin tins, just to make them extra festive!

Ingredients
- 2 cups pumpkin puree (Bonus points if you grow the pumpkin yourself! But if you go with the canned stuff, that's 1 standard 16oz can)
- 1 1/2 cup brown sugar
- 1/4 cup vanilla soymilk or almond milk (Any brand will work, but we're particular fans of Pacific Natural Foods vanilla milks)
- 1/8 cup molasses (blackstrap if ya got it, but Grandma's will do if you don't)
- 1 tsp vanilla extract
- 3/4 tsp salt
- 3/4 tsp baking soda
- 2 tsp baking powder
- 2 tsp ground cinnamon
- 1/2 tsp ground cloves
- 1/2 tsp ground ginger
- 1/4 tsp ground nutmeg
- 1 bag semi-sweet chocolate chips (10 - 12oz)
- Chopped pecans
- 2 1/2 cups flour
- Raw (turbinado) sugar for sprinkling on top (optional)

In a bowl, combine the pumpkin puree, sugar, soymilk, molasses, and vanilla. Mix it up real well. Add the salt, soda, powder, and spices. Mix until everything is well blended and you don't see any lumps or soda, powder, or spice. Stir in the chocolate chips and pecans, then add the flour and stir until thoroughly combined.

Bake at 375ºf until the top starts to brown and a knife comes out clean. For muffins this is usually about 20 minutes, and for loaf pans closer to 30. But ovens vary and environmental factors can influence bake times, so check it often and rely more on your eyes than your timer.
And there you have a delicious seasonal treat! And also, your house now smells amazing!
Enjoy!

Guy Meets Devil's Food Cake
It's that time of year again! Time to get spooky sweet with some Halloween treats! And what more appropriate choice for your Halloween cake than a decadent and delicious Devil's Food Cake?

This year, we wanted to make sure we had a cake that was truly worthy of the Prince of Dark(chocolate)ness, so we went straight to the source of all things spooky- Andrew Fuller of Guy Meets Cake. Here's Andrew's recipe for Drop-Dead Delicious Devil's Food Cake!

Needs Must
3/4 cup Dutch-process cocoa powder
1 1/2 cups cake flour
1 tsp baking soda
1/4 tsp baking powder
1 stick salted butter, softened or room temp
1 1/2 cups granulated sugar
1/3 cup cold brew coffee, undiluted
2/3 cup whole milk
1 tsp vanilla extract
3 large eggs
In the Details
Combine and sift cocoa powder, cake flour, baking soda, and baking powder and set aside.

Using whisk attachment, starting slow and moving to a medium high speed, beat together butter and sugar until graininess is gone, texture is smooth, and color is lighter (about 3-5 minutes). Add vanilla and eggs, beat until incorporated.

Slowly add half of sifted dry ingredients to mixture beating slow-medium speed as it incorporates. Combine together the coffee concentrate and milk, stream into mixture while it's still going at a medium speed. Stop, scrape down sides of bowl. Add remaining half of dry ingredients and beat at lowest speed just until fully incorporated.

Work for Idle Hands
Divide batter into greased parchment lined pans, greased pans dusted with cocoa powder, or lined cupcake pans.
Bake at 325º for 25-33 minutes, depending on so many variables. For me, it's usually about 30 minutes with a gas oven. Do the toothpick test and pull it out when it's clean.

I prefer to cool my cake for about 10 minutes in the pans, then turn onto a piece of cling film and wrap while it's warm to assure a nice moist cake. Let it come to room temperature and chill in the refrigerator until you're ready to use or pop it in the freezer for an hour before carving to reduce crumbs.

Gluten-Free Mochonut Cookies
We're on a coconut kick this month at Sugarworks! We don't know if it's the warm, sunny weather putting us in a tropical mindset, or if it's just how great the kitchen smells when coconut is cooking, but we can't get enough lately.
Today, we're packing all the coconut we can into these Gluten-Free "Mochonut" Cookies! Enjoy!
Ingredients
- 1/2 cup coconut oil
- 1 cup sugar
- 3 tbsp instant coffee
- 1/4 cup coconut milk
- 1 tbsp ground chia seeds
- 3 tbsp water
- 1 tsp pure vanilla extract
- 1 tsp salt
- 1/2 tsp baking soda
- 1/2 tsp baking powder
- 4 oz melted chocolate
- 1 1/4 cup coconut flour
- 1/2 cup shredded coconut
First, let's do a little prep work. Mix your ground chia seeds in the 3 tablespoons of water, and let this sit for at least 5 minutes.
Did you ever have a Chia Pet? Do you remember soaking the chia seeds to get them gooey enough to stick to your "pet"? That's essentially what we're doing here. Without the binding element of wheat gluten, our coconut flour tends to make a pretty crumbly cookie. We're going to need the "goo" of the chia seeds to help keep them together. Using ground seeds instead of whole ones will yield a thicker goo. I let mine sit for 10 minutes for optimal goo-ing.
Preheat your oven to 375° fahrenheit.
Now, cream the coconut oil, sugar, and instant coffee together. Stir in the coconut milk, chia seed goo, and vanilla extract. Then add the melted chocolate and mix well.
I used 63% dark chocolate for this recipe. Unsweetened baking chocolate works fine as well. Let your preference for sweetness and bitterness determine the cocoa content of your chocolate. Just remember- there's already sugar in the cookies, so don't go too sweet with your chocolate.
Next, stir in the remaining dry ingredients: salt, soda, powder, and coconut flour. Mix well, making sure the coconut flour gets thoroughly blended into the dough.
Shape the dough into 1 1/2" balls and roll in the shredded coconut for a coating. Place on a baking sheet and bake for 15 minutes.
Few things make your kitchen smell as wonderful as the mingling aromas of warm chocolate and baking coconut. That alone is reason enough to give these delicious treats a try!
But if you need more convincing, there's also the many health benefits of incorporating coconut oil into your regular diet. Coconut oil is high in "good fats"- the ones that help your body increase its levels of healthy cholesterol and convert unhealthy cholesterol (LDL) into the good kind (HDL). The fatty acids in coconut oil have anti-microbial and anti-fungal properties, helping your body fight bacteria and infection. Coconut oil has also been linked to increased levels of energy and endurance.
We won't go so far as to call cookies a health food, but substituting coconut for your ordinary ingredients might be one way to get some of those beneficial components into your diet. One delicious, decadent, indulgent way.

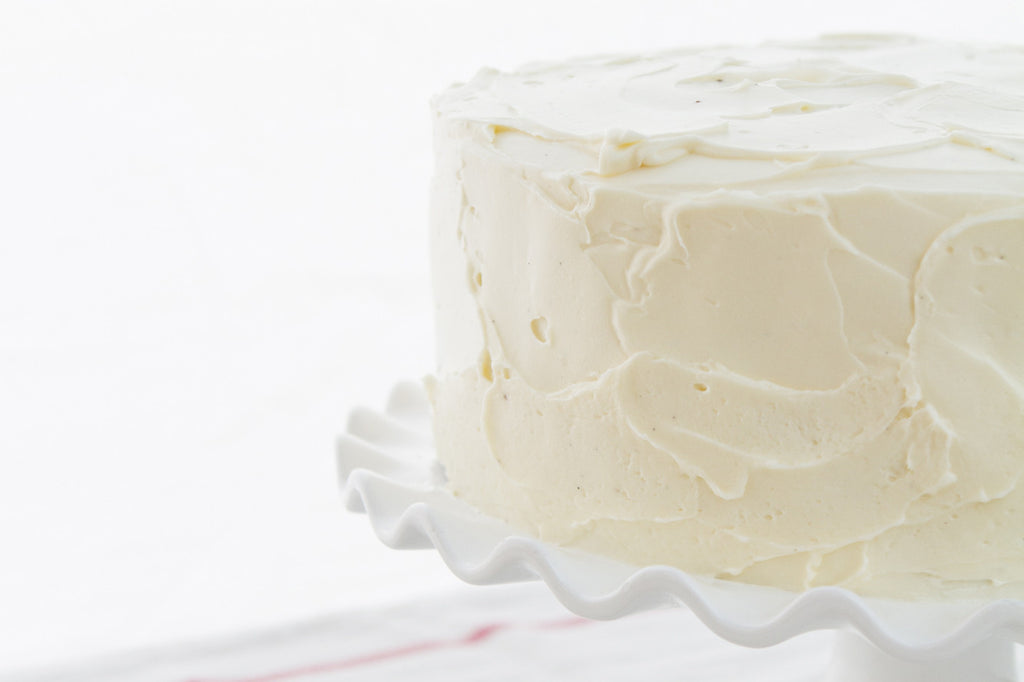
Kaysie's Coconut Milk Cake
We hate to call a natural, healthy fruit a "fad food", but coconuts have certainly gained in popularity recently. Whether due to purported health benefits ranging from improved immune system function to heart disease risk reduction, or simply because they taste delicious, coconuts are definitely the flavor du jour.
Today we're bringing this delicious superfood into cake. Because that's what we do- we find a thing we love and we cake it.
Ingredients
- 170g Cake flour
- 234g Sugar
- 9g Baking powder
- 2g Salt
- 113g Butter, unsalted
- 120g Coconut Milk
- 76g Egg whites
- 57g Whole milk
- 4g Vanilla extract
- 2g Coconut extract
- 75g Shredded coconut
These measurements will yield two 8" round cakes. For larger cakes, scale up according to your needs.

Directions
First, combine all dry ingredients, including the sugar, in a mixer. Add the softened butter and coconut milk to the dry ingredients and beat on a low speed until combined. Raise the speed to medium and beat for 4 minutes.

In a separate bowl, combine the egg whites, whole milk, and extracts. Slowly add this wet mixture to your batter, scraping well as you go.
Add the shredded coconut and mix to combine.

Bake at 325° fahrenheit until the top starts to golden and a toothpick comes out clean. Start checking your cake at around 30 minutes.
Enjoy the delectable flavor of coconut in its most indulgent form! And hey- maybe it'll even cure what ails you!

Kaysie's Carrot Cake
After we posted this sumptuous photo of a slice of Kaysie Lackey's carrot cake on Facebook, we got a bunch of requests for the recipe. Well, we love to make you happy, so here it is!
This recipe makes two 8" cake rounds. For more layers, scale up the ingredient measurements accordingly.

Ingredients
- 397 grams sugar
- 283 grams vegetable oil
- 200 grams eggs
- 200 grams cake flour
- 160 grams all-purpose flour
- 12 grams baking powder
- 2 grams baking soda
- 5 grams ground cinnamon
- 2 grams ground nutmeg
- 2 grams salt
- 410 grams shredded carrots

First, combine the sugar and oil. Then add the eggs and mix well.

Next, sift all the dry ingredients.
Then toss the carrots with 1/3 of the dry ingredients. Add the remaining dry ingredients to the sugar mixture and mix until combined. Add the carrots and stir until just combined.
Bake at 325 degrees until cake is fully baked, but still moist.
Enjoy!

Nathalie's Champion Dark Chocolate Cake
Nathalie Sorensen of Lucy Cake Design and our own Kaysie Lackey recently paired up once again for an episode of Food Network's Cake Wars. This time they competed against other teams who had also previously won on Cake Wars. It was the Avengers episode of Cake Wars Champs!

Once again, Nathalie and Kaysie pulled off an epic win! Not only was their sculpted cake visually stunning and impeccably crafted, it was delicious as well! And here is the recipe for the cake within the creation!
Ingredients

Chocolate Cake:
- Unsalted butter, for greasing
- 125 grams (about 1 cup) awesome-quality unsweetened cocoa powder, plus more for dusting
- 90 grams dark chocolate, chopped
- 360 milliliters (about 1 1/2 cups) hot coffee
- 310 grams (about 2 1/2 cups) all-purpose flour
- 10 grams (2 teaspoons) baking soda
- 5 grams (1 teaspoon) baking powder
- 600 grams (about 3 cups) sugar
- 180 milliliters (about 3/4 cup) vegetable oil
- 6 grams (1 teaspoon) kosher salt
- 5 milliliters (1 teaspoon) vanilla extract
- 3 large eggs
- 360 milliliters (about 1 1/2 cups) buttermilk
Toffee:
- 2 cups (4 sticks) unsalted butter
- 2 cups sugar
- 1 teaspoon kosher salt
- 1/2 teaspoon vanilla extract
Italian Meringue Buttercream:
- 369 grams (about 1 3/4 cups) sugar
- 125 grams (about 1/2 cup) water
- 20 grams (about 1 tablespoon) light corn syrup
- Pinch kosher salt
- 170 grams egg whites
- Pinch cream of tartar
- 452 to 565 grams (4 to 5 sticks) unsalted butter, cubed, at cool room temperature
- 2 tablespoons vanilla bean paste
Chocolate Feuilletine Crunch:
- 4 ounces great-quality dark chocolate
- 4 ounces great-quality milk chocolate
- 2 to 4 ounces feuilletine flakes

For the cake:
Preheat the oven to 350 degrees Fahrenheit. Butter three 9-inch cake pans and dust with cocoa powder, shaking off the excess.
Mix the chocolate into the hot coffee in a medium bowl and stir to melt. Set aside to cool completely. In another bowl, sift together the flour, cocoa powder, baking soda and baking powder. Set aside.

Combine the sugar, oil, salt and vanilla in the bowl of a stand mixer fitted with the paddle attachment. Mix on medium speed, 3 to 5 minutes. (This batter is fluid and tends to get lumps; mix carefully with the paddle, or even use the whisk attachment on low speed to avoid lumps.) With the mixer on low speed, add the eggs, one at a time, mixing well after each addition. Scrape the bowl and continue mixing on medium-low speed until fully incorporated, 2 to 3 minutes. (Don't worry about overmixing at this stage; you need to make sure the batter base is fully mixed.)

Stir the buttermilk into the coffee mixture. In alternating batches, add the flour and buttermilk mixtures to the batter base. Mix until just combined, being careful not to overmix. The batter should be thick but fluid. Stir or mix by hand to get rid of any lumps; strain if you feel compelled.
Divide the batter among the prepared cake pans. Bake until a toothpick comes out clean or with just a few crumbs, 20 to 30 minutes. Let cool completely.
For the toffee:
Line a baking sheet with parchment paper.
Combine the butter, sugar and salt in a heavy-bottom saucepan fitted with a candy thermometer. Heat over medium-high heat to 300 degrees F (the hard crack stage), 7 to 10 minutes. Remove from the heat and stir in the vanilla extract. Pour over the prepared baking sheet and let cool completely. Break into small pieces, then process into a powder using a food processor or coffee grinder.

For the buttercream:
Combine 339 grams of the sugar, the water, corn syrup and salt in a heavy saucepan fitted with a candy thermometer. Heat over medium-low heat until the sugar dissolves. Increase the heat to medium, being careful not to let the flames go up the sides of the saucepan. The target temperature for the syrup is 250 degrees F.
Meanwhile, combine the egg whites and cream of tartar in the bowl of a stand mixer fitted with the whisk attachment. When the syrup has reached 230 degrees F, run the mixer on medium speed until the egg whites get frothy. Sprinkle the remaining 30 grams sugar into the egg whites and continue to whip on medium speed. (The egg whites should increases in size and form soft peaks by the time syrup reaches 250 degrees F.) Once the syrup reaches 250 degrees F, increase the mixer to high speed and carefully pour the hot syrup down the side of the bowl, being sure not to hit the whip. Whip the mixture until it has cooled to room temperature, 5 to 10 minutes.
Replace the whisk with the paddle attachment. Gradually beat in the butter, a few cubes at a time, on medium-low speed. Mix until the buttercream comes together, then mix in the vanilla bean paste.
Mix 3 to 4 ounces of the powdered toffee into 1 cup of the buttercream and set aside.
For the chocolate feuilletine crunch:
Line a baking sheet with parchment paper.
Melt the dark chocolate and milk chocolate in a double boiler. Remove from the heat and mix in the feuilletine. Spread on the prepared baking sheet and let cool. Crumble into bite-size pieces. Set aside.

To assemble the cake:
Set one cake layer on a serving plate. Spread with a thin, even layer (about 1/4 inch) of the buttercream, then spread with a thin, even layer (1/8 to 1/4 inch) of the toffee-buttercream mixture. Top with feuilletine crunch. Repeat with the remaining layers. Cover the cake with the remaining buttercream.

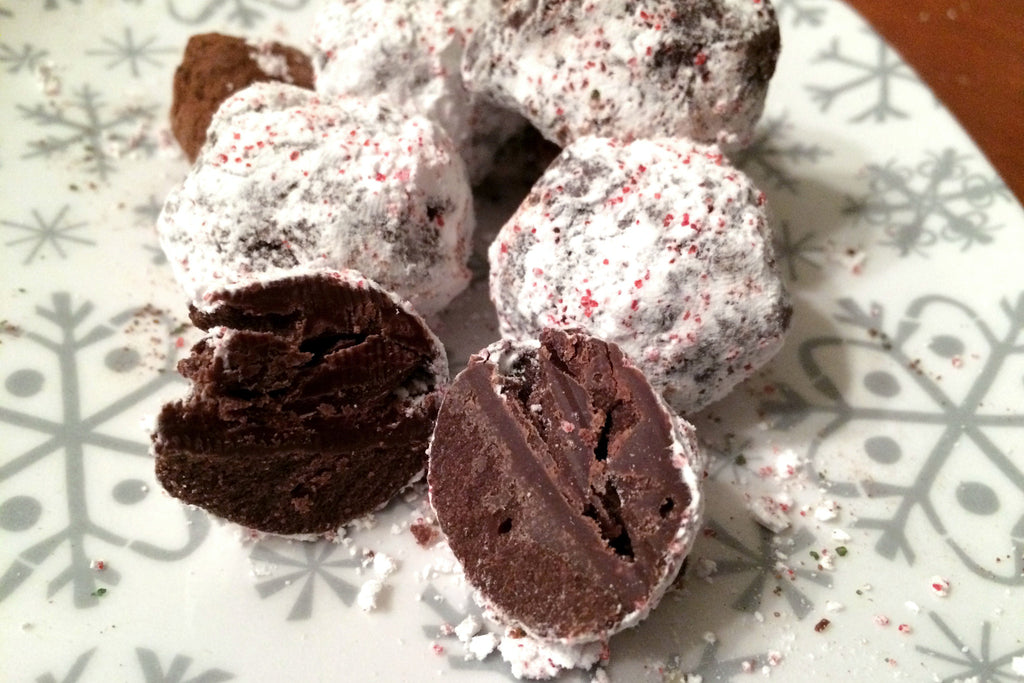
Boozy New Year’s Truffles
It's just about time to ring in the new year! And in these last moments before we all make our resolutions to forsake sugar, fat, chocolate, and alcohol, we thought we'd indulge in all of those things with these delicious boozy chocolate truffles! This year's flavor selections are Chocolate Peppermint Schnapps Truffles and Mocha Amaretto Truffles.

Ingredients
- 2 10-oz bags of semi-sweet chocolate chips (I like Simple Truth chocolate, but use whatever brand you like. Just note that most other brands sell their chips in 12-oz bags, not 10-oz. So scale up accordingly)
- 6 Tablespoons unrefined coconut oil
- 1/2 teaspoon salt
- 1/4 cup liquor of your choosing
- 2 Tablespoons instant coffee
- Powdered sugar and/or cocoa powder for rolling

These truffles are insanely easy. The first thing you're going to do is melt the chocolate in a double boiler. If you don't have a double boiler, don't worry; just stack up two pots, boil water in the bottom one and put the chocolate in the top one. Easiest kitchen hack ever. And it will prevent your chocolate from burning as easily as it would in a single pot alone.
Once the chocolate is melted, add the coconut oil and stir until it's completely melted and everything is smooth.

I wanted to make two different flavors, so at this point I divided the mixture by pouring into two separate bowls. Into one, I added 1/8 cup Peppermint Schnapps and into the other I added the instant coffee and 1/8 cup Amaretto. Stir well. You can play with how alcoholic you want your truffles and add more or less to taste. These were not super boozy.

Now, just pop the bowls in the fridge and chill until firm. I left them in overnight, but a few hours is probably sufficient.
Once the mixture is firm, scoop out enough chocolate to make 1 1/2" balls, shape them into spheres, and roll into a coating. I used powdered sugar and red decorating sugar for the Peppermint Schnapps truffles and cocoa powder for the Mocha Amaretto truffles. The coating not only makes the truffles look nice, but allows you to pick them up without getting your fingers quite so messy.

Your New Year's dessert is now ready! If you're not serving them right away, keep them in the fridge until it's time to celebrate. Happy New Year!

- 1
- 2


