Sugarworks Blog

Bourbon Sugar Cookies
We don't have a lot of traditions in our family, but the one constant thread of our holiday celebrations is cookies. For as long as I can remember, we've made cookies together at Christmas- drop cookies, rolled cookies, dipped cookies, jammy cookies. Everywhere we go around the holidays, people know to expect a basket of assorted cookies. At some point, friends even started requesting their favorites.

This year, I'm going to share with you a few selections from our family cookie extravaganza. We'll start with my signature Bourbon Sugar Cookies. These are a take on the traditional Christmas sugar cookie archetype, but with a few notable aberrations. Most obviously- booze. I like the slight edge the bourbon gives these cookies, but don't worry- the alcohol content is minor. No one's going to get tipsy off your cookies.

Ingredients
- 1 cup packed brown sugar
- 3/4 cup Earth Balance spread
- 2 tablespoons vanilla almond milk
- 1 teaspoon pure vanilla extract
- 1/4 cup bourbon
- 1 teaspoon salt
- 1 teaspoon baking powder
- 2 1/2 cup flour

Stage One
In a mixing bowl, combine the sugar and Earth Balance until well blended. Add the almond milk, vanilla, and bourbon and stir together. Then mix in the dry ingredients and stir into a firm dough. Wrap in plastic and refrigerate at least 3 hours.

Stage Two
On a floured work surface, roll your dough out about 1/8' - 1/4" thick and cut into whatever shapes you choose.

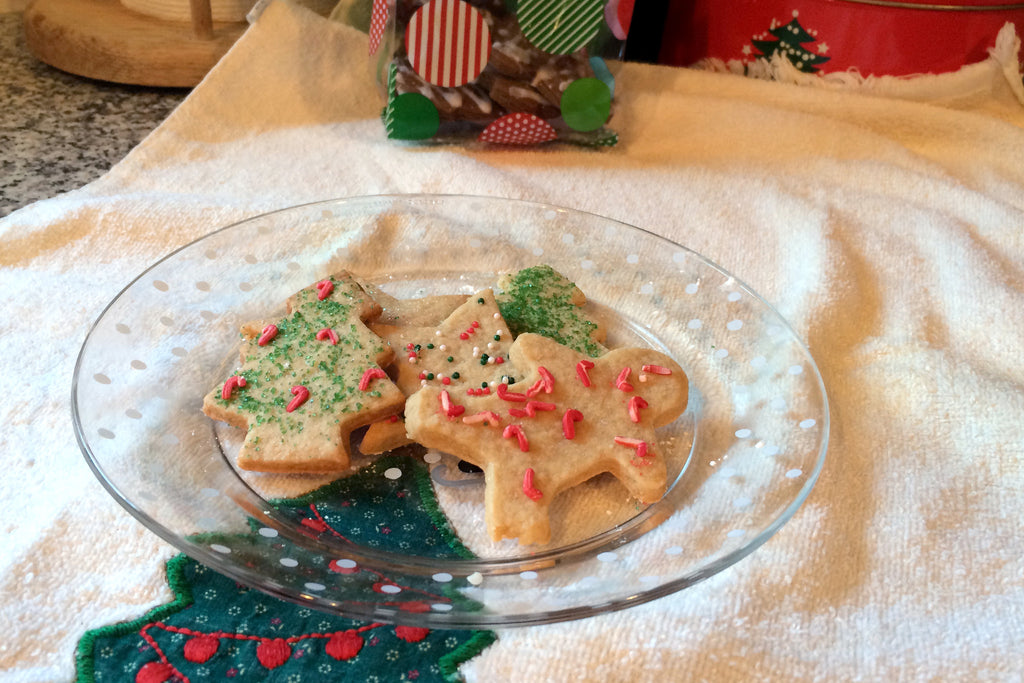
I usually decorate my cookies at this stage using colored sugar, sprinkles, or crushed candy. If you plan on decorating them later with frosting or icing, leave them plain now.

Bake at 350 degrees for about 8 - 10 minutes. The time on these can vary a lot based on the thickness of your cookies, so check them frequently. They can go from slightly underdone to burned real quick.
These might be my favorite Christmas cookie. They're classic, yet with a twist. They look great on a holiday cookie platter, and this recipe makes about 3 dozen so you've got plenty to share!


Perfect Roasted Chestnuts Every Time
Roasted chestnuts are an iconic element of the winter holiday season. We all sing about them, (in fact, nearly everyone from Garth Brooks to Twisted Sister has sung about them) but here in the United States, very few of us ever eat them. And fewer still have made them ourselves.

Of those I've met who have tried to roast chestnuts at home, most expressed frustration and disappointment- the chestnuts came out dry, or hard, they burned before they even softened, the whole batch was internally mildewed. They can be tricky, especially if you're unfamiliar with the nuts in their raw state.

So today, I thought I'd show you how to get a full batch of perfect chestnuts every time you roast.
Be Picky!
The first thing we need to do is select our chestnuts, and this is really important. The nutmeat of chestnuts is softer and moister than most other nuts. This makes them really susceptible to mold and mildew. So you need to be very careful when you're picking your batch. Don't just blindly scoop a bunch out of the bin; be that obnoxious shopper that picks nuts out of the bin one at a time and scrutinizes each one. Your kids will be embarrassed, but trust me- the payoff is worth it.

And here's what you need to look for. First, check the bottom of the shell. If you see any trace of green mold, toss that one back. It's not just exterior- that nut is definitely moldy.
Next, look at the tip. If the pointy part of the nut is starting to look pale and fuzzy, don't take that nut. This is a sign that mildew might be growing inside. Now, this sounds really obvious. "Why would I buy fuzzy food? Fuzzy always means bad!" But this doesn't look like mold fuzz. If you're not very familiar with chestnuts, this slightly fuzzy pale tip looks like a normal feature of the nut. Even many grocers don't realize it's a sign the nuts are bad internally, so you'll find many fuzz-tipped nuts in the bin. If it's only slight, the nutmeat might still be okay, but it's not worth the risk. Hold out for some really good ones.
A healthy and delicious chestnut will be firm and shiny with no sign of fuzz. In the below photo, the chestnut in the foreground is a good one; the one in the background is questionable.
Toil, but not much trouble
Okay, so now we've got our good-looking raw chestnuts. There's a little prep work involved before we start cooking. You need to cut open the shells or your chestnuts will explode during the roasting. (This sounds exciting, but really is just disappointing and a little messy.) I just use a paring knife for this. It's a little tough to cut through the shells, so I find the smaller the blade the less chance of accidents if the nut slips while I'm cutting. (And they're very smooth and hard, so watch out for slipping.)

Make sure you cut all the way through the shell and that you're not just scoring the surface. Most people cut an X shape into the shells. Not only does this make it easier to peel the shell away after they're roasted, but they look so pretty with the four corners peeling back to reveal the delicious roasted nutmeat inside.

Next is the crucial step that most people don't seem to know about. You've got to boil them before you roast them. Boil the nuts, shells and all for 15 minutes.

Then drain the water and lay the nuts out on a baking sheet, cut-side up. Now just bake at 425 fahrenheit for 12 - 15 minutes.

They're best eaten warm, but give them a few minutes to cool before you try to peel the shells off or you might burn your fingers.
Now, put on a little Nat King Cole and let Jack Frost nip at your nose!

Jen’s Decadent Dairy-Free Chocolate Peppermint Fudge Recipe!
Something about the holidays just makes me yearn for rich, decadent treats. And nothing says "Winter Holidays" to me more than peppermint and chocolate together. As a kid, rich chocolate peppermint fudge was one of my favorite treats ever. As an adult, however, the high dairy content of traditional fudge recipes is a no-go for my lately-acquired sensitive stomach.
This year, though, I was determine to have my fudge (and eat it, too!) So, I started with a fudge recipe I found on the back of a jar of Marshmallow Fluff (no, seriously) and totally hacked it to make it completely dairy, egg, and gelatin free.
And it's freaking delicious.

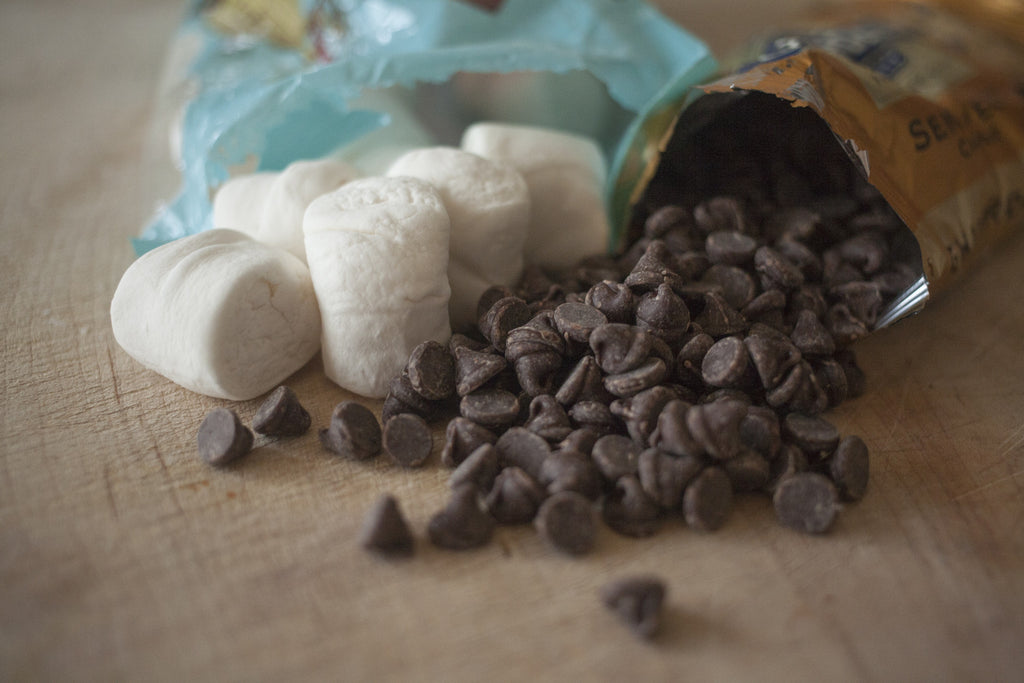
This recipe hinges on a new product Trader Joes has come out with. They're a type of marshmallow that contain no dairy, egg, or gelatin, relying instead on carrageenan for their consistency. Carrageenan is an extract from certain seaweeds, which sounds a bit odd (mmm, seaweedmallows...) but trust me- these marshmallows are fantastic.
So this is what you need:
Ingredients
- 1 bag Trader Joes Marshmallows
- 2 1/2 cups brown sugar
- 6 tablespoons Earth Balance spread
- 2/3 cup plain non-dairy milk (i used soy this time, but almond works just as well)
- 3/4 teaspoon salt
- 1 teaspoon vanilla extract
- 16 oz semi-sweet chocolate chips
- 1/4 cup peppermint Schnapps (or 1 tablespoon peppermint extract if you're not into alcohol)

This recipe is super simple. The first thing you're going to do is combine the marshmallows, sugar, Earth Balance, soy milk, and salt in a large soup pot. Keep the heat low until the marshmallows are completely melted and you've got all the ingredients well-combined.

Then, raise the heat to medium and bring it to a boil. Once you get it boiling, keep it going for 5 minutes. I've made this a few times now, and the 5 minute rule is really spot on. I've never had any success in candy-making with the "soft ball method", so I need definite times. There's just one catch- the mixture will release some air bubbles as it heats, so make sure it's legitimately at a boil when you start the timer. If you under-boil it, it won't set quite right.
After it's boiled for 5 minutes, remove the pot from the heat and stir in the vanilla, chocolate, and peppermint. I used Peppermint Schnapps for a little boozy kick to my fudge.

If you go that route too, add it after you pour in the chocolate chips. If you add the alcohol to the boiling hot candy it'll just fizzle away. Keep stirring until the chocolate has completely melted and the candy is silky smooth.

Pour it into a greased 9x9" pan. I sprinkled some red and white sugar on top just to drive home that peppermint theme, but this is totally optional.

That's all there is to it! Just let it cool and enjoy! This is my new favorite holiday treat- rich, smooth, and so satisfying. I just might make this a treat for every holiday!


Don't compost those carvings- make cookies!
Halloween is just around the corner, and in our house that means one thing: it's Jack-O-Lantern time!

Now personally, I'm a bit of a food waste nut. I am the queen of "I can do something with that!" Your mustard greens have gone to seed? I'll make mustard. Carrots for dinner? Don't toss those greens; I'll make pesto! Kabocha squash rind chips? Ok, this is where I usually lose people, but really- they're good.
So pumpkin carving kind of kills me just a little bit. All that potential food used as home decor! But at least I can salvage the cast offs- roast the seeds and use the carved out hunks to make pumpkin goodies.
After this week's pumpkin carving night, I cranked out some delicious, Halloweeny chocolate chip pumpkin cookies.

Ingredients
- 2 cups pumpkin puree
- 1.5 cups sugar
- 1/4 cup vanilla almond milk (or whatever type of milk you prefer)
- 1/4 cup molasses
- 1 tsp vanilla extract
- 2 tsp cinnamon
- 1 tsp ground cloves
- 1 tsp ground ginger
- 1/2 tsp salt
- 1/2 tsp baking soda
- 2.5 cups flour
- A whole lotta chocolate chips (I prefer semi-sweet)

Pumpkin Prep
The first thing you'll need to do it prepare your pumpkin. Gather all the big chunks you cut out of your Jack-O-Lantern and pile them in a pan. Use a pan with a lid to prevent the chunks from drying out in the oven. Bake at 425f until the pieces are very soft. This will vary a bit depending on what sort of face you gave your Jack-O-Lantern and if it resulted in big chunks of pumpkin or small ones. But expect somewhere between 25 and 45 minutes.

Once it's cooked squishy, scrape the pumpkin meat off the skin and into a food processor. Puree it until it's smooth.

Cookie Creation
Combine the pumpkin puree, sugar, molasses, almond milk, and vanilla extract until well mixed. Stir in the cinnamon, gloves, and ginger.

Add the flour, salt, and baking soda and stir until smooth. Because of the pumpkin base, this dough will be softer than other cookie doughs. Fold in as many chocolate chips as you like.

Drop by spoonful onto cookie sheets and bake at 375f for 8-10 minutes. These are soft and chewy cookies so they'll look puffy and feel slightly firm when they're done.

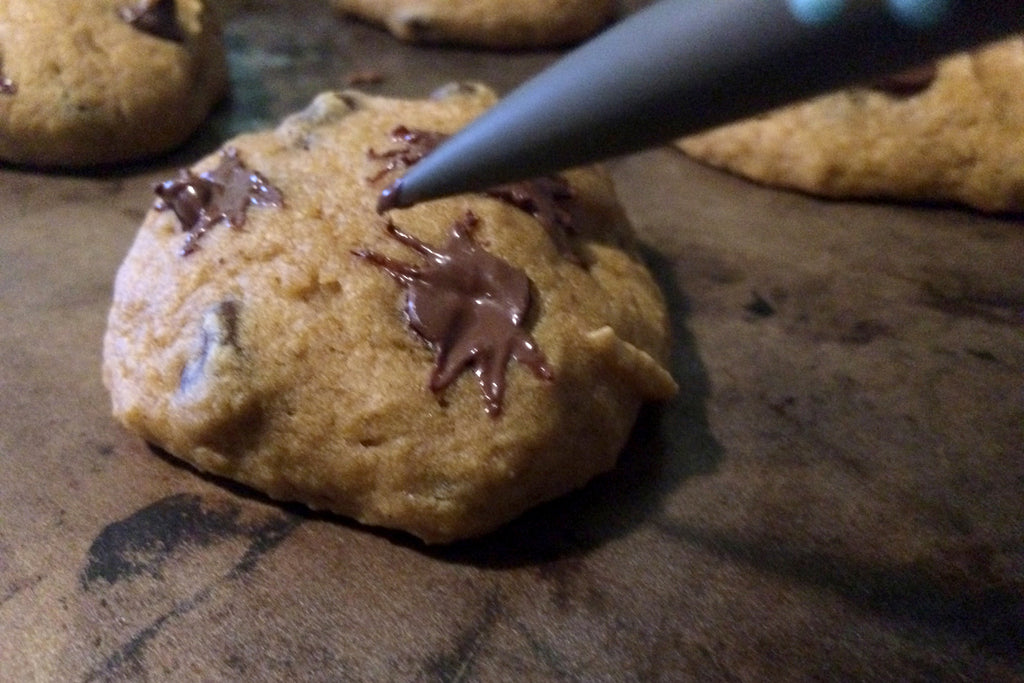
For an extra Halloween touch, while the cookies are still warm, use your pointed tip Sugar Shaper to draw out the warm chocolate of any exposed chocolate chips to make them into little chocolate spiders.

That's it! You've saved some good, edible food from the compost bin and made some delicious cookies in the process! Trick or Treat!

Simple Sugar Cookie Crisps
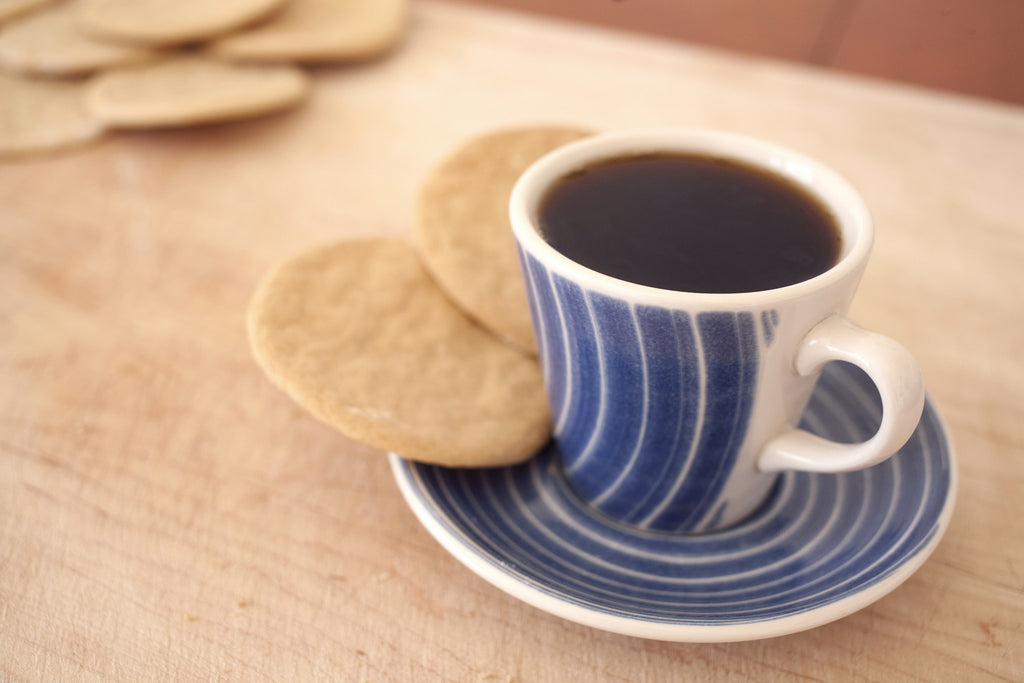
Sometimes you don't want a lot out of cookie, just a plain and simple "serve with your tea" style cookie. And sometimes you just want to get right down to the fun part- the decorating, and you don't want to spend a lot of time on the making and baking of the cookie part.

These simple, three-step Sugar Cookie Crisps are the perfect versatile cookie- they're simply delicious all on their own, and they make a great cookie base for decorating.

Ingredients:
- 1/2 cup Earth Balance buttery spread
- 1 1/4 cup sugar
- 2 1/2 cups flour
- 1/8 cup vanilla almond milk
- 1 tsp pure vanilla extract
- 1 tsp baking soda
- 1 tsp baking powder
- 1/2 tsp salt
Step One: The Soggy Stuff


Cream the sugar and Earth Balance together. Then add the almond milk and vanilla extract and stir until it's all well combined.
Step Two: The Doughening


Add your remaining dry ingredients- salt, soda, baking powder, and flour- and mix until thoroughly and evenly combined. You should have a nice dough.
Refrigerate for at least an hour.
Step Three: Cookies!


Flour a flat work surface. Roll out your dough to about 1/8" - 1/4" thick. Cut out your shapes and place them on a cookie sheet. Bake at 350 degrees fahrenheit for about 8 minutes. They're done when the edges just begin to golden.

Use a spatula to remove them from the cookie sheets and place them on cooling racks while they're still warm. If you let them cool too much they can be hard to get off the sheets, especially if you rolled them out thinner.
And now you either have delicious crispy sugar cookies, or you are ready to begin decorating!

Home Grown Chocolate Chip Zucchini Bread
Labor Day has passed. The kids are back at school. Summer is definitely winding down. And if you're a backyard gardener like me, you are sick to death of zucchini.
Zucchini is a lot of fun early in the season- it grows fast, it's the first to fruit, it thrives in nearly every climate, and it can seemingly withstand all conditions of hardship. It is the viking of the vegetable patch.

It also makes a whole heckuva lot of food.
By late summer, you're drowning in zucchini. They never stop growing! You pick one zucchini longer than your arm and a half dozen smaller ones burst forth nearly instantly. You've steamed them, sauteed them, skewered them, and stir-fried them. You've braised them, broiled them, and breaded them. You've made them into those trendy "zucchini noodles" that really don't pass for real noodles no matter what the health fad magazines say.
Your friends have stopped inviting you over because they know you'll bring zucchini.
What do you do with it all?
Well, personally, by this point in the season I feel I've paid my dues in healthy summer home-grown vegetable eating and I'm ready to mash them all up with sugar and spice and make myself a treat.
It is time for zucchini bread!

If I'm baking for myself, I feel like the stakes are pretty low. (Meaning if it turns out truly awful I can quietly slip it in the compost bin and no one is any the wiser...) So I tend to make my own recipes. This one turned out pretty fab (an opinion validated by my two roommates, who scarfed it down in a day,) so I'm going to walk you through what I did.
The first thing I did was a quick internet search on quickbreads just to get a sense of basic proportions (flour:sugar:fat) commonly used. The I rummaged through my cupboards to see what I had on hand that sounded good in zucchini bread.
This is what I came up with:

Ingredients:
- 2 cups zucchini
- 1/2 cup vegetable oil
- 1/2 cup almond milk (or whatever type of milk you enjoy)
- 1 1/2 cups sugar
- 3 tablespoons dark molasses
- 2 tablespoons agave nectar (honey is fine also)
- 1 teaspoon vanilla extract
- 1 teaspoon cinnamon
- 1/2 teaspoon ground cloves
- 1 teaspoon salt
- 1/2 teaspoon baking soda
- 2 teaspoons baking powder
- 3 cups flour
- Semi-sweet chocolate chips
- Walnuts
- A few pinches of turbinado sugar
Step One: Wet stuff

Grate 1 cup of the zucchini. Put the other cup in the food processor. It doesn't need to be pureed, but it should be processed down to tiny chunks. Put all the zucchini in a mixing bowl.
Add the oil, milk, molasses, agave, and vanilla extract. Mix it up. Then add your sugar and mix some more. Set this bowl aside for a minute.
Step Two: Dry stuff

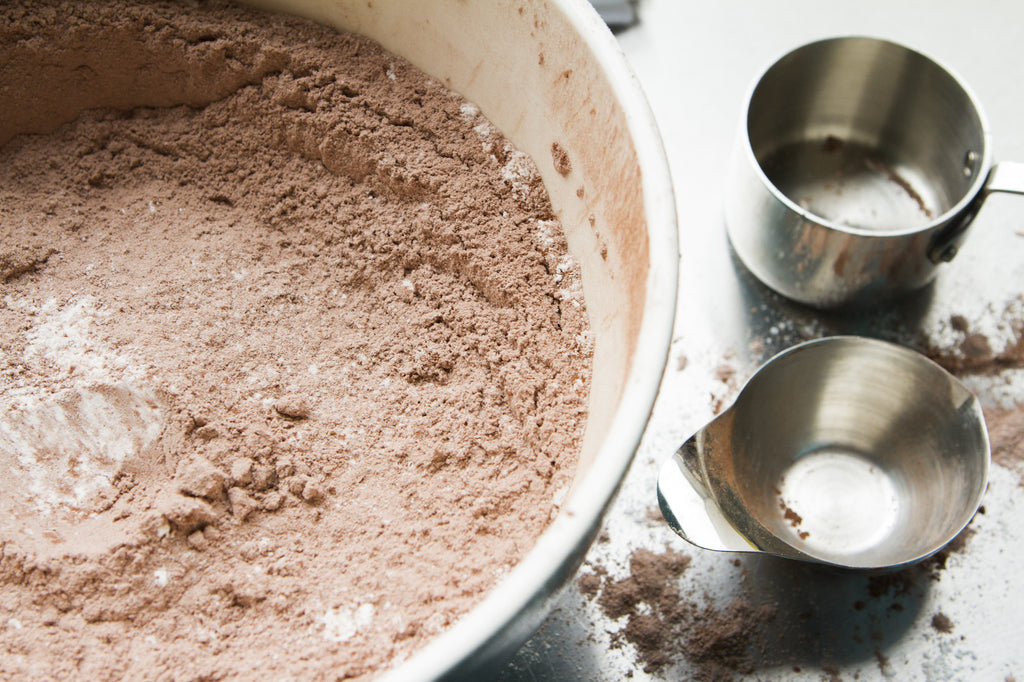
In a separate bowl, mix together the flour, salt, baking soda, baking powder, and spices. You can sift all this if you want, but it's not crucial to do so. Just mind the baking soda. Nobody likes clumps of baking soda in their snack.
Step Three: Two worlds collide

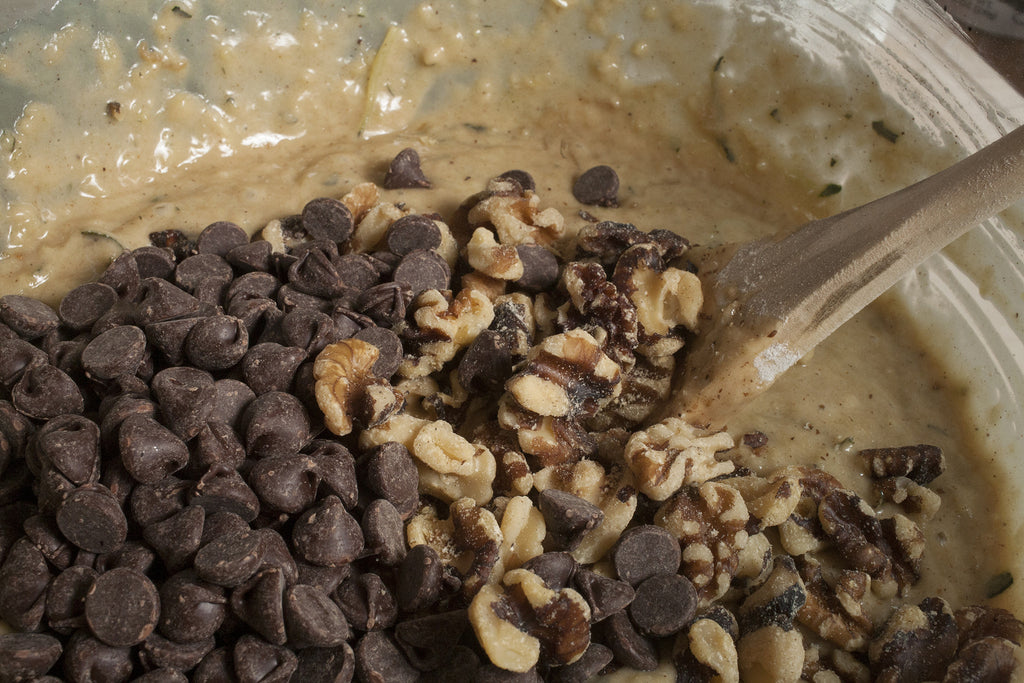
Add the dry mixture to the wet, sugary, zucchini pulp in the mixing bowl. Stir it up until you have a nice batter. Fold in as many chocolate chips and walnuts as fits your taste. I was real heavy on the chocolate chips, but lighter on the walnuts.

Step Four: The final stretch
Pour your batter into a greased 8 1/2" x 4 1/2" loaf pan. I like to sprinkle a little turbinado sugar on top for a little sugary crunch in the top crust.

Bake at 350f for about 50 minutes. I've found over the years that bake times can vary a lot among home ovens, so start checking your bread around 45 minutes. When you can poke a knife through to the bottom and it comes out mostly clean, it's ready.
And there you have your Chocolate Chip Walnut Zucchini Bread!

Not only is this the best zucchini bread I've made so far, but it might be the most delicious end-of-summer zucchini disposal you could hope for.
Modeling Chocolate: Two Different Approaches
For today's recipes, we're going to talk about modeling chocolate. Modeling chocolate is a wonderful edible sculpting medium. It's like clay you want to eat- firm, yet malleable, capable of holding it's shape or being reworked, and also delicious. We know of two different recipes for modeling chocolate- one that uses candy melts, and one that uses real chocolate. We're going to give you both.

Modeling Chocolate Using Candy Melts:
Ingredients:
- 454g Candy Melts
- 115g corn syrup
Tools:
- Plastic lined sheet tray
- Double Boiler
- Silicone Spatula
In a double boiler, heat your candy melts until they're mostly melted but a few lumps remain. You don't want to risk the candy melts getting too hot and burning, so take it off the double boiler and set it aside while there are still a few lumps. (The lumps will melt out from the residual heat of the warm melted candy).

Microwave your corn syrup for a minute and a half so that the syrup gets very warm and very thin. Put your melted candy melts back on the double boiler over a low heat and pour in the warm corn syrup.
Begin stirring! And keep stirring! Stir much longer than you think you need to; if you don't stir your mixture enough, the fats will separate out during the cooling process and your modeling chocolate will wind up lumpy. Your modeling chocolate is ready when it's absolutely silky-smooth and shiny- no air bubbles, no "curdled" appearance, and no liquid separated out.
Pour your warm modeling chocolate onto the lined sheet pan and spread to about 1/4" thick. Once it's cooled, you can start sculpting immediately or put it in an air-tight container for later.

Modeling Chocolate Using Real Chocolate:
Ingredients:
- 500g White Chocolate (or regular chocolate if you want an all-brown figure)
- 250g Glucose
- 1 Teaspoon water
- Gel color (optional)
Tools:
- Plastic lined sheet tray
- Double boiler
- Silicone spatula
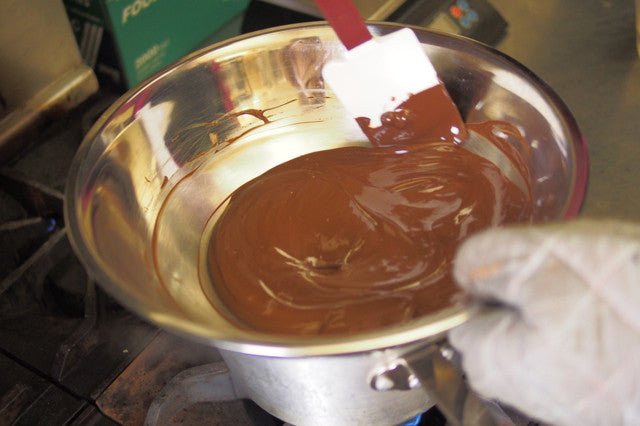
In a double boiler, melt your chocolate over a medium heat until it is super smooth. Once your chocolate is completely smooth, take it off the double boiler and set it aside. You don't want it to continue to heat after it has reached the right consistency.

Because glucose has a lower water content than the corn syrup we used in the candy melt recipe, you'll need to add just a smidge of water. Add 1 teaspoon of water to your 250g of glucose now. Microwave the glucose and water for a minute or two- until it's warm enough to be smooth, liquidy, and easy to pour. Put your chocolate back on the double boiler over a low heat.
Pour the glucose-water mixture into the chocolate and begin stirring over a constant low heat. You should notice after a bit of stirring that the fat from the chocolate begins to separate out. Keep stirring! You want that fat content to be reabsorbed by the chocolate; don't stop stirring until it is. If you notice any lumping up of the chocolate- keep stirring! Eventually you will get to a stage where your chocolate is silky smooth. If you want to color your chocolate- this is a great time to do it! You can knead in color later when your chocolate has cooled, but it is so much easier to stir it in now while the chocolate is warm and soft.
Pour your warm chocolate onto a sheet tray lined with plastic and smooth it out to about 1/4" thick. Once it's cool, you can use it immediately or store it in an air-tight container in a cool, dry place.
That's it! Now you know how to make modeling chocolate. Get to sculpting!


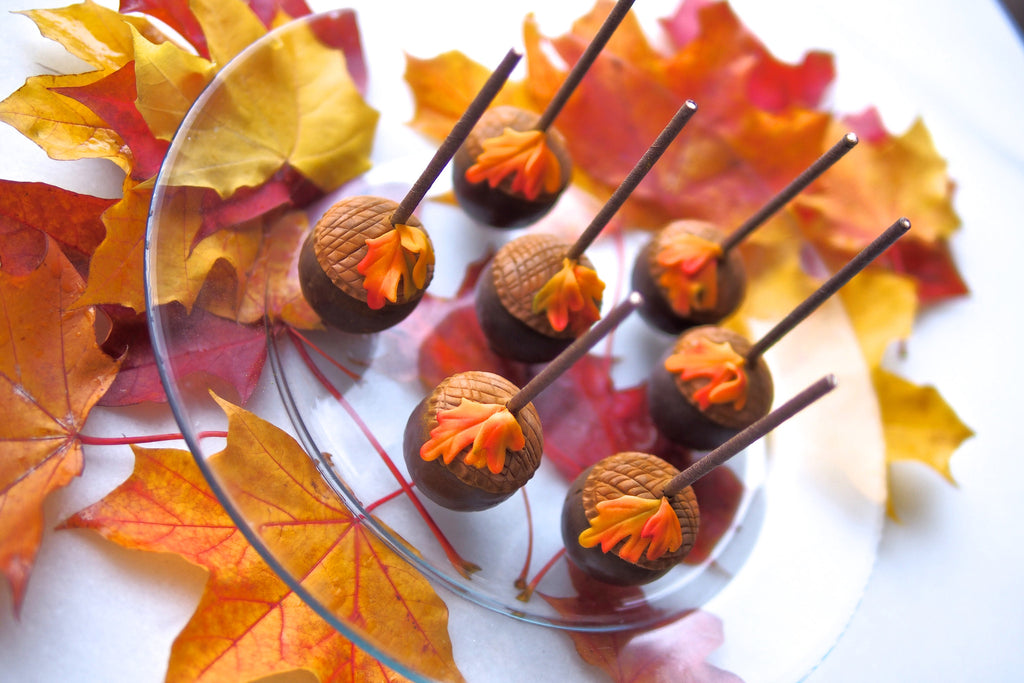
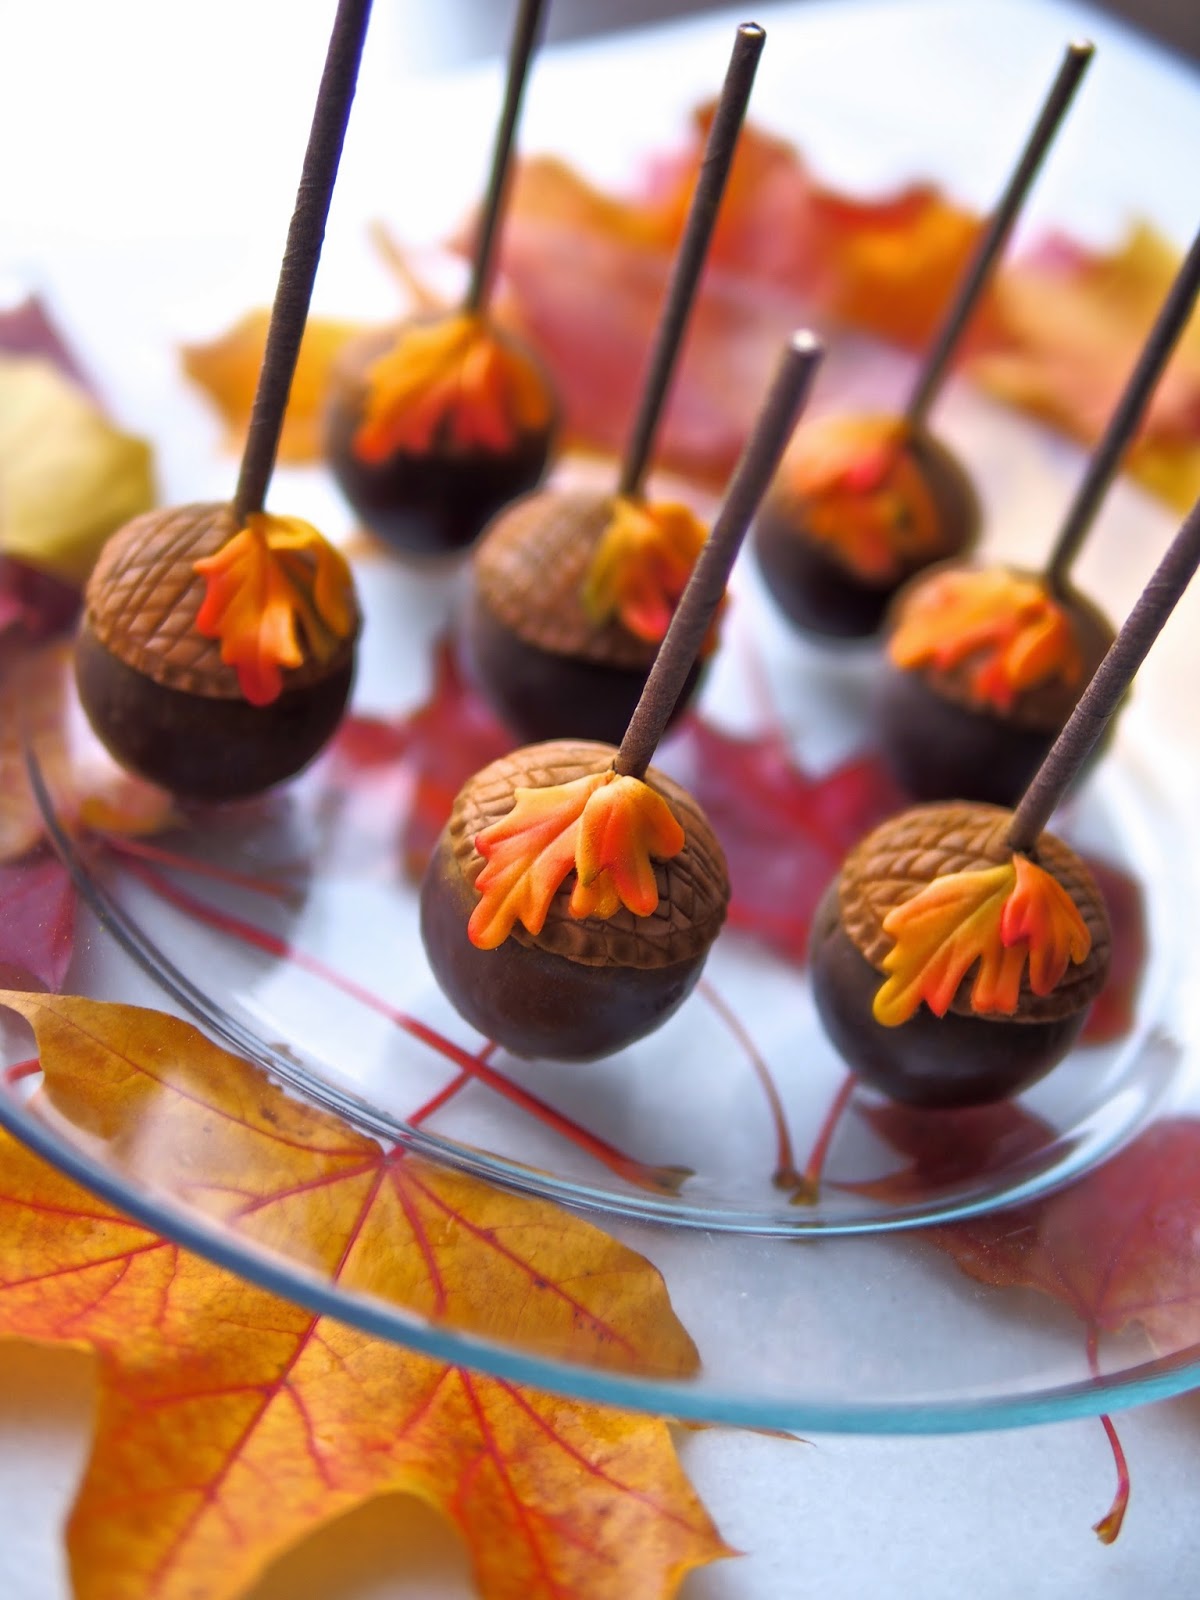
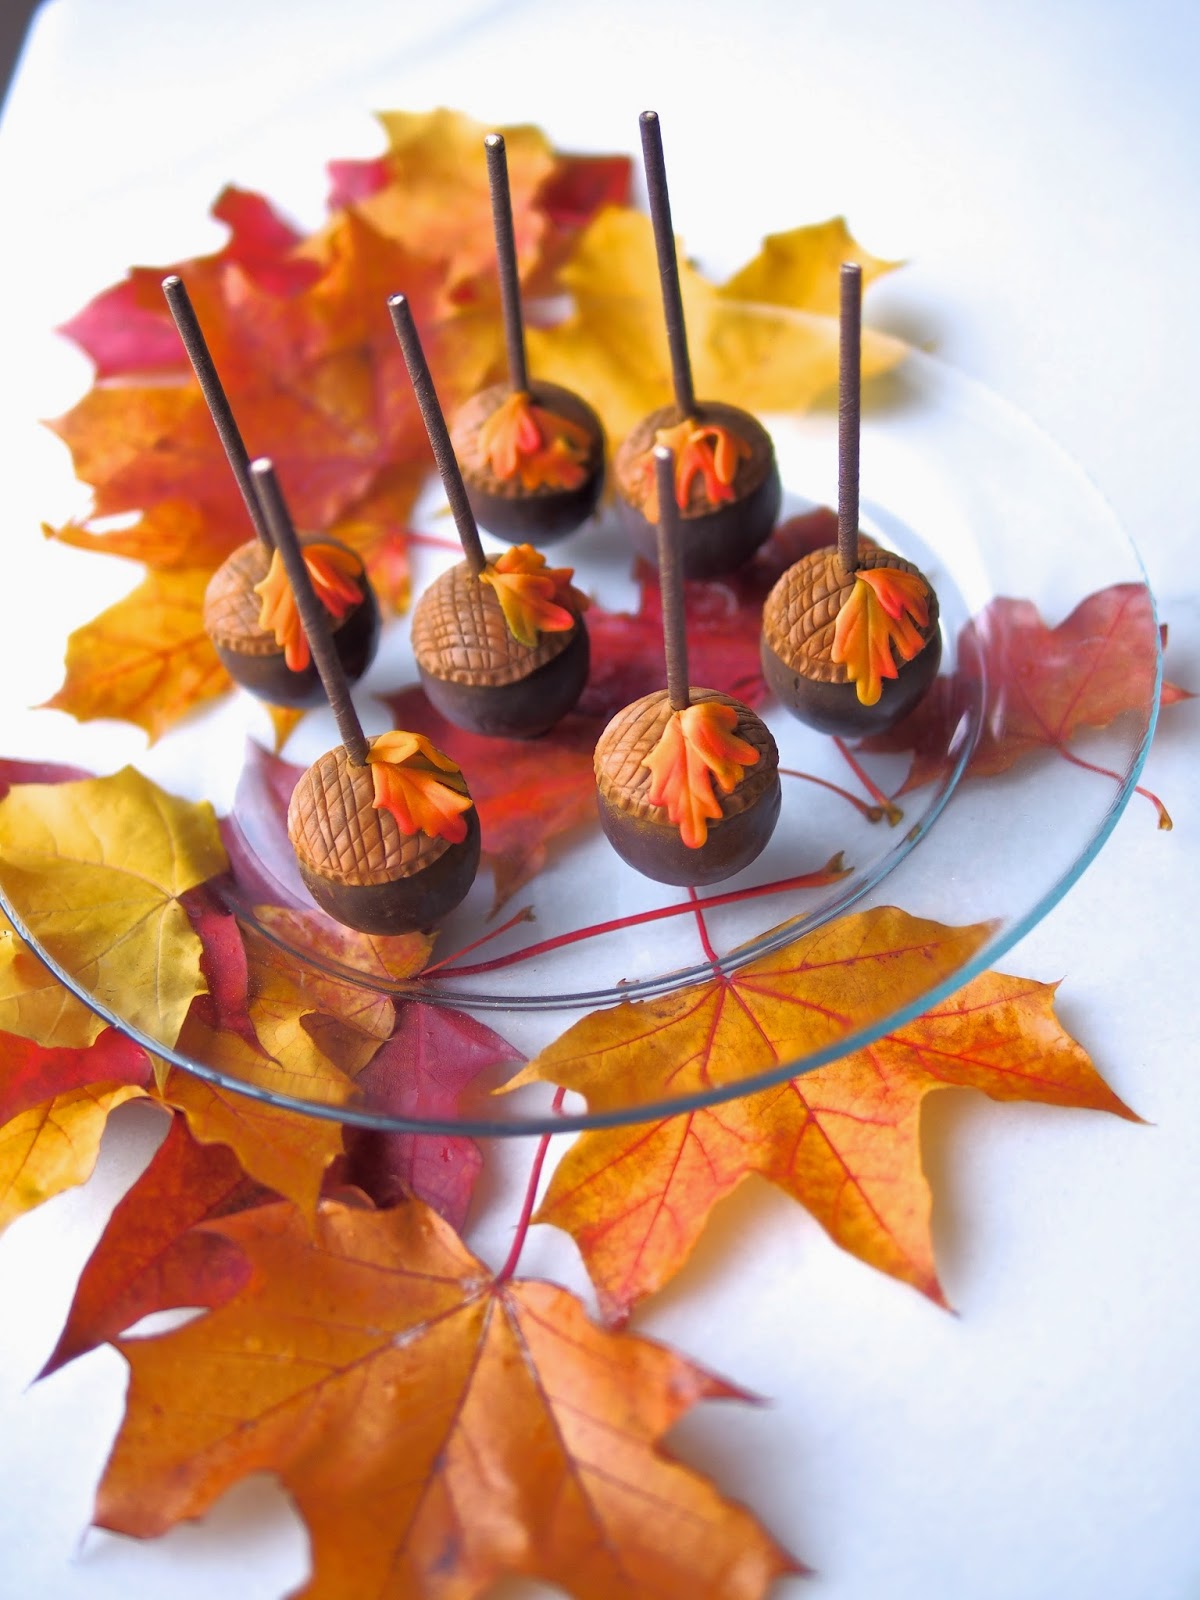
Acorn Cake Pops

Here’s what you'll need for twelve Cake Pops
INGREDIENTS/SUPPLIES
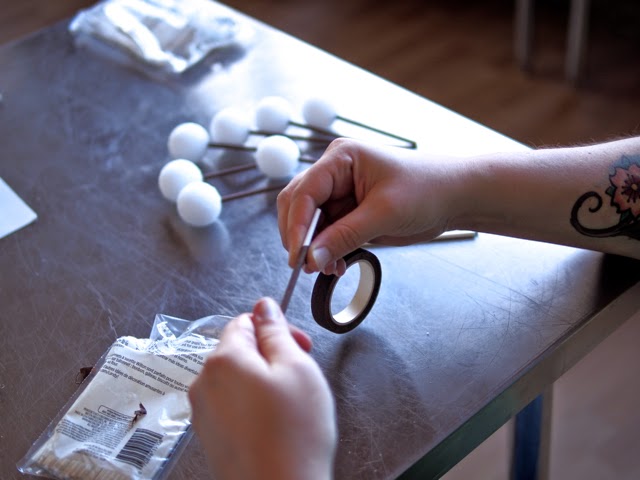
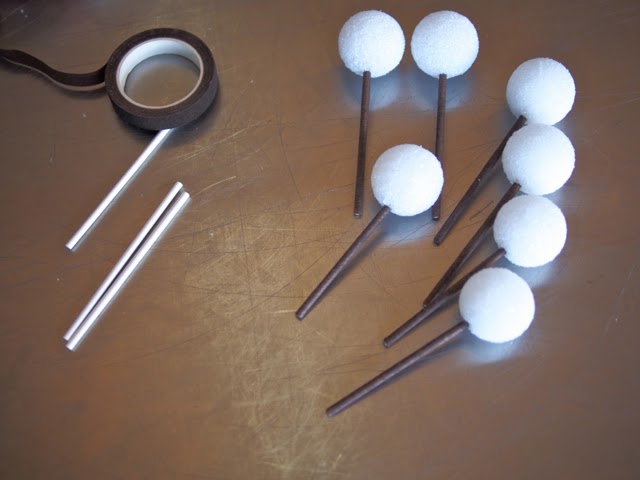
- 12 lollipop sticks
- brown floral tape
- 12oz bag of dark cocoa candy melts
- liquid vegetable oil (canola, etc)
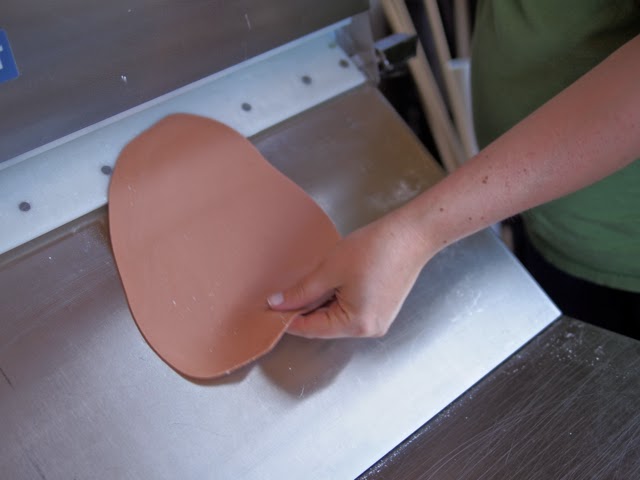
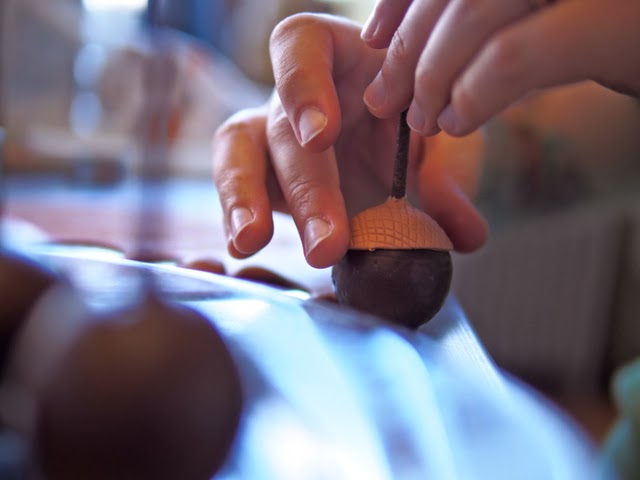
- light brown modeling chocolate or fondant (for caps)
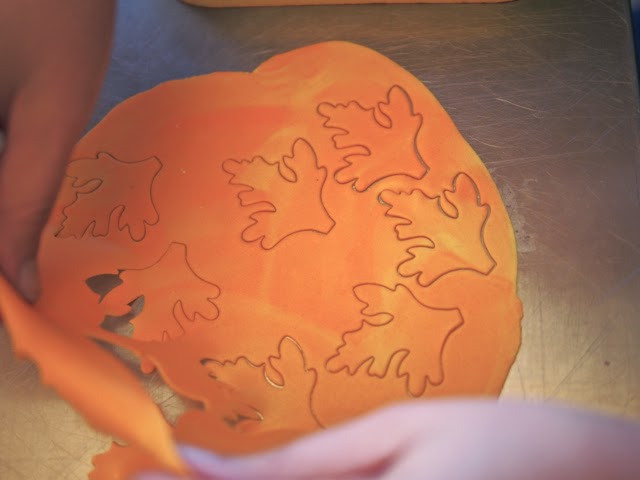
- orange and yellow modeling chocolate or fondant (for leaves)
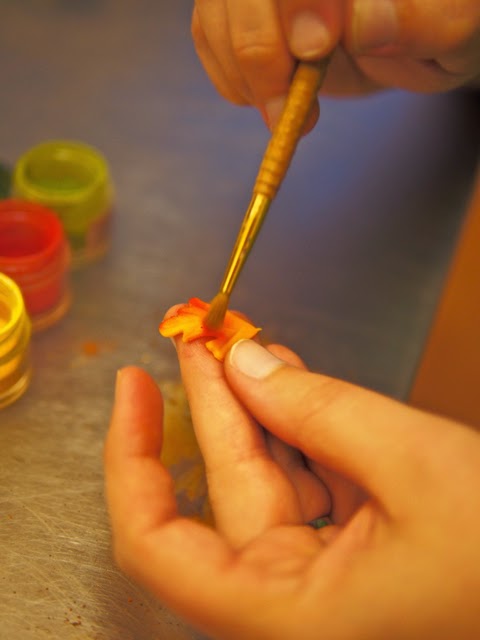
- green and brown petal dusts
- leaf shaped cutter or exacto knife to free cut leaf shapes


- 1
- 2