Myriam's Monkeys!
Hi everyone!
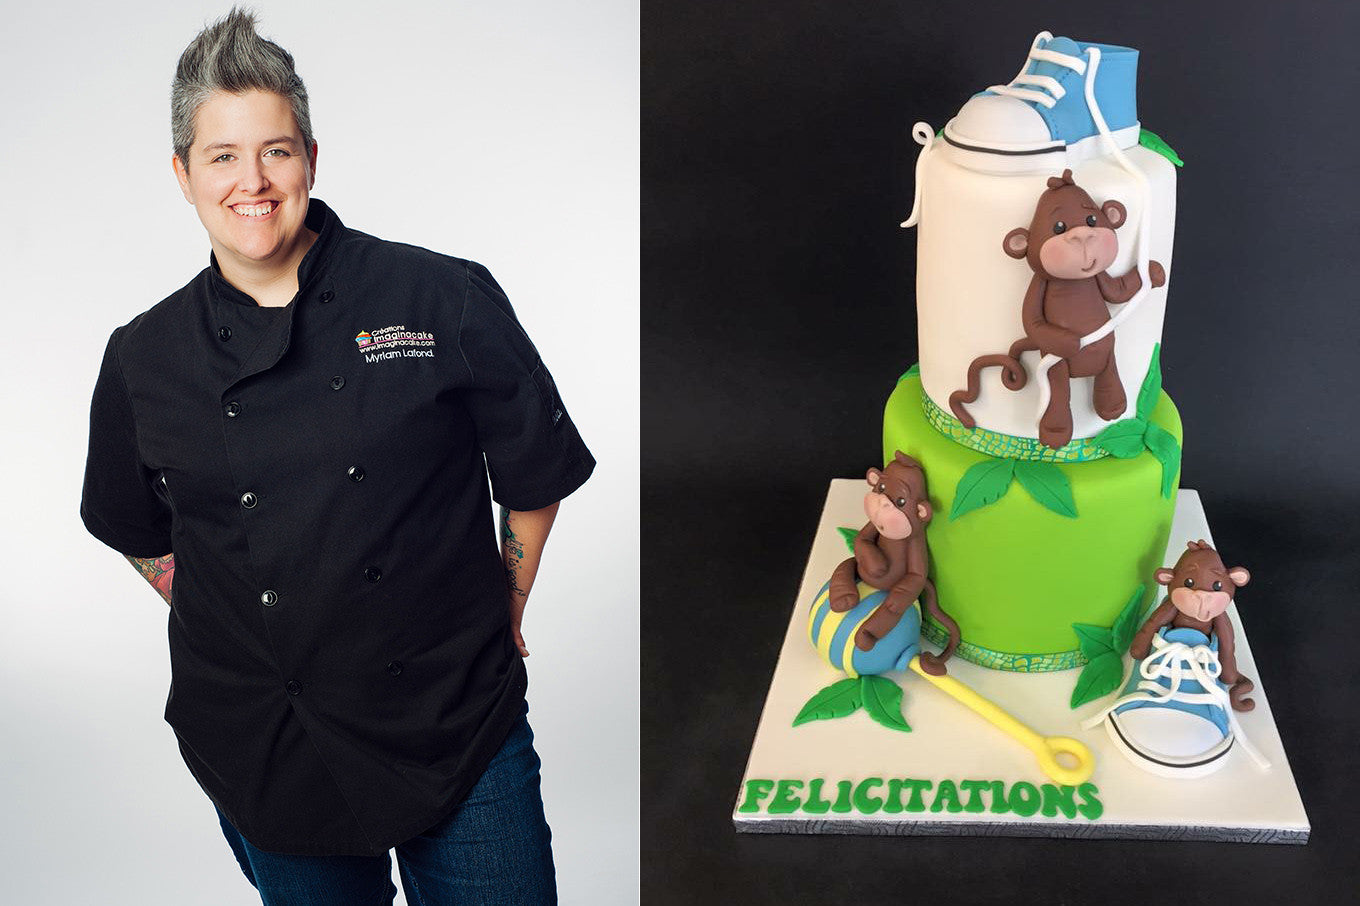
For those who don’t know me, my name is Myriam Lafond, owner and cake designer at Imaginacake. My native language is French, but being surrounded by amazing cake friends from all over, I quickly learned English. My creative side is really strong so when I started making cakes for fun, I found a passion that made people happy. My friends and clients started sharing my work, my business grew, and for the past 5 years, I have been making cakes full-time. I also give classes to people who want to learn my craft, in groups or in private. 3D cakes and figurines are my favorites, and I was really excited to work on this tutorial for my friends at Innovative Sugarworks.
For me, baby showers are always a good time to be creative. The Converse baby shoes are a classic and an easy way to represent the new family member to come. I really love adding some cute characters to create a unique cake each time.

If you don’t know how to make the shoes, you can follow my step by step video slideshow on how to create them. For the shoes seen in the video you can find the template to print and some extra information here on my French blog . As you will see I translated that page for you. I'm also happy to let you know that my entire blog will soon be translated to English.

Once you have the shoes done, you can start following this step by step pictorial to make the cute little monkeys for your shower cake.

You will need some modeling chocolate. You can use your own recipe or buy some amazing Hot Hands Modeling Chocolate, which I used for this project. Mix some food coloring in your modeling chocolate to get the brown for the body and some skin tone for the face and the inside of the ears. You will also need a set of Sugar Shapers (I used firm tipped Mini-Tip Sugar Shapers) and some black and white fondant for the details.
Step 1: The tail
Roll a small ball of brown modeling chocolate into a tube to make the tail and place it inside of one of the shoes. Try to keep some realistic proportions.

Step 2: The body
Make a tear drop shape for the body of the monkey and place it inside the shoe.

Step 3: the arms
Roll a tube and try to keep one end more round to be able to make the hand. Then press the rounder end down gently to form the hand.

With your trip-tip chisel sugar shapers (the coral one) mark the fingers. I use it tip down.

Cut your arm at a good length (it depends on the size of your body so try to keep it proportional.) After this, you will be able to stick the arm in place. You can also use the same tri-tip chisel Sugar Shaper to mark the elbow fold. Then repeat the same step for the second arm.

Step 4: The head
You can use a wood skewer to maintain the head in place on your monkey body. Roll a proportional ball for the head and with your pinkie just gently press the top to create the forehead.

Place the head gently on the skewer, pushing it down, then carefully push the skewer in the body to be sure it doesn't move.

Roll a small amount of skin tone paste into a tube. Try to keep the ends round. Then press it down in the bottom of the face.

With your round tip chisel tool (the lime green one) create the mouth. You can also mark the line over the mouth with the trip-tip chisel tool (the coral one).

Roll a tiny ball of skin tone modeling chocolate to create the nose,place it on the face and make some nostrils with your small bone chisel tool (the orange one)

Use the same tool to form the eye cavities then add the details like black eyes balls and some white small light in it. You can also add some eyebrows

For the ears, I use a small amount of skin tone paste that I put over a bigger part of brown paste then I press it down with the round chisel tool (the green one). I also pinch the bottom then cut it straight to get a bigger area to stick it on the side of the head.

You can also give your monkey a plush look by adding some stitching using your square tip chisel tool (the yellow one). Then use some pink powder and a small brush to color the cheeks.

You can always put more monkeys by following the same steps. Just sit them near the shoes. Add some legs, some foot prints and other details like a bow to make it unique.

I hope you have enjoyed this pictorial.
Have fun and be creative

We hope you've enjoyed this tutorial by Myriam Lafond, and we're looking forward to seeing millions of little monkeys on everyone's Facebooks and Instagrams!
If you want to see more of Myriam's work, check out her website- www.imaginacake.com and her blog- www.parlonsgateaux.com.
And if you'd like to take a class with Myriam, keep an eye on her events page for class offerings!
You can also follow her on social media:
IG: myriam_imaginacake
FB: @imaginacake
Products
View all
