Sugarworks Blog
Sugar Shapers and Sorcery Soap- Magic in the Making!
We've got something a little different for you all today. "How different?" you ask? Well... you can't eat it. So REALLY different for us!
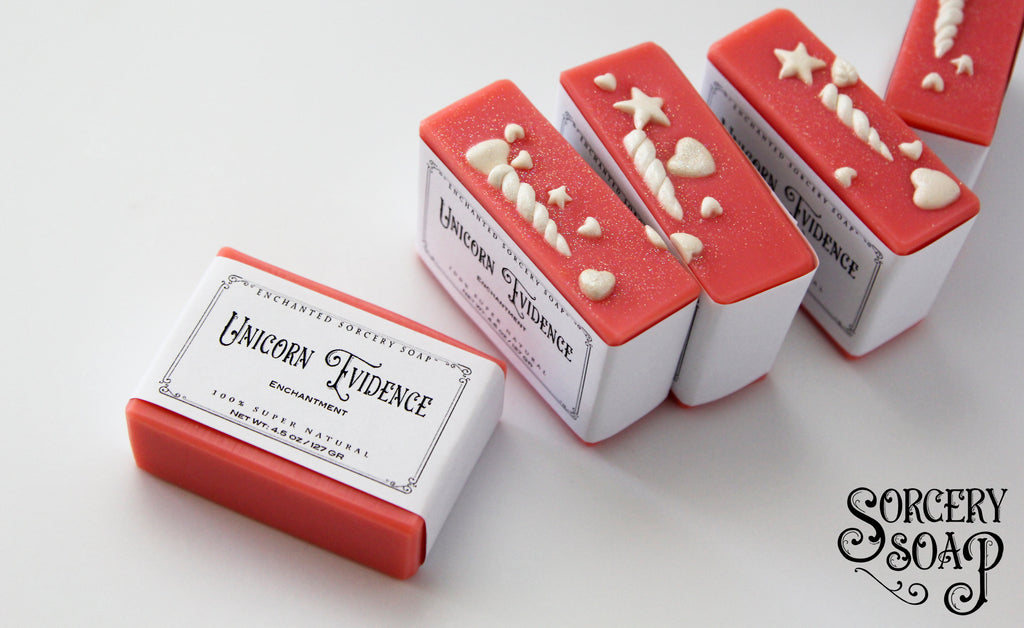
We'd like to introduce you to Bee Iyata and Sorcery Soap - high minded soaps for those who see magic! Bee is the head soap witch of Sorcery Soap. She lives in a strict desert with her 2 mates: one is a modern wizard and the other named after the 33rd President. We recently discovered that Bee is doing something with Sugar Shapers we'd never imagined when we created them- sculpting soap! We didn't even know such a thing existed, but we have been amazed and delighted by Bee's beautiful soaps!
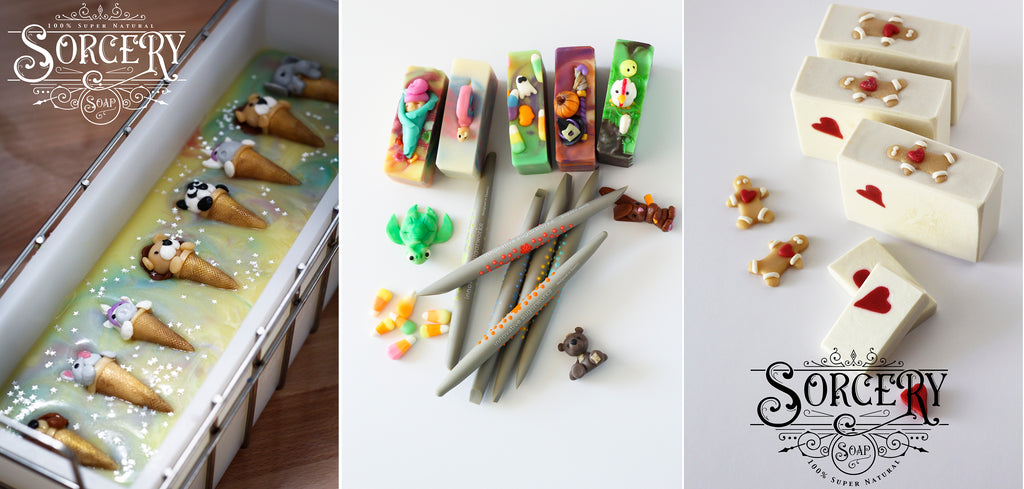
Bee is famous throughout the soap world for being a master of soap dough - a moldable cold process soap. She has, in fact, published three books on this unique topic. Bee’s first book is An Enchanted Book Of Peculiar Ideas And Soap Potions - a book of inspiration for all crafts.
Her second book, A Soap Recipe Book Of Light and Shadow, has more tips and tricks to help with soap molding by hand, 20 dough/bar soap recipes, and charts and note pages to help you stay organized and keep track of all the inspiration and soap ideas generated by the first book.
The third book in her soap-craft trilogy, The Magic Of Soap Dough is her opus to making, using, and creating with soap dough.
As well as writing books and offering peculiar soaps, Bee runs a soap group called “Sorcery Soap Creations” on Facebook and supports other soap makers with a soap blog. We are super excited to host Bee in our own (not-so-soapy) blog today! Though soap may not taste like cake, we see a similar vein of creativity and DIY resourcefulness among the 2 skills and we think a lot of you cakers would enjoy translating your skills to soap making as well!
Hi cake makers and sugar artists. I am a soap maker and you are my inspiration for creating unique soaps!
Why would a soap maker be addressing the cake and sugar world? Sugar Shapers.
I’m Bee- a soap maker and head soap witch of Sorcery Soap. I make high minded soaps.
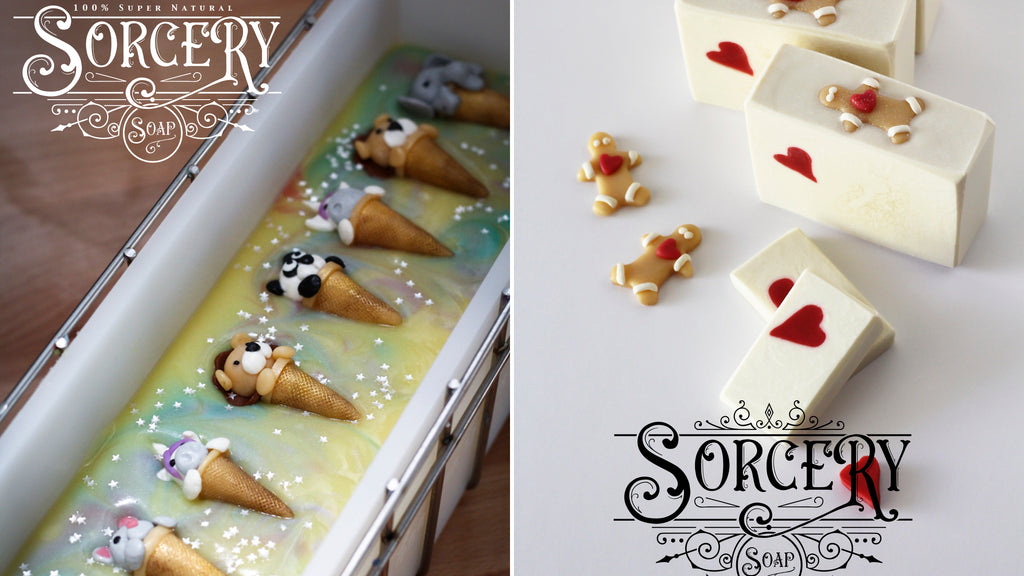
Sugar Shaper tools from Innovative Sugarworks were an early investment and have never let me down. There wasn’t one soap maker using these tools in the beginning, so I utilized a fair amount of hope when I hit the purchase button.
Sugar Shapers help me sculpt creations from soap dough. Soap dough is similar in texture to fondant, but more firm, a little like clay.
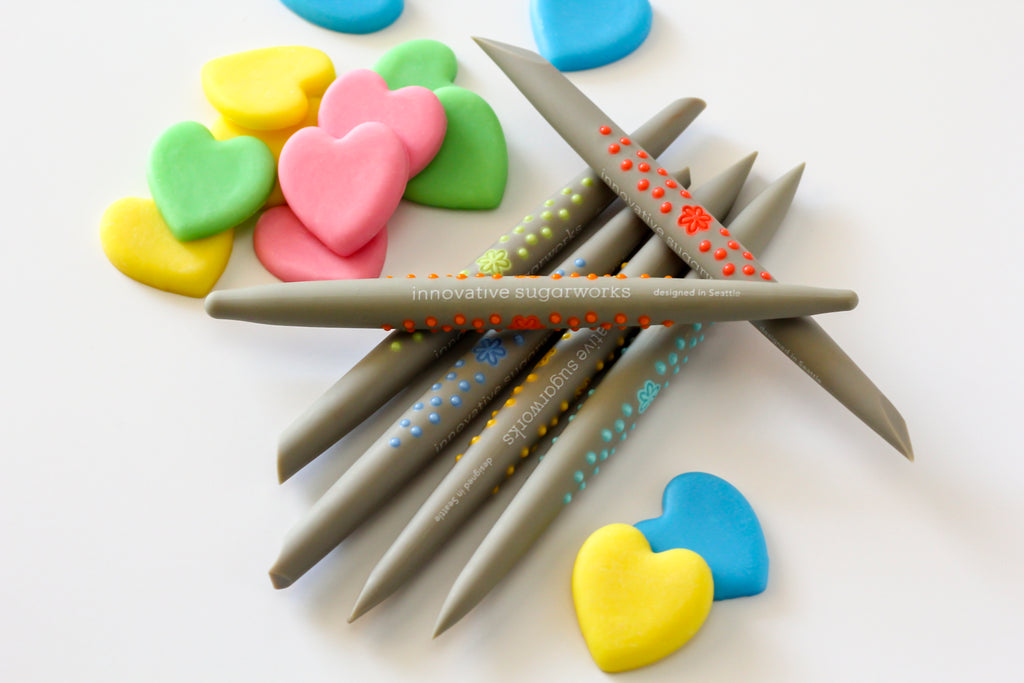
About five years ago I stumbled upon soap dough. I did not see anything created with soap dough online. I looked to the sugar artist community for ideas and inspiration, for determination and gumption, and most of all to be delighted by your creations. In the last few decades sugar art work has dramatically increased, as has the depth and scale of what is possible in edible art. This gave me inspiration to create in soap.
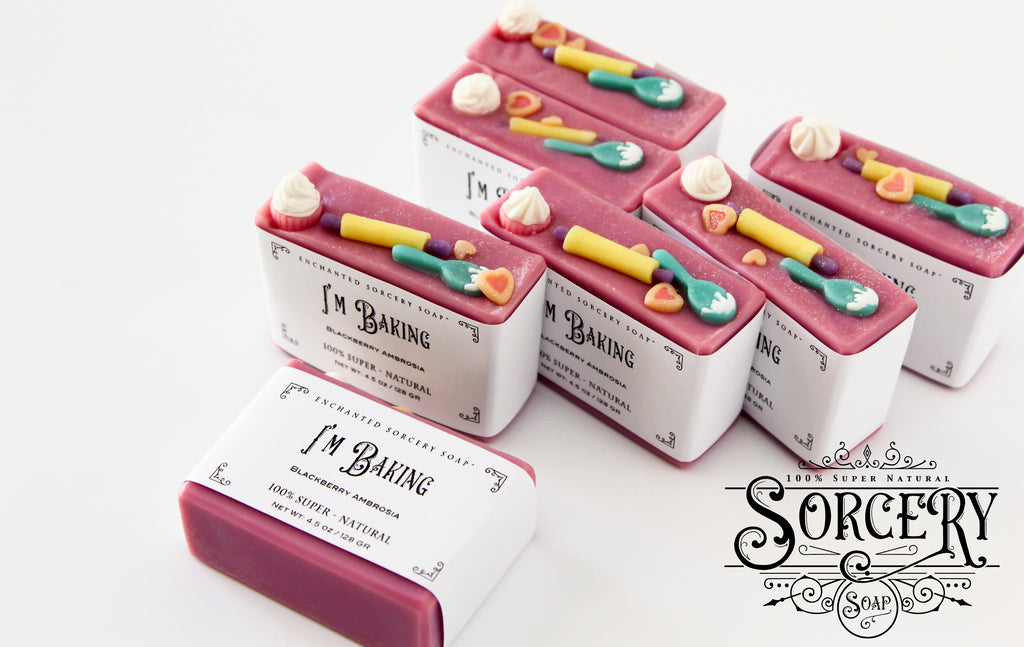
Now, I needed some tools of the trade. A trade I was making up as I went along.
Soap dough is a fully saponified but uncured cold process hand made soap that is moldable. I was enchanted with this pliable substance that could be molded into any shape my imagination could conjure. All this created a magic that was undeniable, along with a soap that was great for skin.
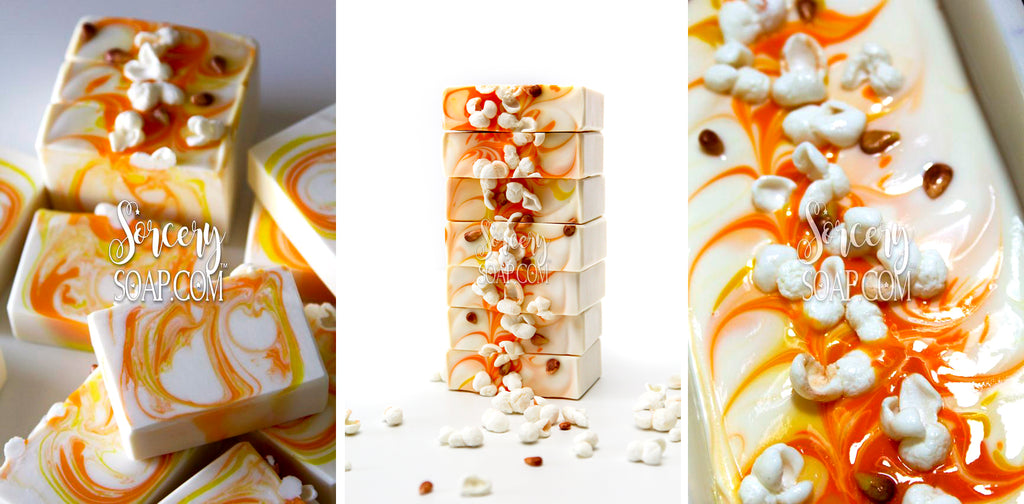
The first time I showed someone a Popcorn soap was a moment that changed my mind. This popcorn soap was colored with bright orange and yellow micas inside a white bar of soap with hand molded popped corn and kernels on top, all scented with buttered popcorn fragrance oil. All this was created with Sugar Shapers. The look of astonishment and delight on my friend’s face was all the encouragement I needed.
Sugar Shapers help me get into the tiny places, smooth areas down, push and extract soap from places my fingers cannot get to. I bought my Sugar Shapers about four years ago and they are as good as new. I wash my Sugar Shapers a lot, use them daily and these tools are so resilient and reliable I even included them in my latest book about soap dough!
The sugar artist community helped guide my way. Thank you for doing what you do, publicly and quietly, offering your vision of art to the world. I hope I showed you how significant your art work is, not just to those who make sugar works, but a wide variety of crafters.
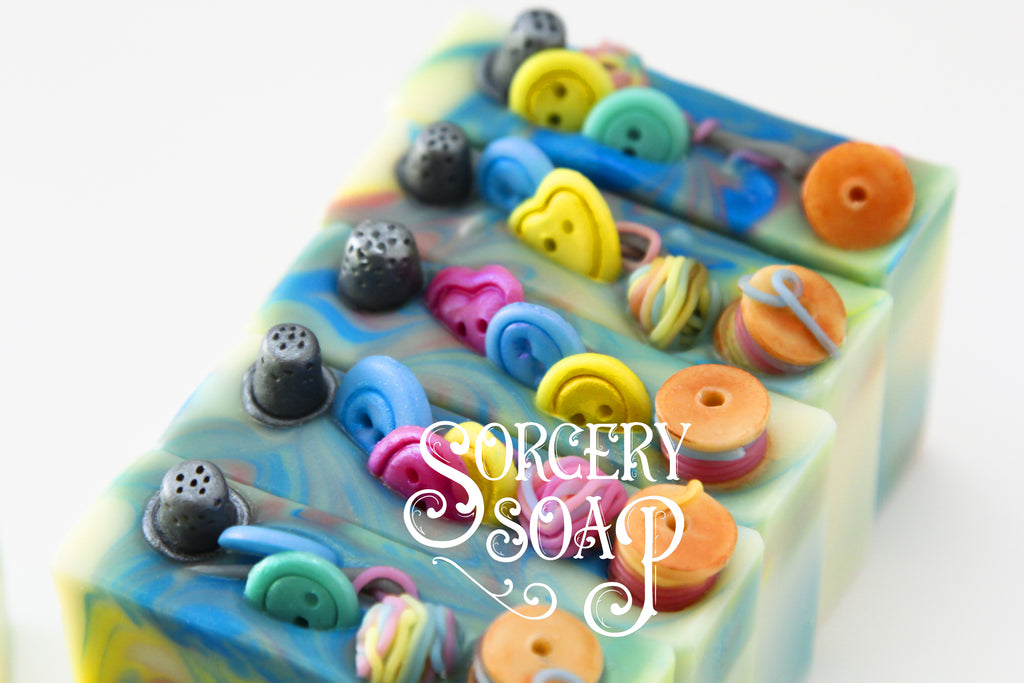
And we here at Sugarworks hope that Bee's passion and jaw-dropping soap creations have inspired you to test out your sugar skills in this new medium!
If you're interested in trying your hand at soap making and soap sculpting, make sure to check out Bee's soap dough eBook trilogy. And keep up with her online and on social media at the following links:
Website: www.SorcerySoaps.com
Facebook: @sorcerysoap
Instagram: @sorcerysoap
Pinterest: @SorcerySoap
Youtube: @SoapWitchSorcerySoap
Beyond the Box- Customizing your Sugar Structure Kit
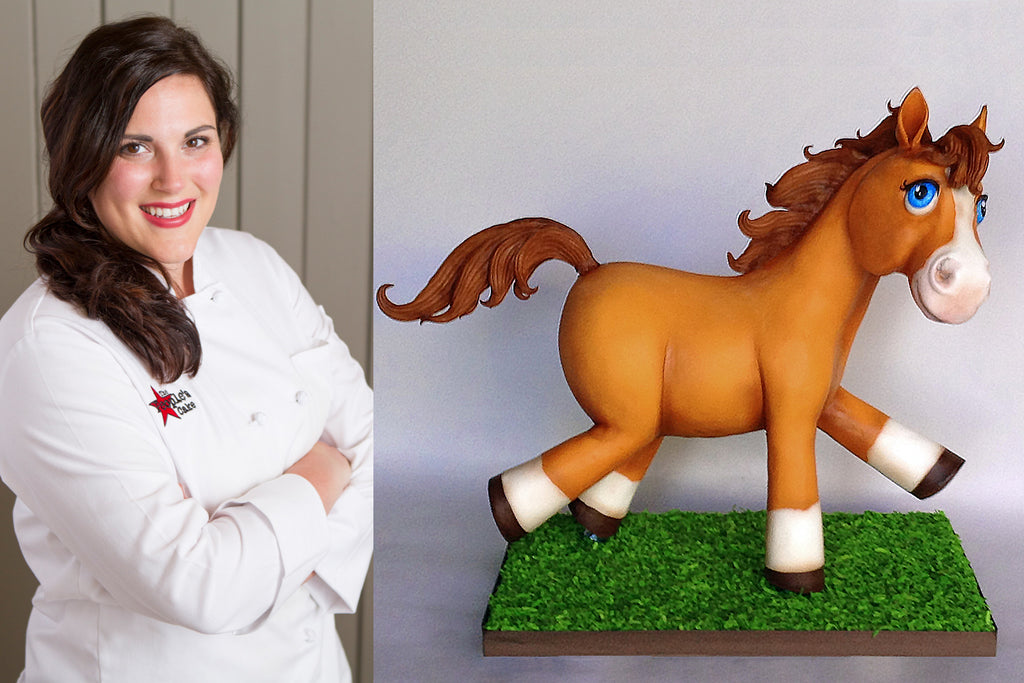
One of the greatest things about Sugar Structures cake armatures is that they are completely interchangeable. Just like Legos, the pieces fit together any way you can imagine- you can combine kits, omit pieces, rearrange things, and buy add-on parts. You can replicate the image on the box, or do something totally different. Today, cake superstar and Sugar Structure co-conspirator Kaysie Lackey is going to show you how she started with our 4 Legged Standing Sugar Structure kit, added a few parts from Expansion Packs, and created the galloping cutie Petunia the Pony.
Petunia the Pony Supply List
- Base board - 12" x 16" plywood (1/2" thick) + 12" x 16" foamcore (1/4" thick)
- Head - 4" styrofoam ball + 2.5" styrofoam ball
- Cakes - 9" x 7" (3)
- Front leg - 150g modeling chocolate (2)
- Back leg - 200g modeling chocolate (2)
- Cheeks - 100g modeling chocolate (2)
- Neck - 250g modeling chocolate
- Mane & tail - 200g modeling chocolate
- Body covering (colored) - 1200g blend (800g fondant + 400g modeling chocolate)
- Body covering (white) - 225g blend (150g fondant + 75g modeling chocolate)
- Cake boards - 8.5" x 11" foamcore (2) cut to custom shape
- Sugar Structures 4 Legged Standing kit
- Sugar Structures expansion parts- corner couple, 30* angle, 1" rod, 2" rod
- 1/4" armature wire (length = however long you want your pony's tail)
The first thing I do with any sculpted cake is sketch out my cake design and then outline how the armature will be constructed. Determine where in your design you'll need straight lines (rods) and where you'll need angles and bends or breaks in the lines. Measure the parts of your sketch where the rods will go so you can scale up in your armature design without losing proportion.
For Petunia, I kept her basic shape in line with the standard 4 Legged Standing Sugar Structure kit design, but I added a few parts from Sugar Structure Expansion packs to give her a nice horsey tail.
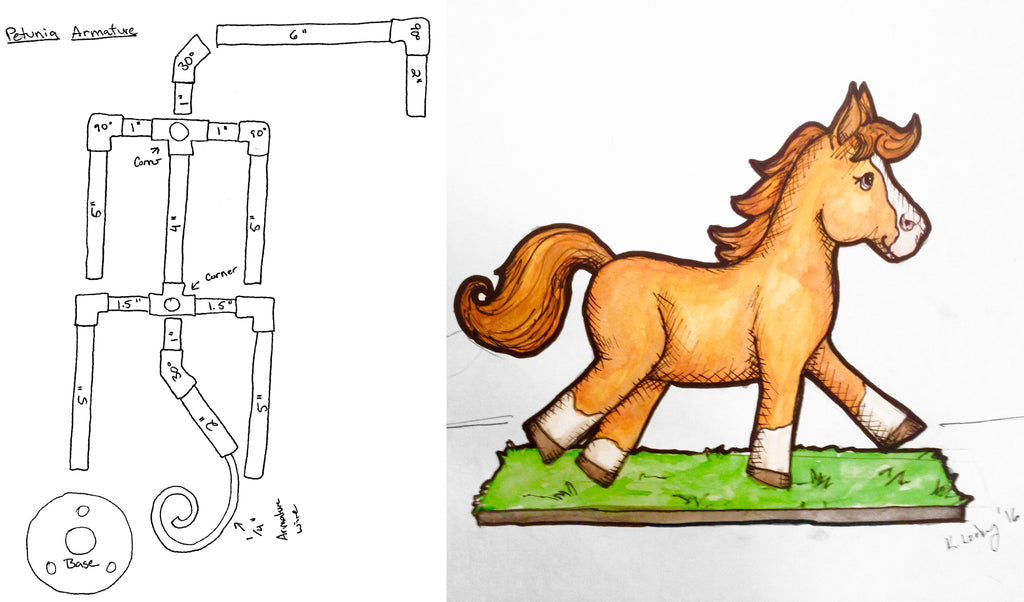
The next thing you'll want to do is determine what parts of your design will be made from cake and where you will need boards to support the cake. Generally, when I make animal cakes like Petunia, or like the Mollie Moo cow on the box of the 4 Legged Standing kit, I make the body out of cake but use foam for the head. I find you get so few usable servings out of the head that it's not worth the trouble of carving it out of cake. So my cake boards for Petunia are going to rest along the "spine" of the armature to support the mass of her torso.
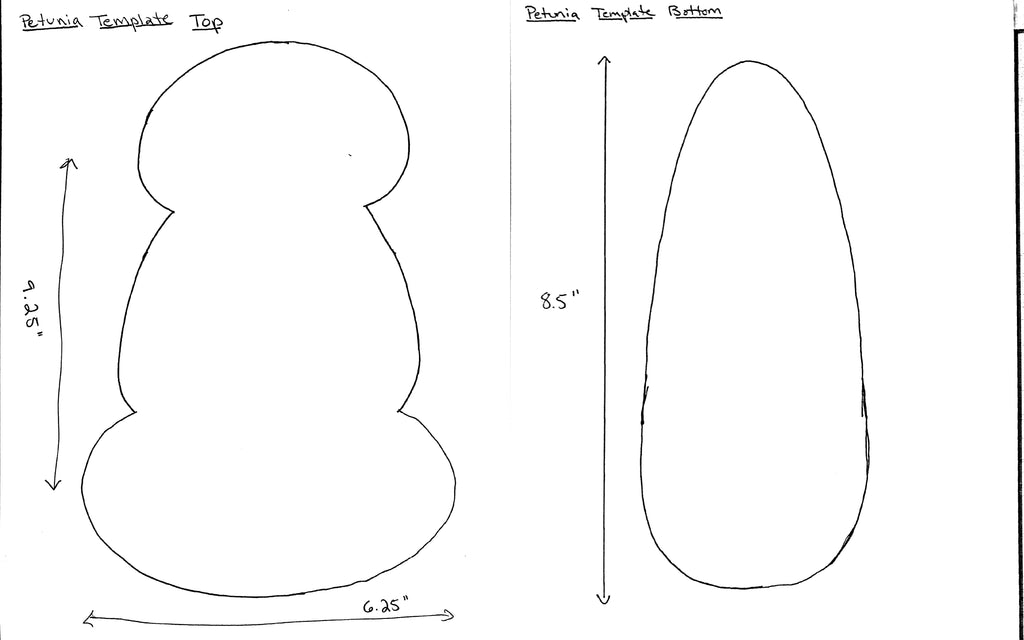
Next you'll draw out templates for your cake boards. To determine the size and dimensions of your boards go back to your armature design sketch. Add up the lengths of the longest and widest areas that your board will need to cover. And don't just add up the rod lengths; the elbows and connectors will add some length as well. Once you have your dimensions, look at your drawing of your cake and think about the shape you'll be carving the cake into.
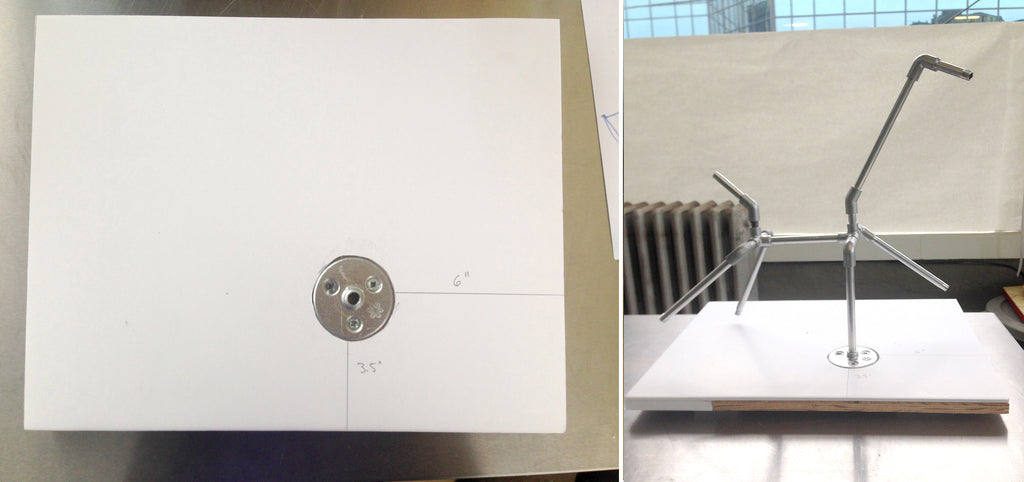
Now you're ready to start constructing. Think about what part of your cake is touching the "ground" (for Petunia, it's her front right hoof) and where on the space of your baseboard that part will need to sit. This is where you will affix your Sugar Structure base piece. Make sure to measure so no part of your cake (like her back hooves) winds up off the board. I like my "ground" to be flat and even, so I generally cut a sheet of foamcore to the size of my base board and cut out a circle where the armature base piece will be. This makes the hardware flush with the surface of the foamcore (or the "ground" of my cake). Then assemble your armature and thread it into the base piece.
Now we put the cake boards onto the armature. You'll notice in my templates I have a top and bottom board. You're going to sandwich your boards around the structure. The two pieces really need to come together flat and touching, so we need to hollow out space for the armature to nestle into. I use 1/2", or 10mm thick foamcore for my boards so I have enough space to hollow out gullies for the hardware without the boards breaking. And remember to measure! I trace my armature to get an accurate layout on my boards, but I still go back and measure and draw out final cut lines before I start hollowing. Care and precision will save you time and frustration in the long-run.
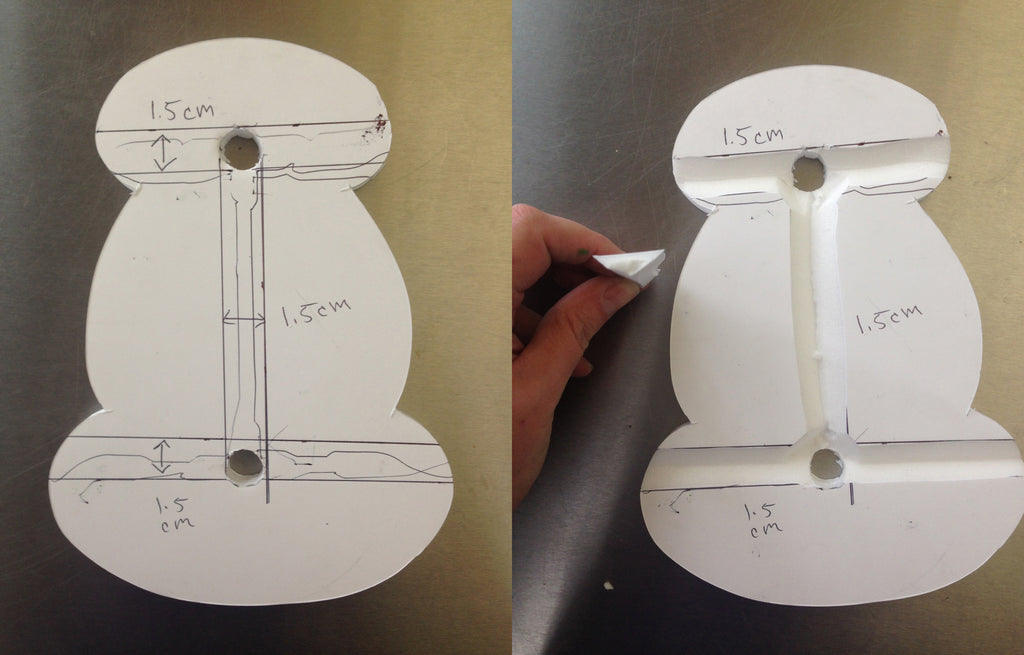
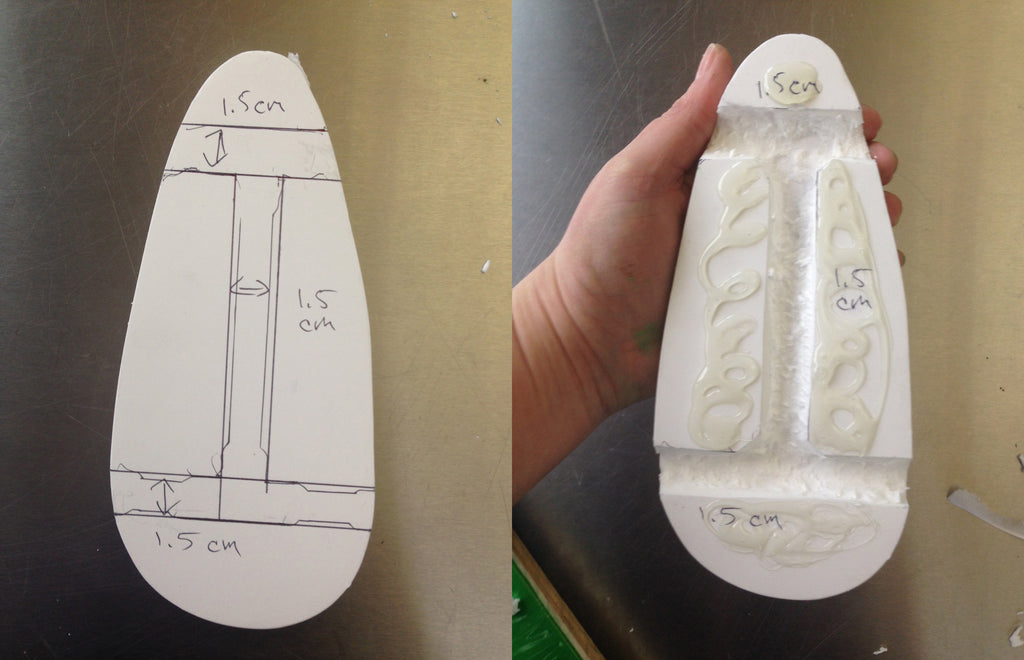
Use hot glue to stick the boards together around the armature. And don't be stingy- stick 'em good!
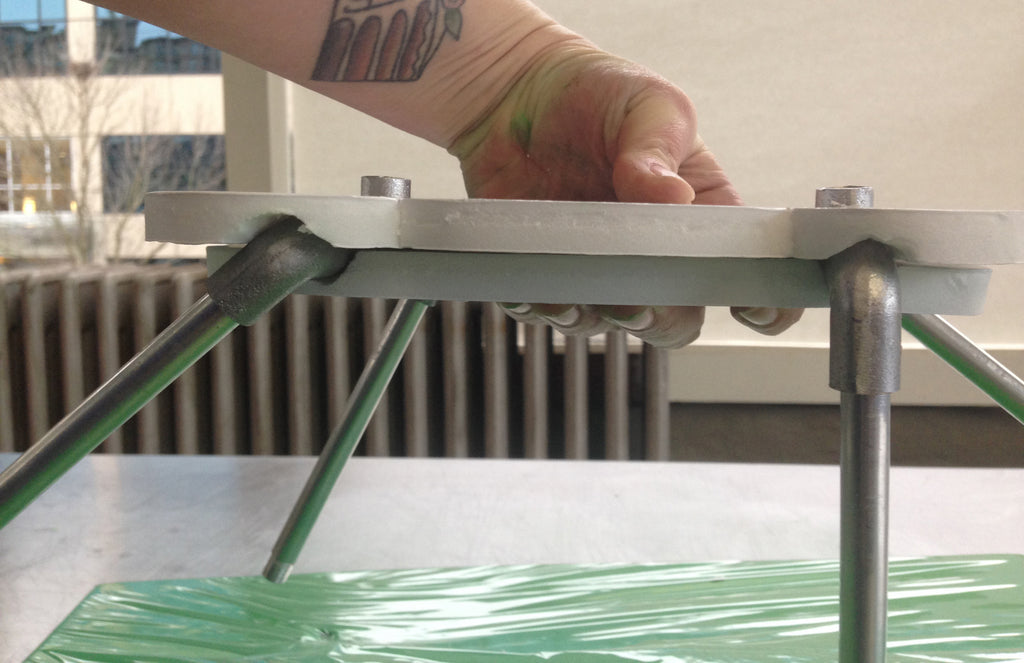
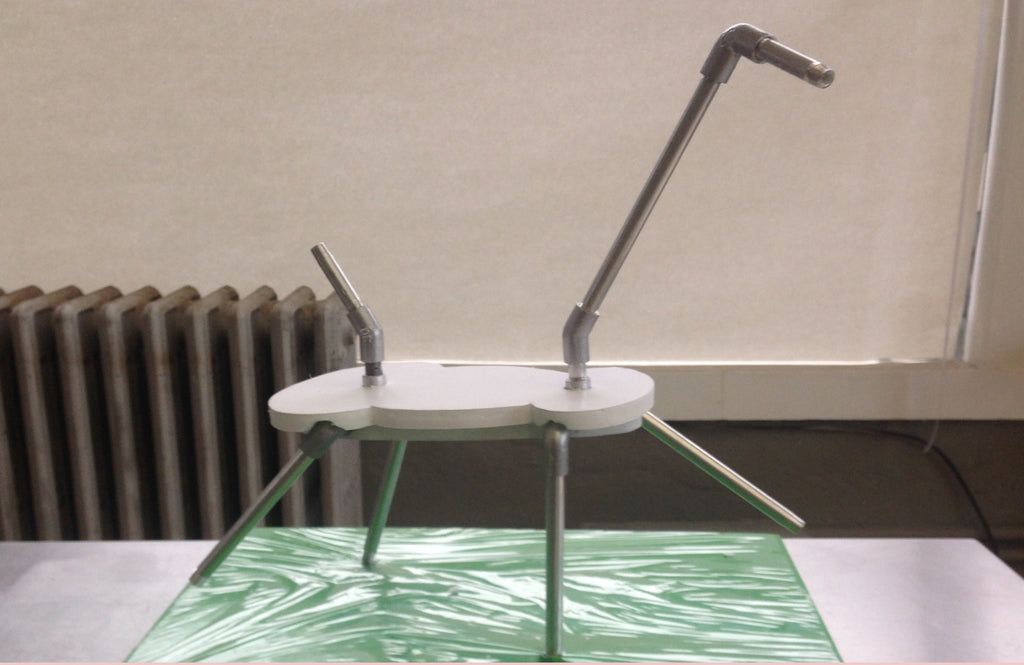
Once the glue is set on your boards you're ready to stack the cake. Notice that I've got 2 pieces of armature poking through the cake boards- the neck and the tail. Don't try to slide your cakes over them- that's a recipe for disaster. And by disaster I mean broken cakes, and broken cakes are harder to carve and keep neat. So instead, I cut out a sliver of cake wide enough for the hardware at both ends. This allows me to neatly lower the cakes onto the board. And remember again- always measure.
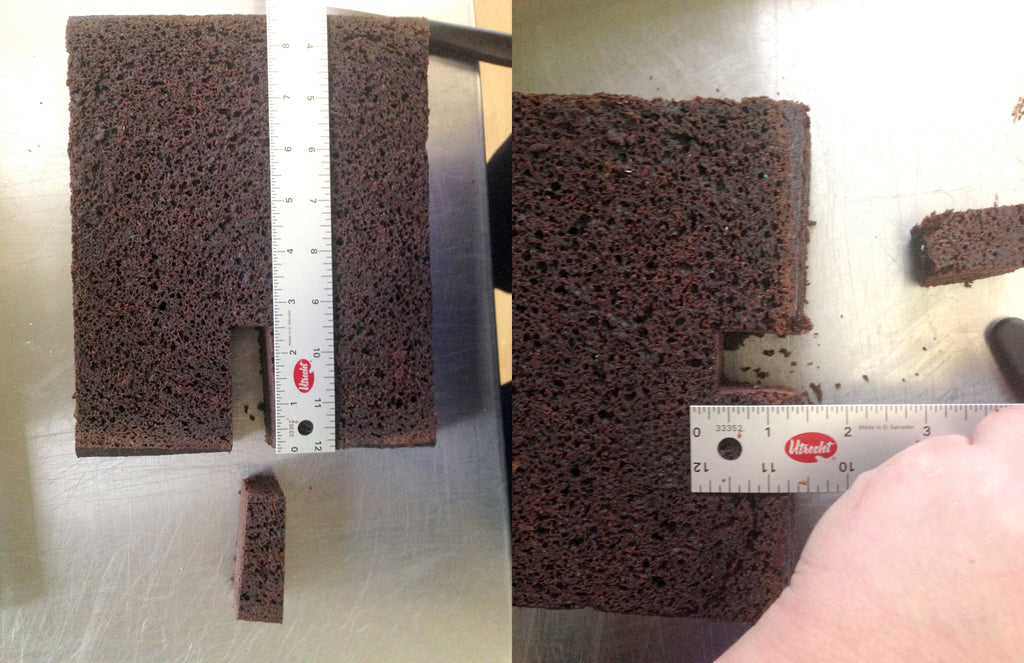
But don't eat that sliver you cut out! (I know it's tempting) You're going to add it back in so there isn't a gap when you carve.
Once you've got your cakes stacked, pop it back in the fridge for a bit. The colder your cake is the easier it will be to carve. I like to carve with an 8" bread knife. Reference your sketch while you're carving to keep yourself on track and think about how your creature will look from all angles- your sketch is 2D, so your cake will have shape and depth that isn't visible in the sketch.
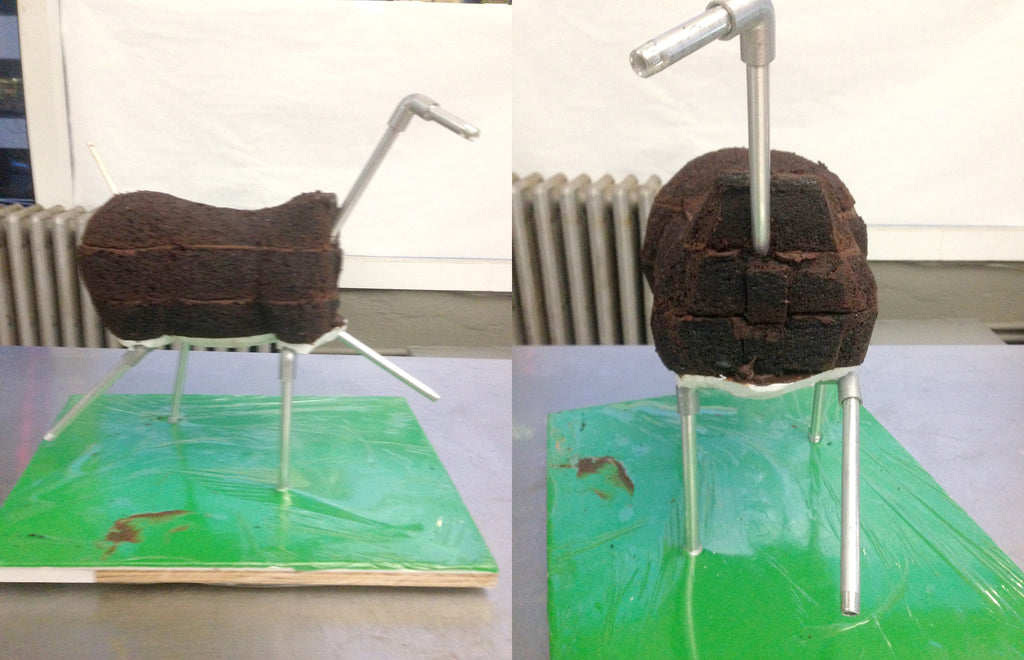
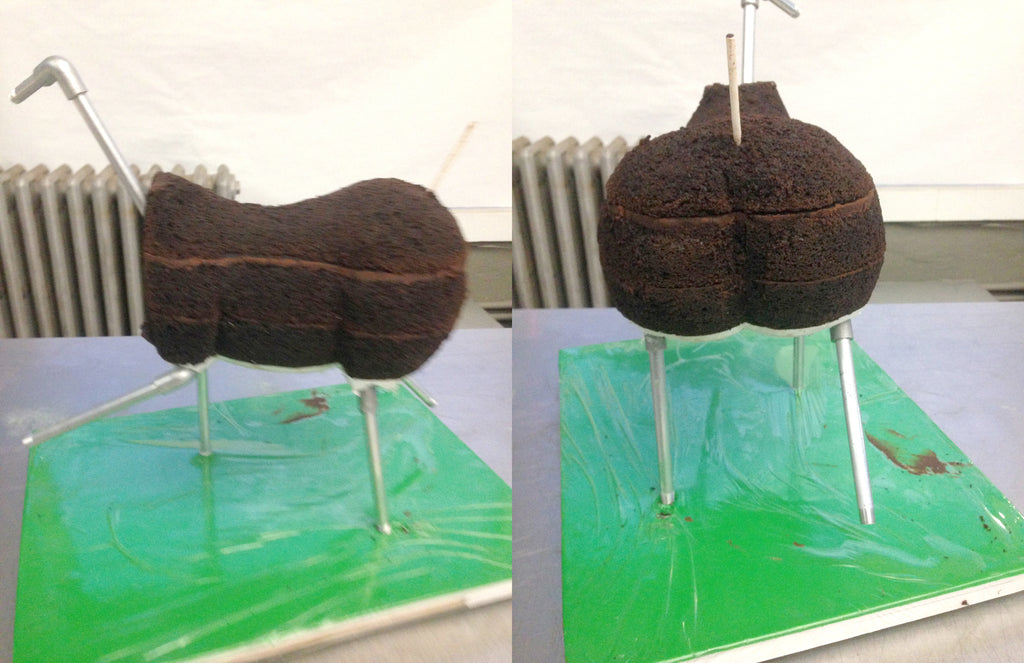
Once you've got your cake carved, cover it with ganache and stick it in the fridge while you prep the head. The foam is tougher than cake, so switch to a smaller serrated knife so you have more control. Use your sketch again as you're shaping the foam, but it can also be helpful to reference photographs of the type of animal you're making. This can give you a sense of the underlying structure you're mimicking. Don't try to get overly detailed with the foam- you're going to be building it up with modeling chocolate and covering it with your blend. Carve just enough to get a basic structure.
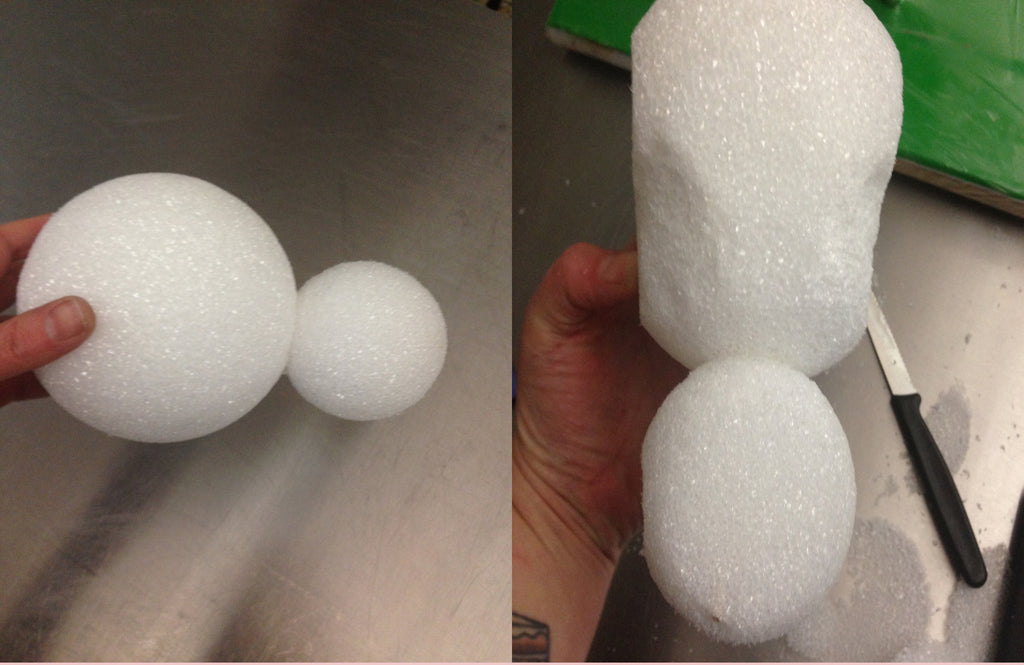
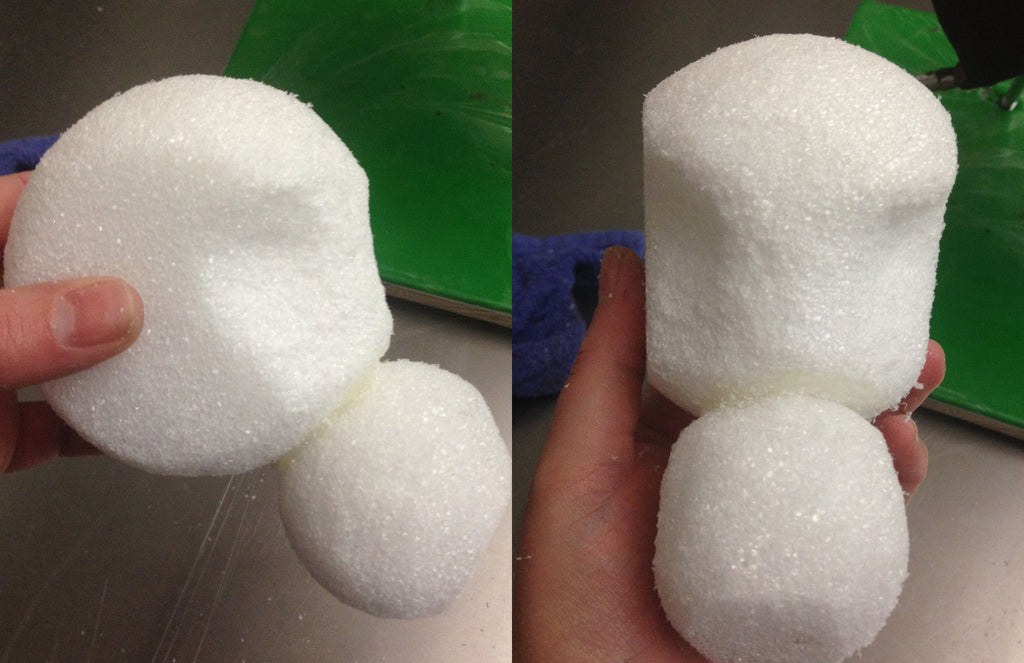
Now we'll move on to all of our modeling chocolate parts. You're going to use 150g of modeling chocolate for each front leg and 200g for each back leg. Roll each portion into a slightly conical cylinder. Each leg is going to fit around the rods of your armature, so slice each open length-wise and cut out a hollow space for the armature.
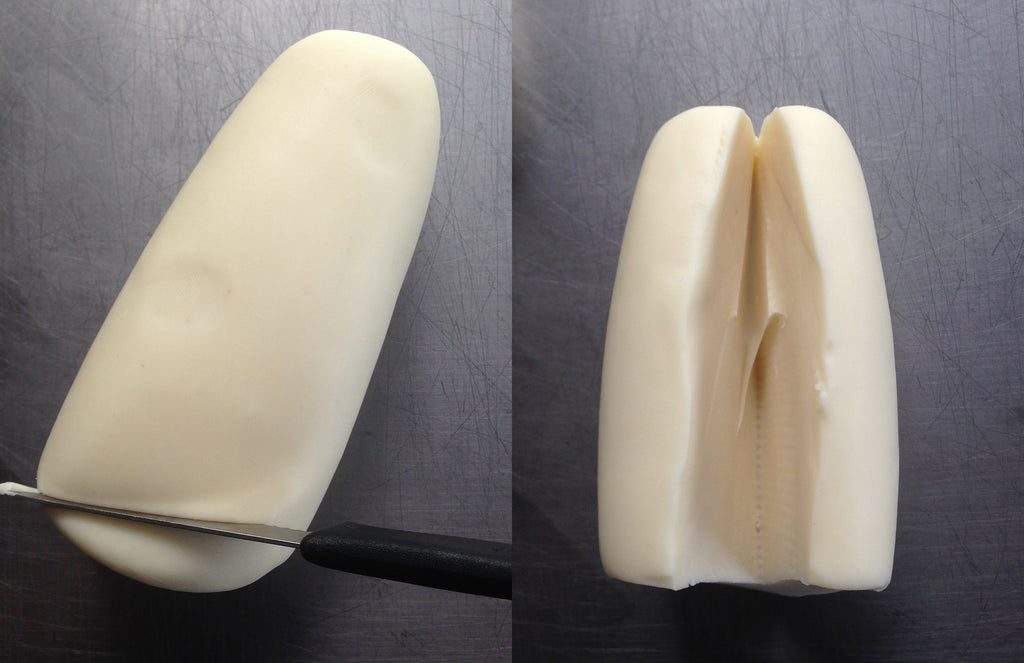
Now do pretty much the same thing for the neck, just cut off a bit of the top at an angle to fit against the head.
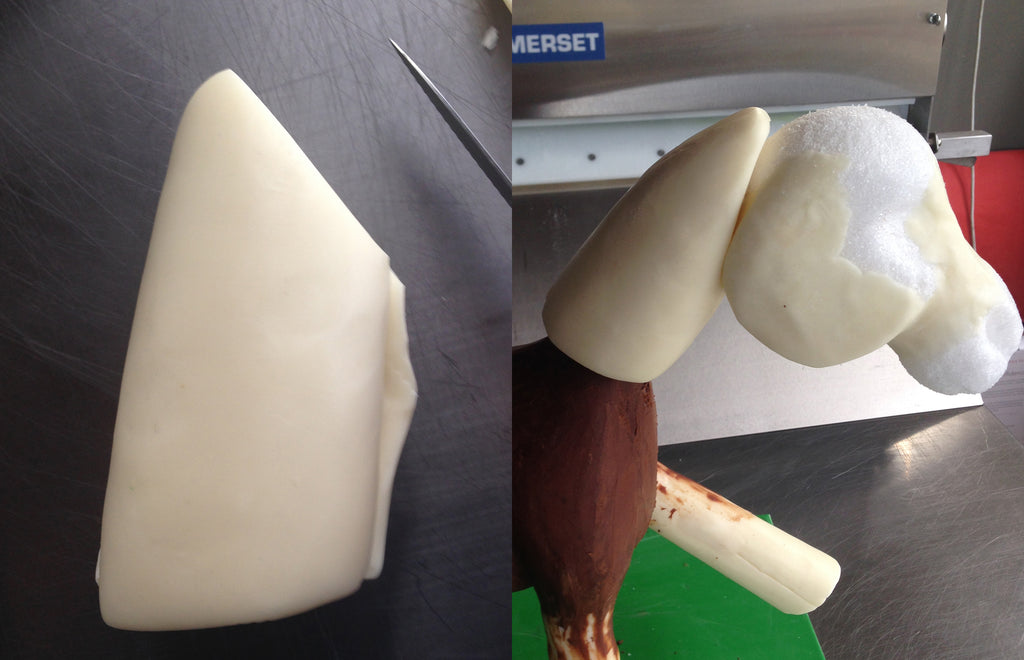
Now add some modeling chocolate to the foam to build up her cheeks and work the chocolate of her face and neck into a smoother, more horseneck-y shape.
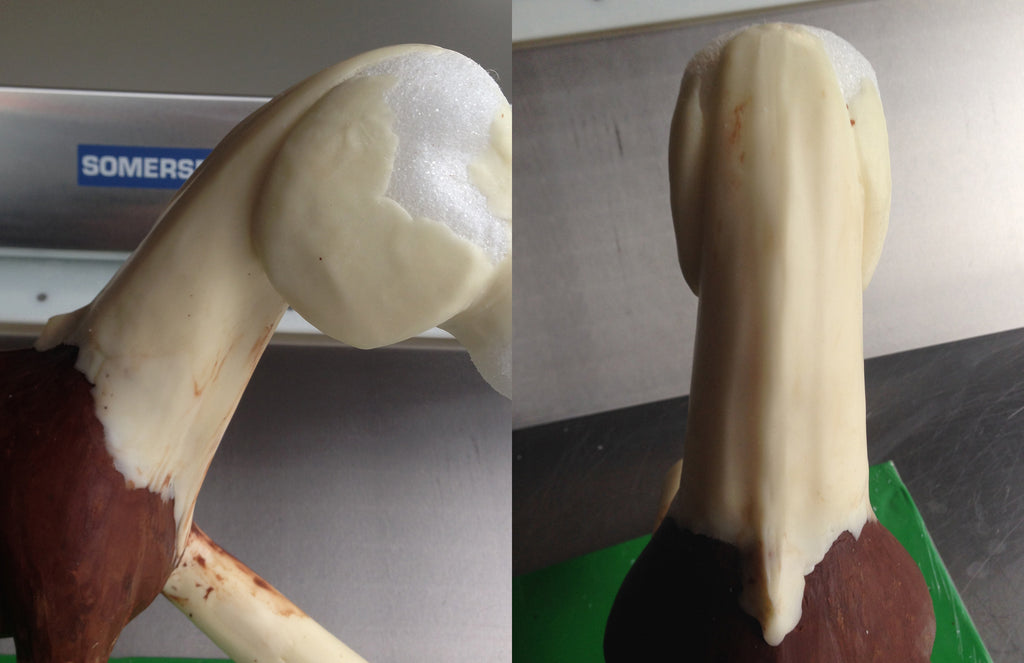
Once you've got everything shaped and smoothed, cover the body with your colored fondant/mc blend. Sugar Smoothers work really great for smoothing out the product on sculpted cakes because the flexibility of the thin smoother allows it to bend around the odd curves of an atypically shaped cake. Use your fingers to get into the creases and tiniest spaces, but be gentle so you don't leave marks.
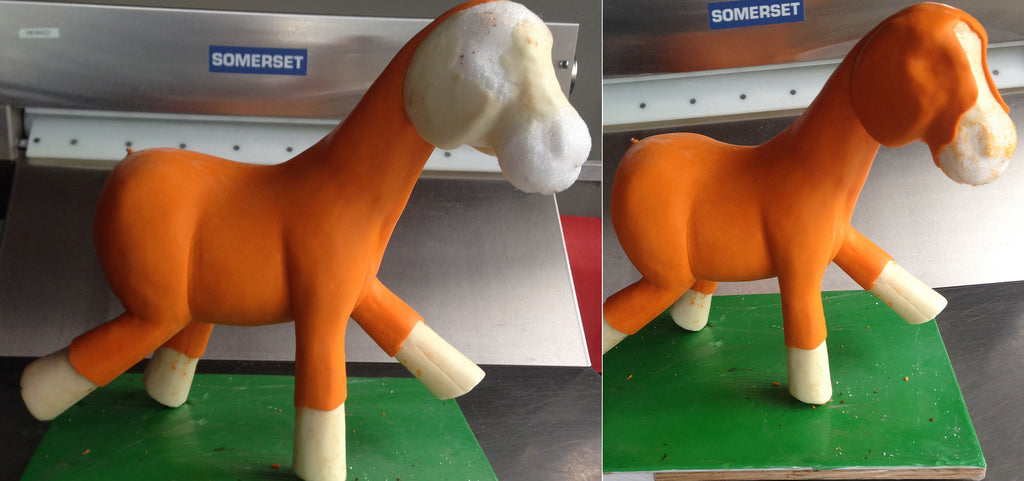
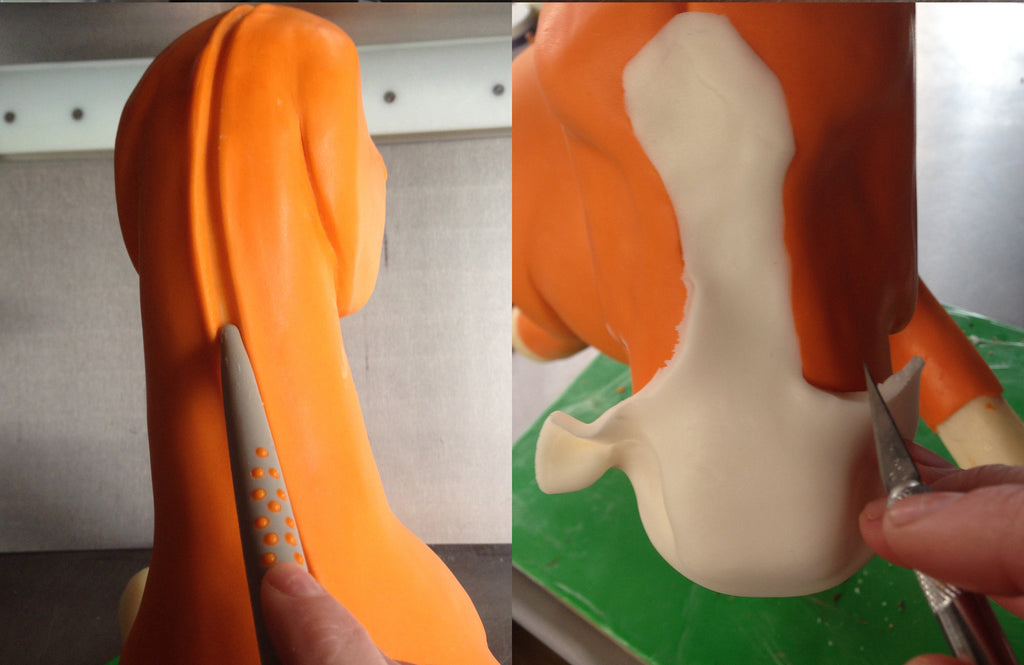
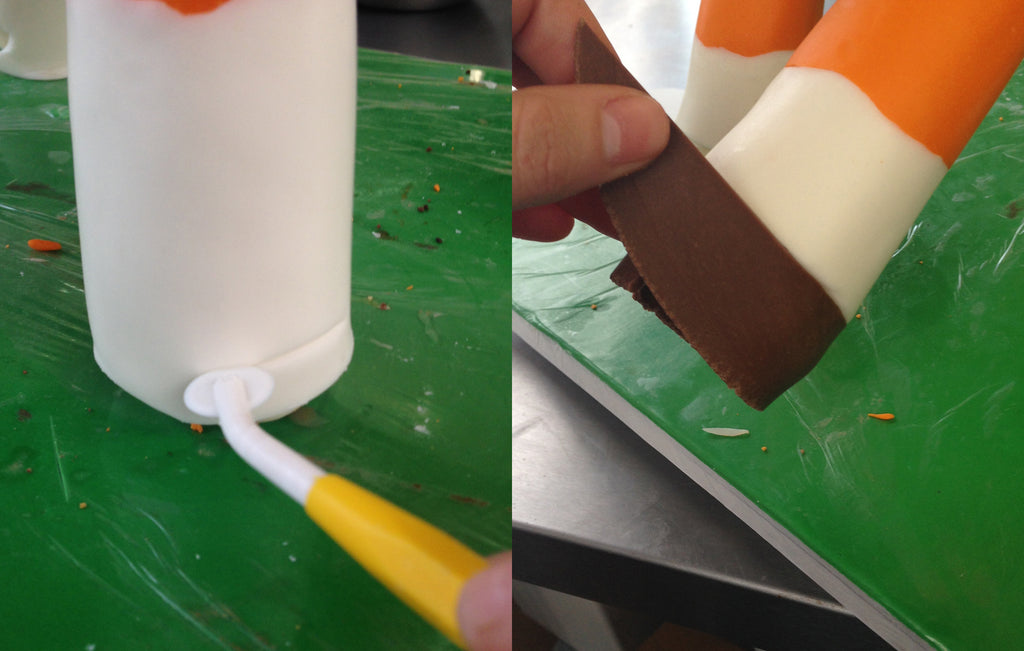
Now comes the funnest part- adding in all the details and character that make your cake truly unique. Start with adding the white blend to her nose and feet. I also use my bone chisel Sugar Shaper to mark out a center line from her head down her neck. This helps me get her mane where I want it later on.
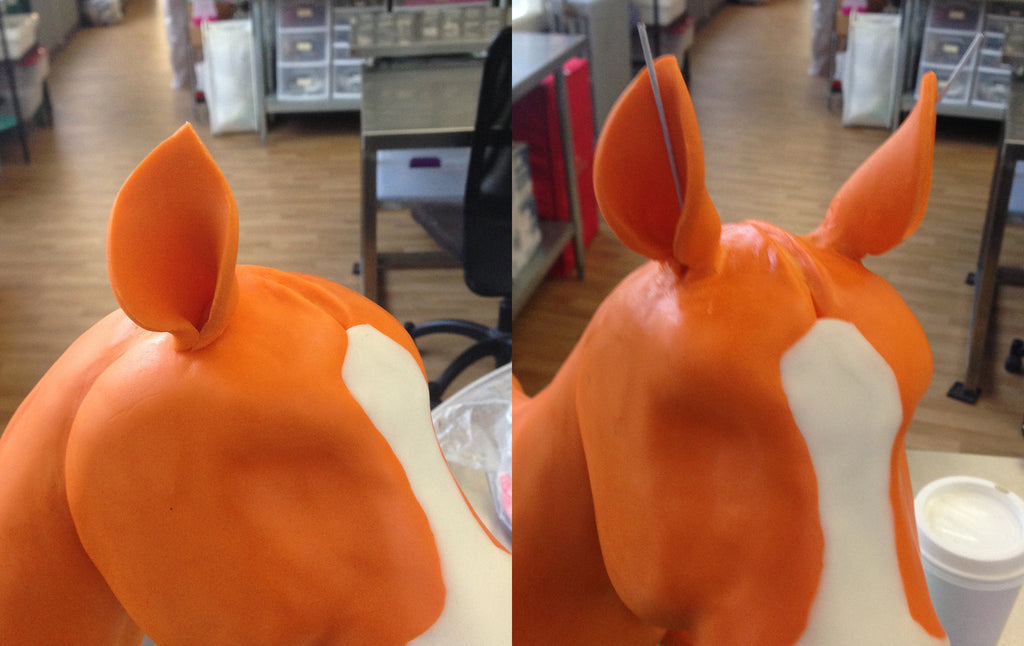
Now let's give her some ears. Cut out 2 tear-drop shapes out of your colored fondant. Attach each ear by pressing down one side of the rounded end of each tear-drop then folding the ear around so that it sticks up. Use a piece of thin wire to keep each ear standing up while the blend dries and firms up.
(pro-tip: I'll actually leave those wires in the ears, or any other small part I've used them for, until the cake is ready to be displayed. Fragile parts like these ears can break or wilt during transit just from the motion of your car. And I hate doing repair work upon delivery.)
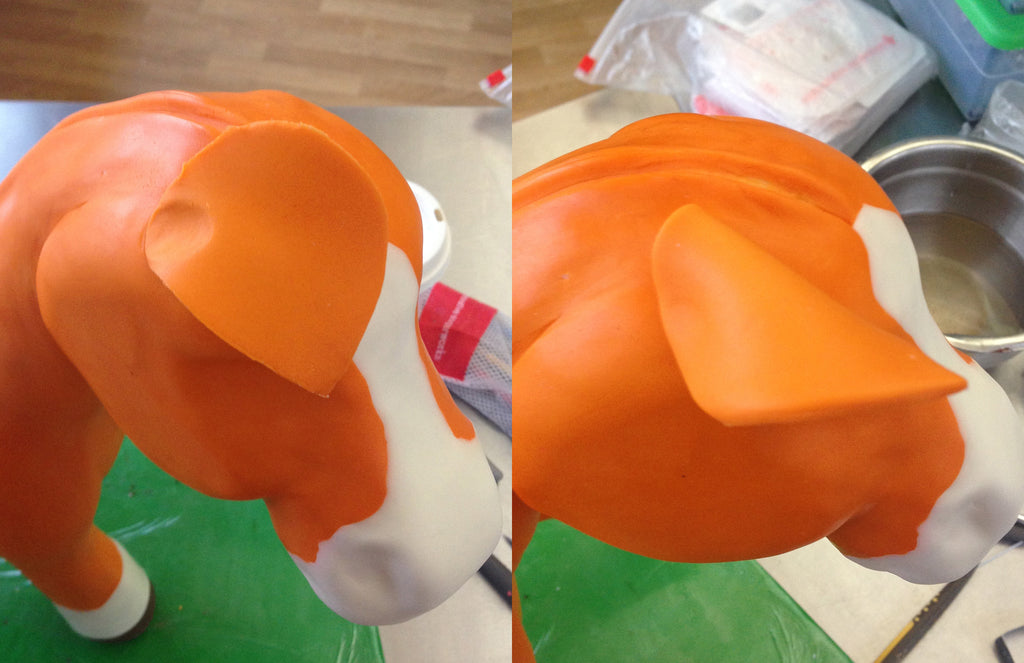
Now add in her facial features using your Sugar Shapers and leftover pieces of your fondant/mc blend.
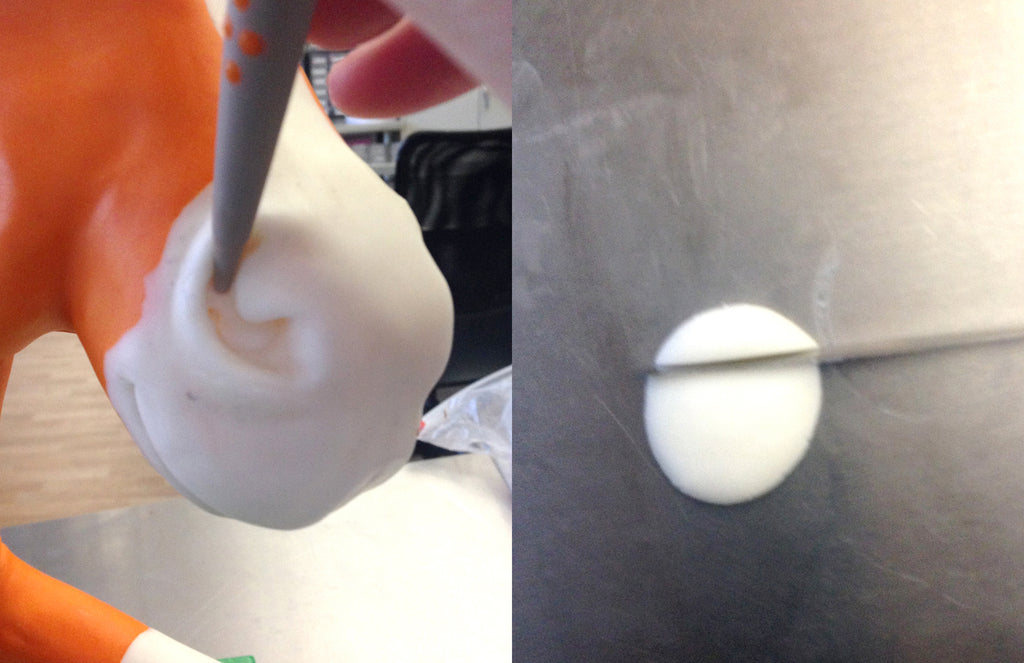
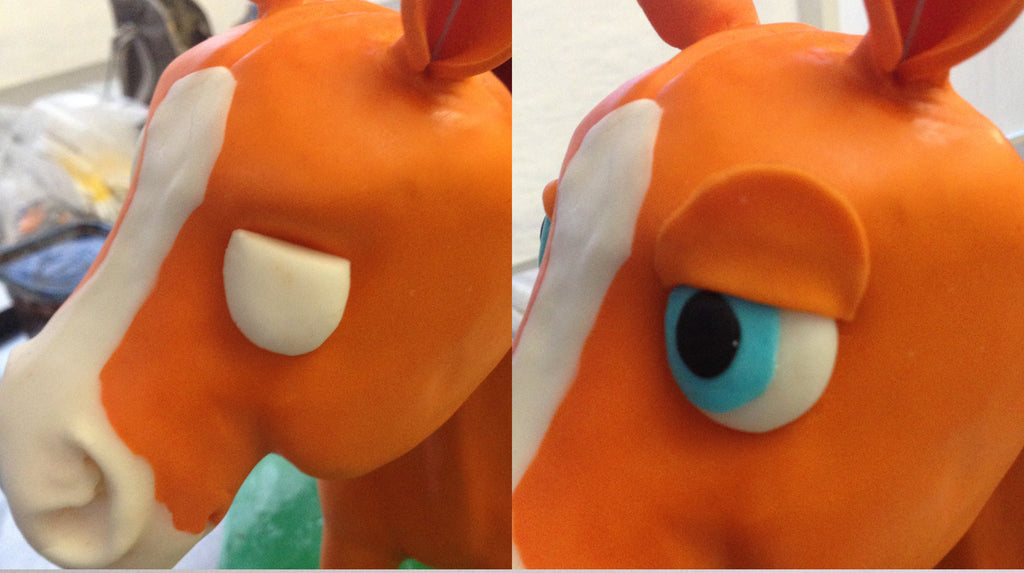
Then just give her whatever style mane and tail you'd like her to have, dust on some color for depth and detail, and you're finished!
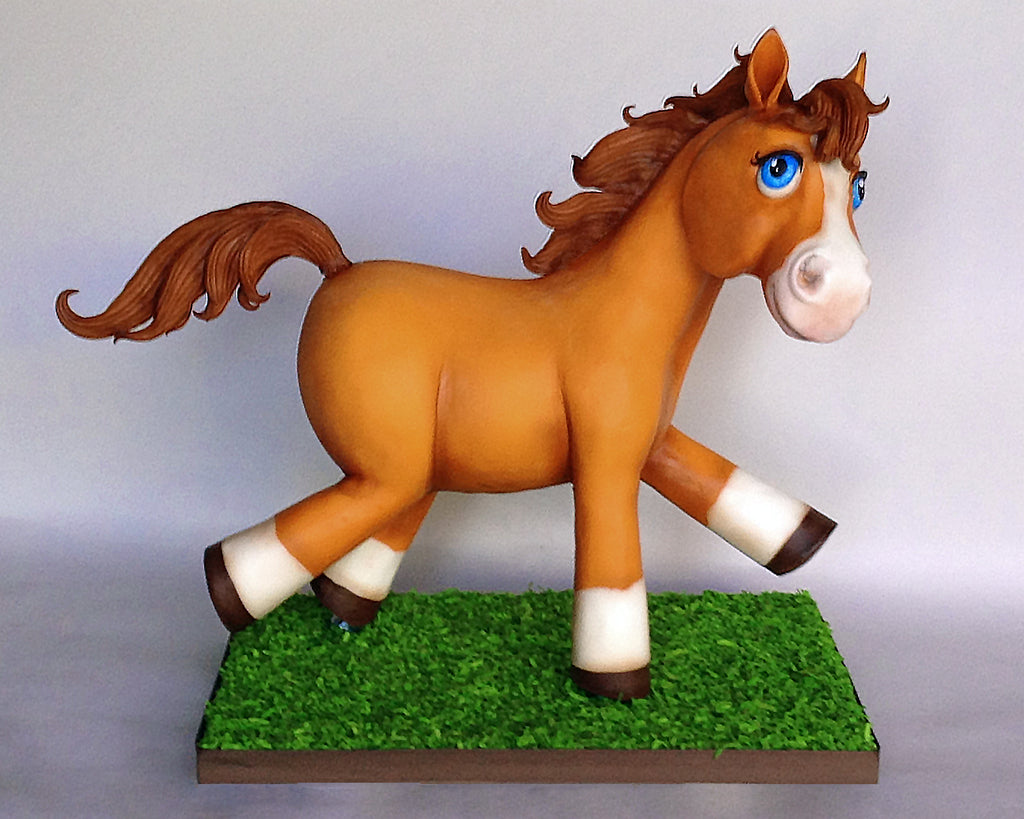
I hope you enjoyed this little peek into sculpting 3-dimensional character cakes on a Sugar Structure armature. Now get sculpting, cakers!
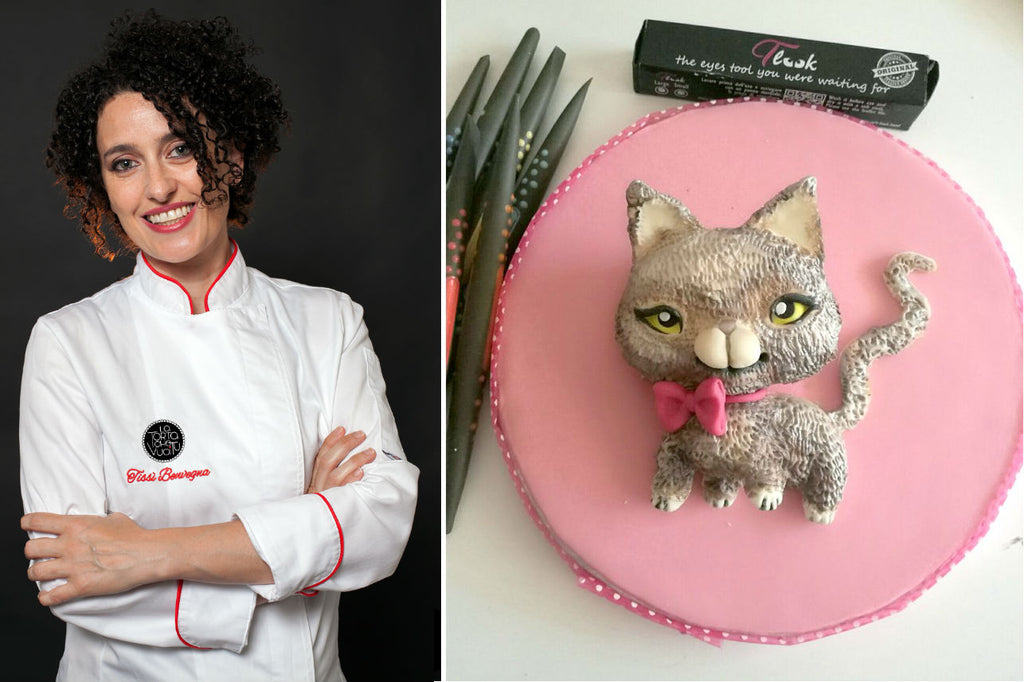
Tissi's Sweet Kitty
Tissi Benvegna is the owner of La Torta che Vuoi Tu and inventor of TLook eye tools. Best known for her amazing doll-like sculpted sugar figurines, Tissi developed TLook to make face modeling quicker, easier, and more accessible to new artists and professionals alike.
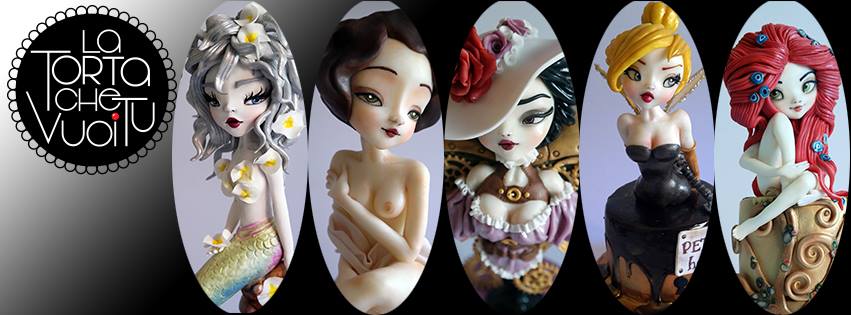
Today, Tissi is going to demonstrate how she made an adorable cat out of sugarpaste using Mini-Tip Sugar Shapers and TLook eye tools.
We hope you enjoyed this tutorial! You can learn more about Sugar Shapers here:
https://www.sugarworks.com/collections/sugar-shapers
And about TLook here:
https://www.sugarworks.com/products/tlook
And you want to keep up with all Tissi's new creations, follow her online:
Website: www.latortachevuoitu.it
Facebook: La Torta che Vuoi Tu
Instagram: @tissi.benvegna
Stacking and Carving on a Sugar Structure with Jamie Louks
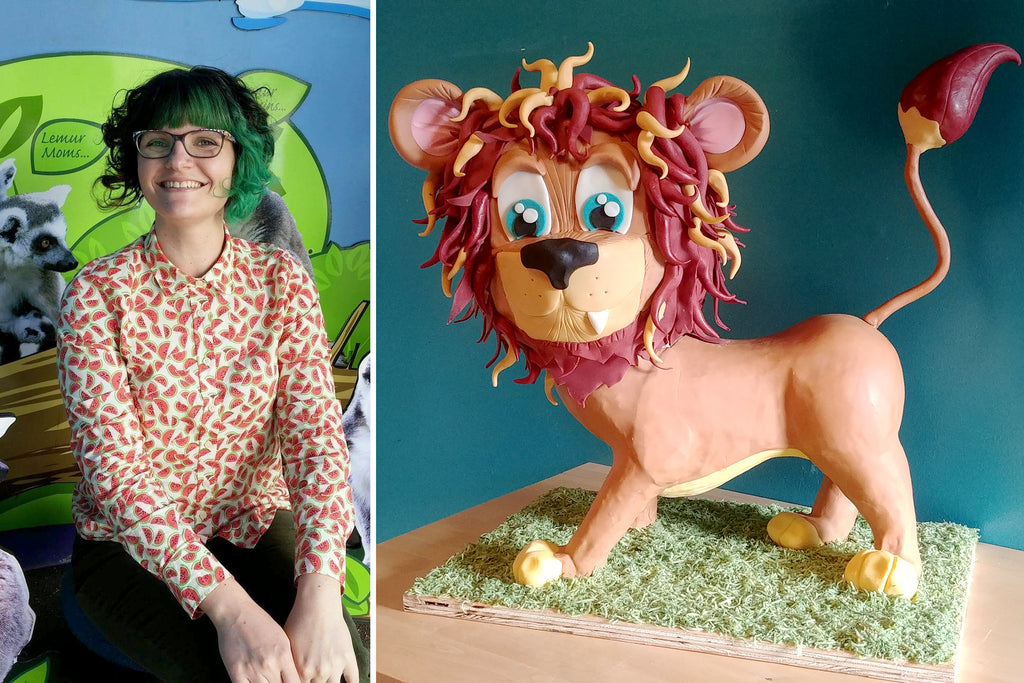
You might recognize Jamie Louks as the face of Jamie Nicole Cakes, or from her super-fab face sculpting video tutorial. Today Jamie is going to demonstrate how she stacked and sculpted cake on an Innovative Sugarworks Sugar Structure to make this adorable lion cake for a school reunion!
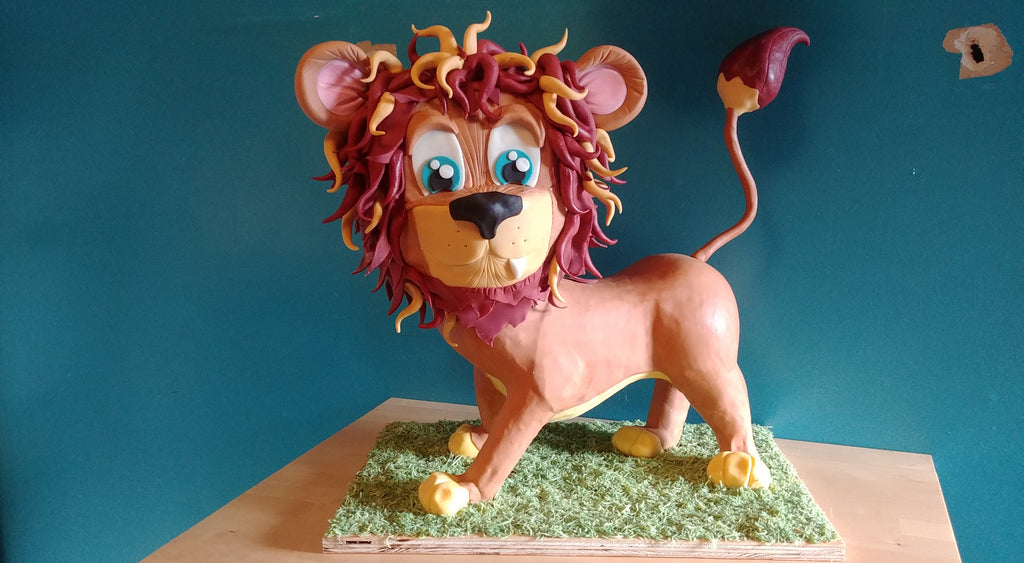
First things first- you've got to decide what size cakes you're going to use, and how many. This lion had to feed a lot of people, so he's got to support a lot of cake. I had a few options on how I wanted to distribute the cake, but I thought the cutest look for this lion would be a huge head with a relatively smaller body. That would give him a cartoonish, exaggerated cuteness that I thought would be a real crowd pleaser.
So I used 10" round cakes for his head and 6" square cakes for his body. I baked four of each size (the squares will get placed side by side for a 6" x 12" rectangle) and before I started stacking I used a cake leveler to level the tops flat, and to cut each cake in half for twice as many layers when stacked. Having more thinner layers serves the dual purpose of extra deliciousness (more frosting!) and making the cake easier to carve because there's more buttercream to firm up.
The next thing you've got to do is assemble your armature, affix it to your base board, and add the cake boards that will support your cake. Sugar Structures are completely interchangeable, with pre-made kits available as well as individual components. So you really can design an armature to fit your vision. For this lion, I started with the Standing 4-Legged kit and customized its head with some expansion components to support the massive cake-head I'd envisioned. If you're deviating farther from the kits, I recommend you sketch out your design, measure your sketch for scale, and put the whole thing together a few days before your cake project just to be sure everything goes the way you'd planned.
The base plate will need to be screwed into your base board. I use a power drill because it's super fast, but a hand screw driver can work, too. Assemble your armature and stand it on your baseboard so you can shift it around until you get a position you like. Then trace around the base plate and mark where the screws will go. Now take the base plate off your armature, line it up with your marks, and screw it into the board.
*Note: We recommend a 1/2" or 12mm thick plywood for the base.
Once you have your armature constructed on your base board, it's time to add the cake board. I took the top neck segment with the head washers off so they wouldn't get in my way. For his body, I used an 11" x 5.5" foamcore board. If you recall, my body cakes will equal 12" x 6", so I've got a little overhang to cut off as I carve the body. This design is pretty stable, with his body evenly distributed on a plane parallel to the ground, so I'm just going to set one board on the frame, using ganache to help adhere it. It's a little hard to see in the video, but I've carved out gullies for the armature to nest in so the board sits firmly in place. I'll include a still image so you can see:
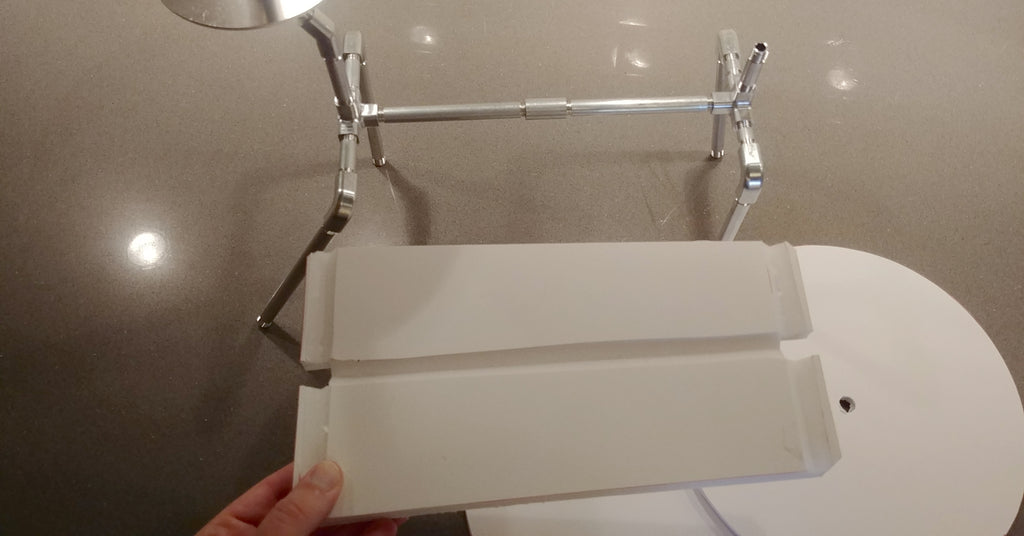
The weight of the cake will keep the board in place pretty darn well, but later I'll add crispy rice treats to the underside for further stability (as well as to shape his belly!)
Next you'll stack your cakes on his body board. This is mostly just like stacking any cake. The only real difference is the rods for the neck and tail sticking up. I just slid my cakes over them, but you want to exercise care when you do this so your cakes don't break apart. If you're worried about the damage, you can also cut a small piece of cake out before you stack each layer. I alternated the filling of each layer between a strawberry buttercream and a lemon basil curd. You'll notice after the second layer my cakes were level with the end of my tail rod. At this point I added in the wire that will be his long, tufted tail. Then I just continued stacking until all my cakes were on.
And now we carve! Carving is where you first really start to exercise your artistic eye. If you're having trouble envisioning the shape your cake needs to become, reference images can be super-duper helpful. This can be a drawing you've made of your cake idea, or photos and graphics from books or the Internet. Any of those will give you a good image to compare your work to and keep yourself on track.
Here are some tips that I've found useful:
- Start with your cake as cold as possible. The colder your cake is, the firmer it will be and the cleaner your cuts will be.
- Use a long, thin knife with a little flex to it. (Bread knives generally work well).
- Carve at an angle rather than straight up-and-down. This will give you smoother lines, more organic shapes, and lessen the risk of accidentally cutting off too much.
- Use small cuts! It's easy to keep carving more off, but not so easy to add cake back on. So cut small amounts off and go slowly.
- Save those scraps! (Ok, you can eat a little, but save most of them- they're super useful) Mash your scraps up with some buttercream like you're making cake pop dough. This is now an excellent building medium for adding shape to your sculpted cake! You can see in this video that I added some at the front and back of the body to build up his shoulders and rump.
Once I had his basic body shape carved, I used RKT to form his legs and the underside of his belly. Using cake for these small parts is problematic and usually isn't worth the trouble for the small amount of servings you get out of it. You can use modeling chocolate for these if you prefer, but like I've mentioned- I love RKT. I used a white chocolate ganache to help adhere the RKT to his body board and to add firmness and stability.
Next, I went back in with a smaller knife to refine the shape of the body and legs. Once it was where I wanted it, I covered the whole thing in ganache and smoothed it out with my Sugar Smoothers.
Now I'm ready to work on the head. I used 6" and 9.5" foamcore rounds for my cake boards for the head. The 6" will go at the bottom and the 9.5" will be in the mid-point, or widest part, of his head. I prepped my round cakes by doing an initial basic carve on my Turntable Expander before I stacked them on my lion.
Once I've prepped my rounds, I can stack them on my Sugar Structure. I've got a 4" Sugar Structure washer at the base of his neck to give me a stable, flat surface for my first round cake board (the 6" one). At this point I stack and fill my layers just like any cake. When I've got half of my rounds stacked, I'm ready for my 9.5" cake board. I used bubble tea straws to support the weight of the upper head cake, just like you would if you were stacking a normal tiered cake. And before I placed the 9.5" board, I added another 4" Sugar Structure washer for added support and stability.
Now all that's left is carving this sphere into a more head-like shape. The same carving tips as above apply here. And just like the body, once I had the shape where I wanted it I covered the whole head in ganache and smoothed it out.
His head looks surprisingly geometric before I put his face on, but once you've made a couple sculpted character cakes you'll get the hang of how much detail you really need in your carving and how much is really about modeling the fondant blend you cover with and the outer components and accessories.
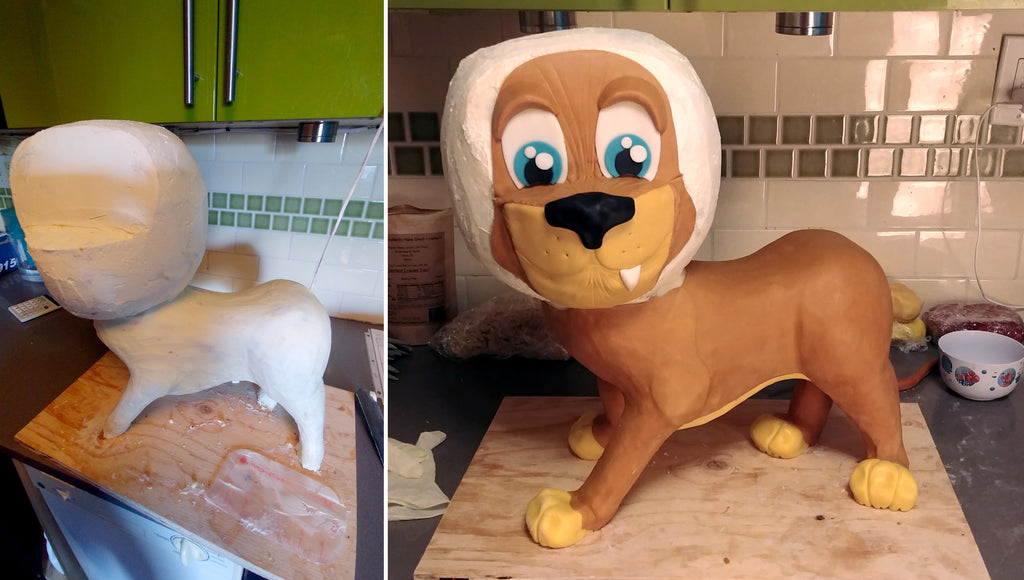
That's all folks! I hope you found this tutorial helpful and informative, and I hope you're all jazzed up to try your own sculpted cake now!
If you want to keep up with my latest creations and tutorials, follow me on social media!
Facebook: Jamie Nicole Cakes
Instagram: jamienicolecakes
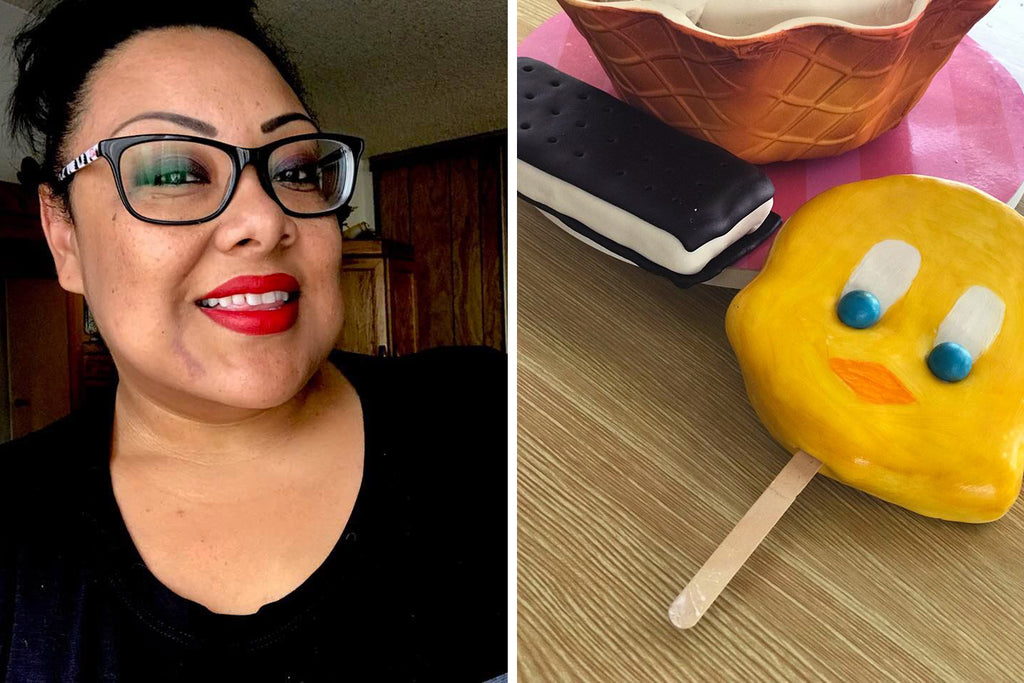
Joyce Marcellus Tricks us With These Summer Treats
You probably recognize Joyce Marcellus as the face of Toxic Sweets Shop. But did you know Joyce has been creating edible art for over 10 years? She specializes in hyper realistic food made from different sugar mediums.

In addition to running Toxic Sweets Shop, Joyce is co-creator of Sweets University and The Cake Bar Cake Show alongside fellow cake artist Kassy Jimenez. She has been featured in numerous magazines including Cake Masters and The American Cake Decorating Magazine, among others. Most recently, Joyce won Cake Wars Season 4 Episode 6 on Food Network!
Today, Joyce is going to show you how to replicate 2 popular ice cream truck items you may recognize from your youth. But there's a catch! As with all of Joyce's creations, things are not what they seem... These "ice cream" treats aren't ice cream at all! Read on to see what she's done!
With Summer here, our days are filled with ice cream truck music! And what better way to pay homage to the delights of summer than with a sugarcraft tribute to two popular ice cream truck items? I'm going to show you how I made a Tweety Bird pop and a classic ice cream sandwich out RKT and fondant. And as an added bonus- Rice Krispies don't melt in the summer heat!
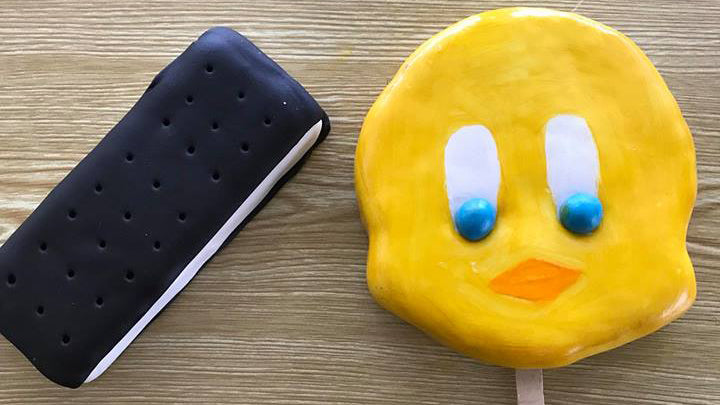
Tweety Bird Ice Cream Supplies:
- 6 Rice Krispie Treat Packages
- Yellow Edible Art Paint
- White Edible Art Paint
- Sky Blue Food Color (Americolor)
- Orange Airbrush Color (Americolor)
- Innovative Sugarworks Sugar Shapers Pointed Chisel (Blue 6) Square Tip Chisel ( Yellow 4) Bone Chisel (Orange 2) Trip-Tip Chisel (Orange 1)
- 2 Paint Brushes
- Paint pallets
- Rolling Pin
- Pizza Cutter
- Mat
- White Fondant ( Satinice )
- Ice pop Stick (Any craft store)
Directions:
Step 1
Unwrap 6 packages of rice crispy treats and start to press and shape into tweety birds head. (Use google image for reference).
Step 2
Use your Sugar Shapers Bone Chisel (Orange 2) to make eye ball indentations and to form the cheeks. Use the Trip-tip chisel (Red 1) to make better indentations on the cheeks. Use the Pointed chisel (Blue 6) to shape the mouth.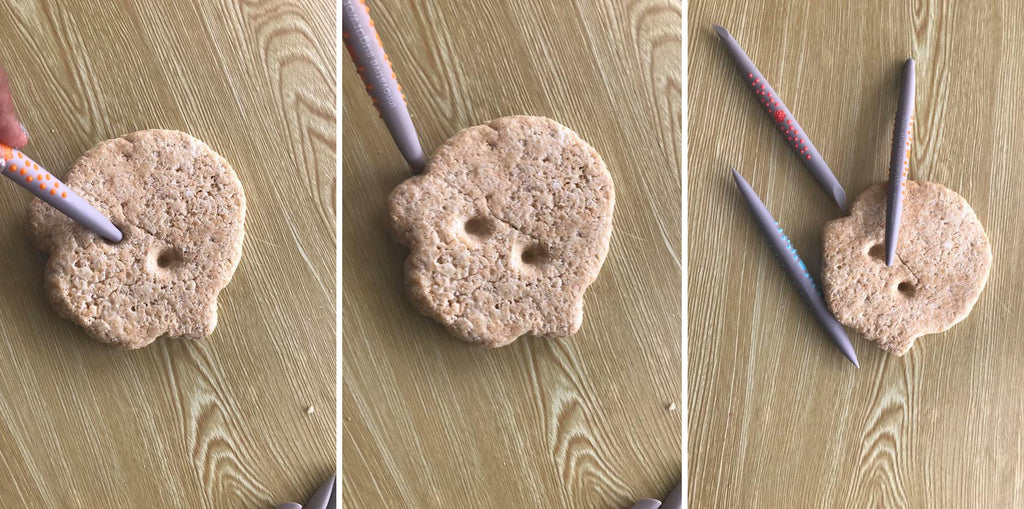
Step 3
Roll out the white fondant, thick enough to cover the rice texture. Cover the top and cut the excess. Then pick up and lay a second piece of rolled out white fondant and trim excess, just like you would panel a cake.
Step 4
Using your Sugar Shapers Bone Chisel (Orange 2) re-indent the eyes.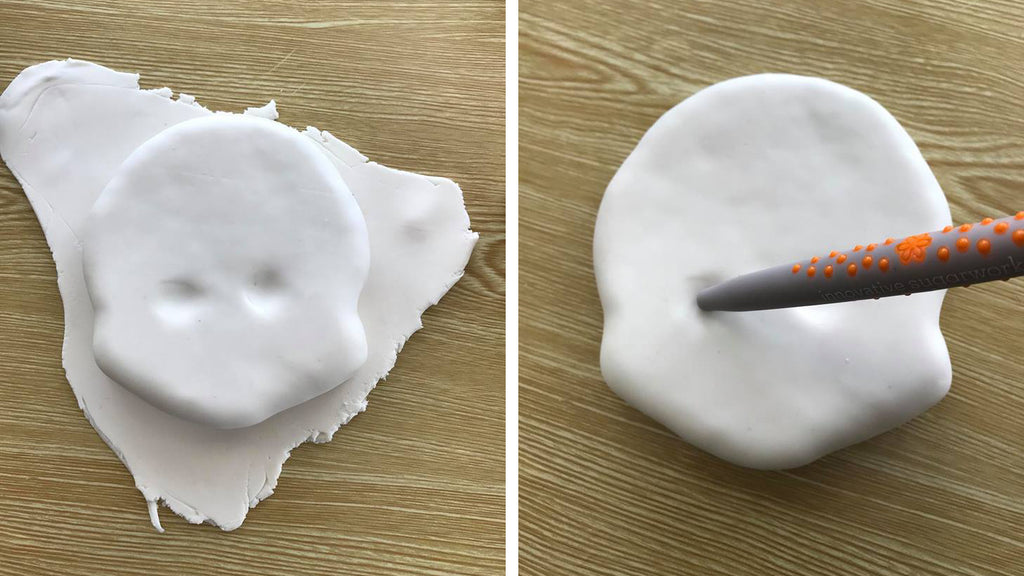
Step 5
Take a small amount of white fondant and color with your sky blue food color. Once the right color is achieved, roll two small balls for the "gumball" eyes.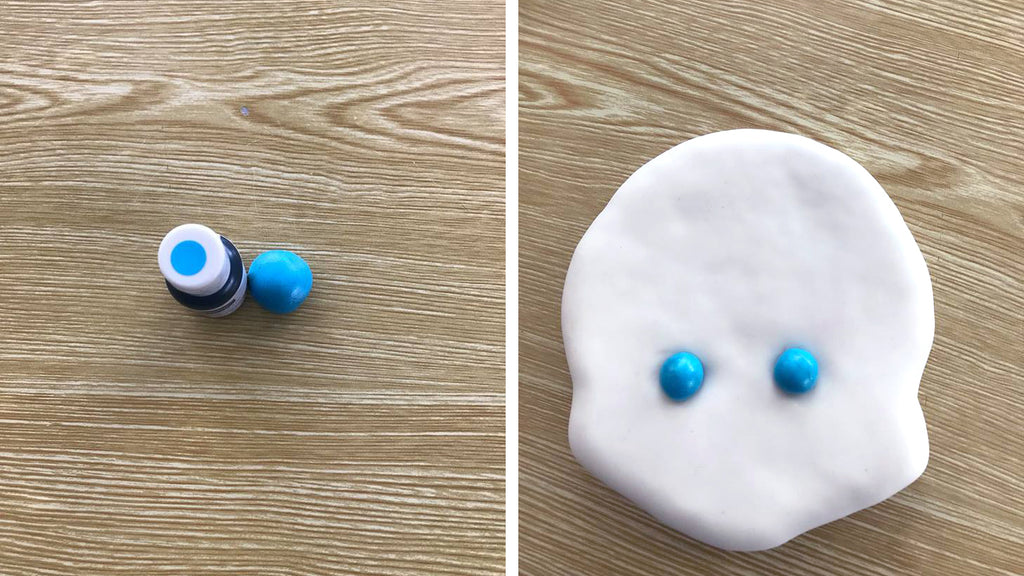
Step 6
To paint the mouth, mix a dot of orange airbrush color with yellow edible art paint. Using a fine brush, paint the mouth.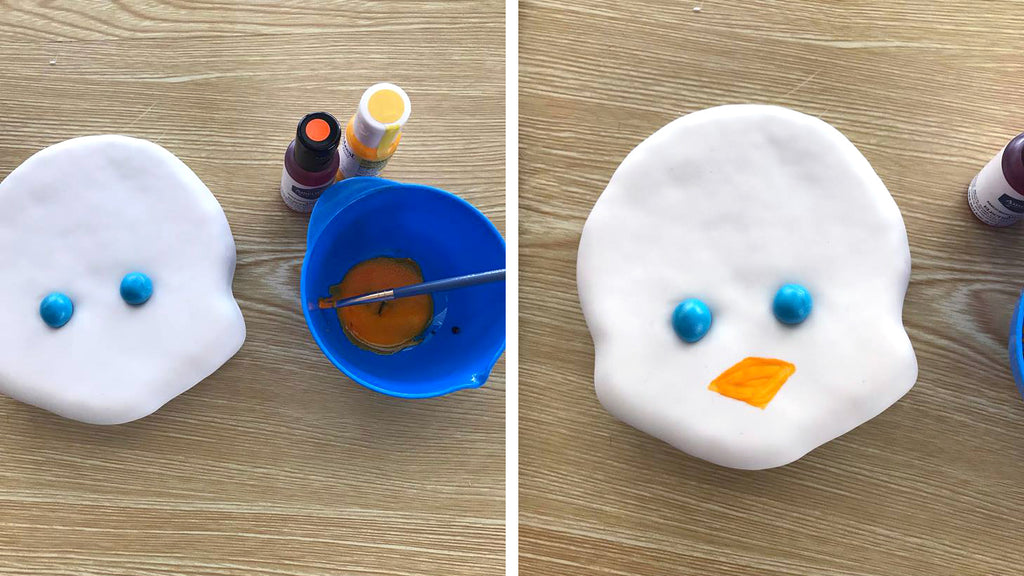
Step 7
Using yellow edible art paint, paint the entire face, being careful around the eyes and mouth. Use your Sugar Shapers Square Tip chisel (Yellow 4) to create a indentation for the ice pop stick and insert stick.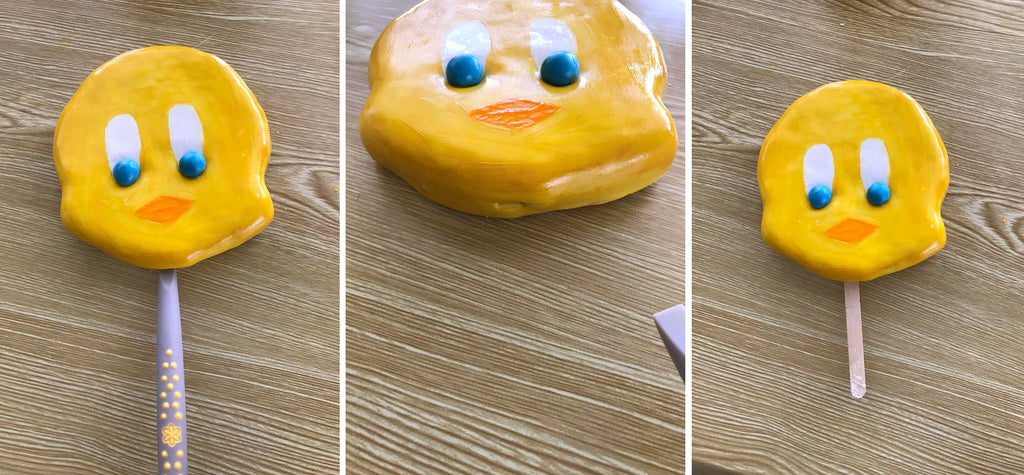
Tah-dah! A convincing, yet unmeltable Tweety pop! And now on to the ice cream sandwich!
Ice cream Sandwich Supplies:
- 2-Rice Krispie Treats Packages
- Chocolate Brown Food Color ( Americolor )
- Black Food Color (Americolor)
- Innovative Sugarworks Sugar Shaper Pointed Chisel (Blue 6)
- Rolling Pin
- Pizza Cutter
- Mat
- White Fondant 1lb ( Satinice )
Step 1
Remove Rice Krispie Treats from packaging and squeeze together short side to short side to create the right dimensions for the ice cream portion of the sandwich.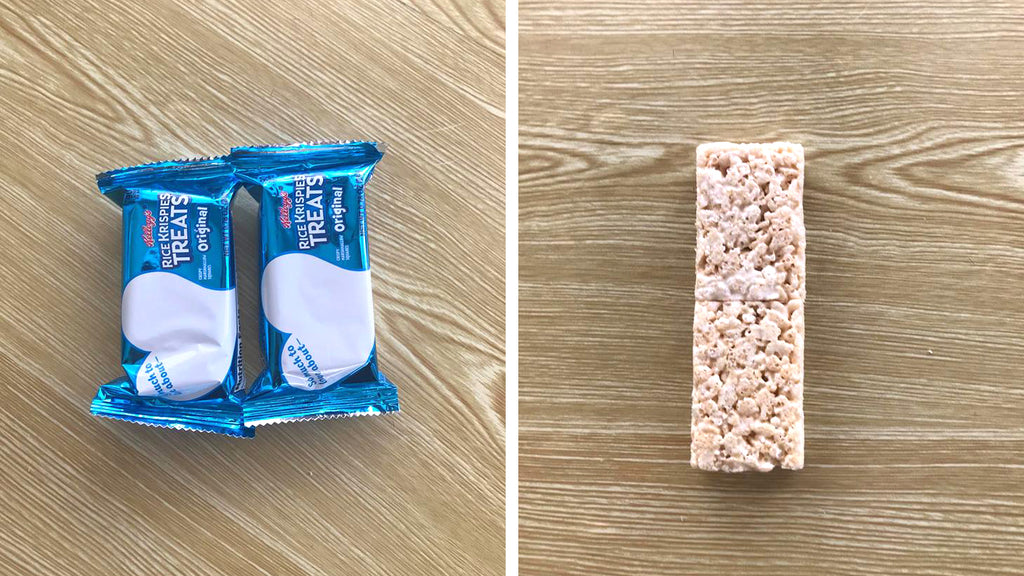
Step 2
Using your rolling pin, roll the two treats to flatten and help blend the seams.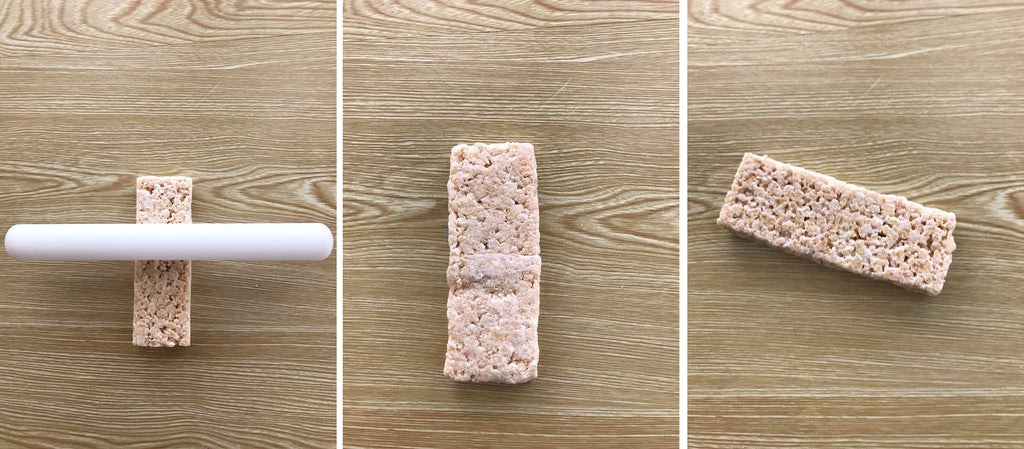
Step 3
Roll out white fondant thick enough to cover the texture of the rice. Once rolled out, place your fondant over the treats and trim the excess.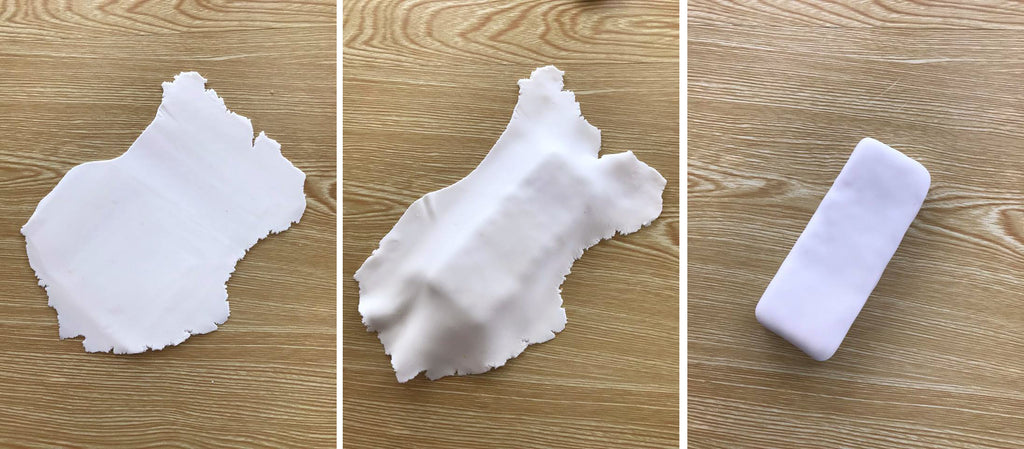
Step 4
Mix a portion of the white fondant with the brown gel food color and a smaller portion of the black food color. Then add a little black at a time to get a nice dark chocolate color.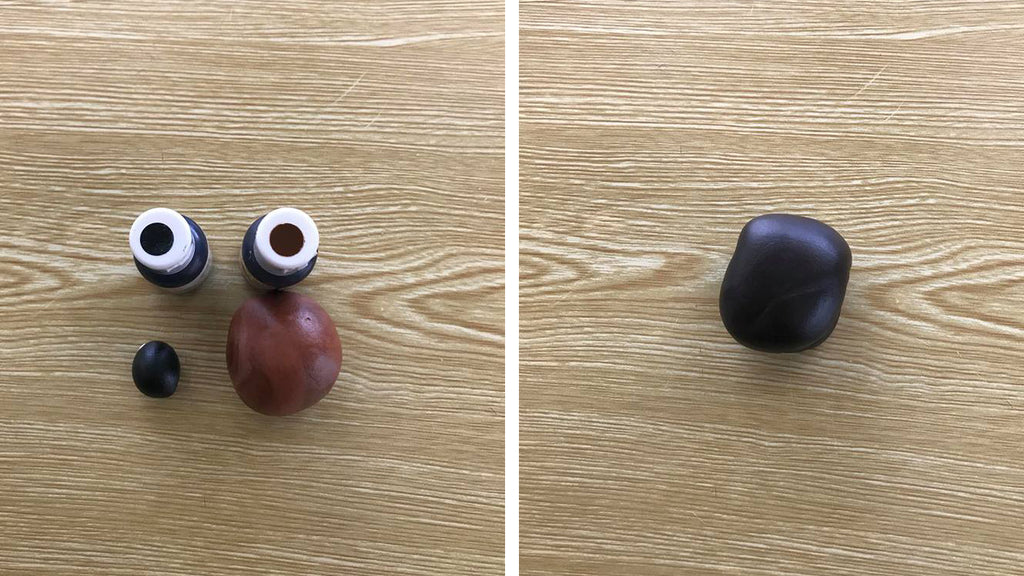
Step 5
Roll out the dark chocolate fondant. Place your "ice cream" block on top of the rolled out fondant and use your pizza cutter to cut out the cookie thins for the sandwich.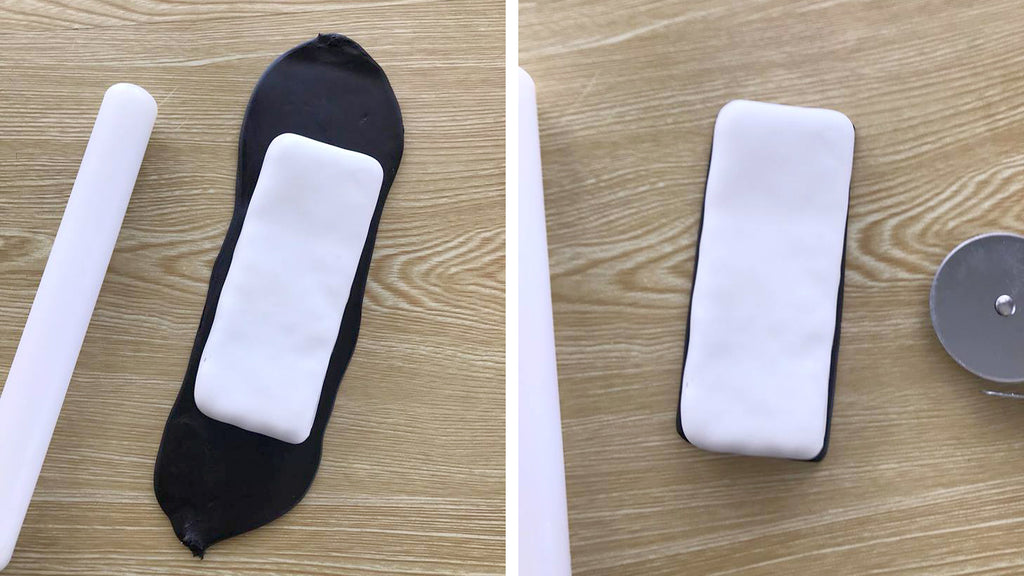
Step 6
Repeat for the top cookie thin of the sandwich. Then use your Sugar Shapers Pointed Chisel to make indentation holes.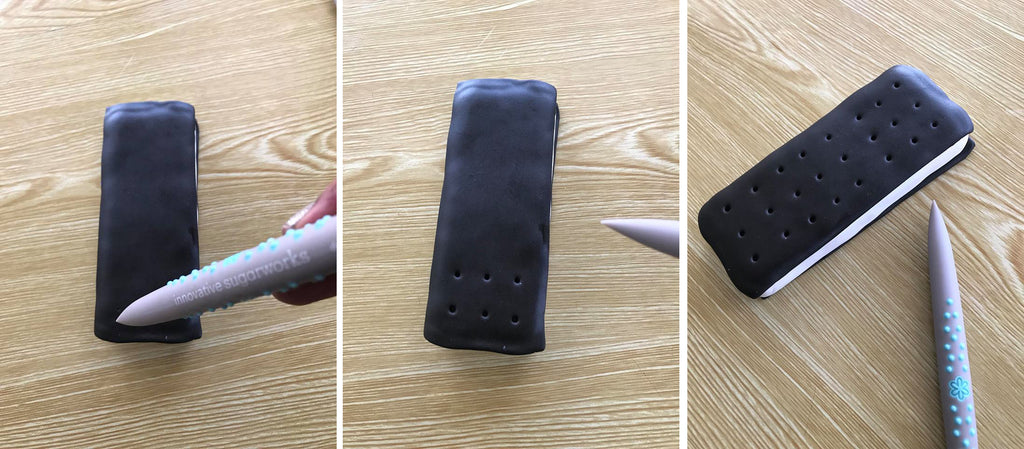
And there you have an imposter ice cream sandwich! I hope you've enjoyed this tutorial, and enjoy fooling your friends with these "ice cream" treats!
This is Joyce’s first time using Innovative Sugarworks Sugar Shapers and she states “Now i understand why they are loved and essentials tools for the sweets artist!” She is working on a full ice cream truck tutorial coming soon using our 2 Legged Running Sugar Structure and Sugar Shapers with these ice cream treats added! Make sure to subscribe to Toxic Sweets Shop to find out when and where it will be released!
To learn more food tutorials check out her “ A La Carte ” online restaurant with many individual food tutorial from broccoli to fish!
www.ToxicSweetsShop.com
And follow her on social media!
Instagram: @toxicsweetsshop
Facebook: toxicsweetsshop
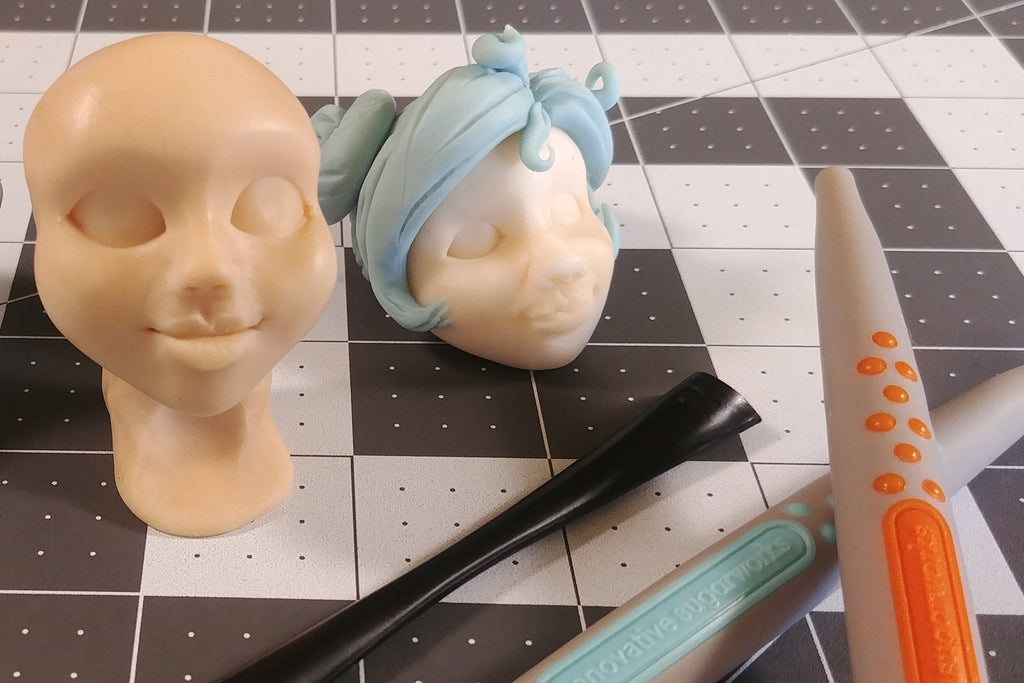
Face Sculpting with Sugar Shapers, TLook, and Jamie Louks
Have you ever looked as those perfect, doll-like figures you've seen on Pinterest, Instagram, and cake forums and wished you could sculpt that well? Did it look like an impossible task? Something unattainable? A superhuman feat of artistic devilry?
Not so, says we! You can sculpt like that, too! And Jamie Louks of Jamie Nicole Cakes in Seattle is going to teach you how! Watch this detailed tutorial and see how very doable it is! You'll be sculpting like the masters in no time at all!
Here's what Jamie used in this video:
- Mini-Tip Sugar Shapers, soft
- TLook eye tool
- Modeling chocolate
We hope to see our Facebook and Instagram feeds full of fun new faces in the coming weeks! And if you want to see more work, inspiration, and instruction from Jamie, follow her on Facebook and on Instagram!
Edible Decoupage and Bringing your Concept To Cake
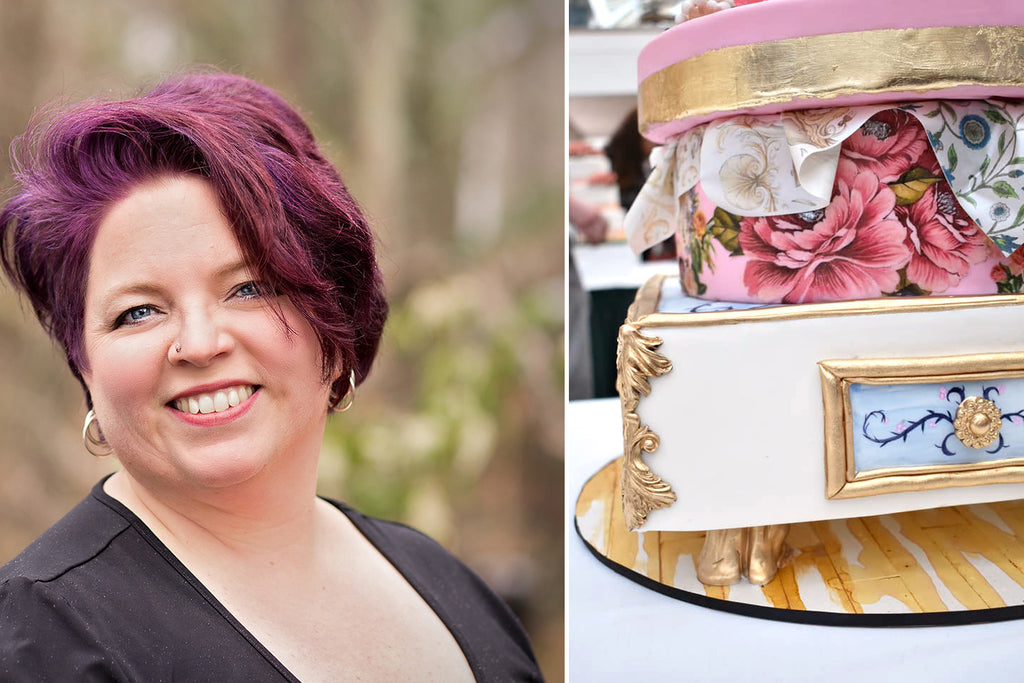
You probably know her as the face of Shinyball Cakes and Shinyball Creations- Rose Brown is a life-long artist and baking dabbler. Rose discovered the strong connection of sugar and art, and has been working on her sugar art skills for the last several years. Always trying to think beyond the traditional, looking for unique techniques and with a special love for hand painting, she creates cakes for friends, family and clients that are one of a kind. She also writes a blog - www.shinyballcreations.com - that shares tips, tricks and tutorials for sugar and baking enthusiasts. And this month, Rose is sharing her blogging expertise with us at Sugarworks, and we couldn't be more excited!
Read on for an excellent journey through bringing a concept into a finished cake as well as a step-by-step tutorial on the very unique technique of cake decoupage!
Have you ever entered a cake competition – a themed competition – and then been totally stumped on what to create? I have…and very recently!
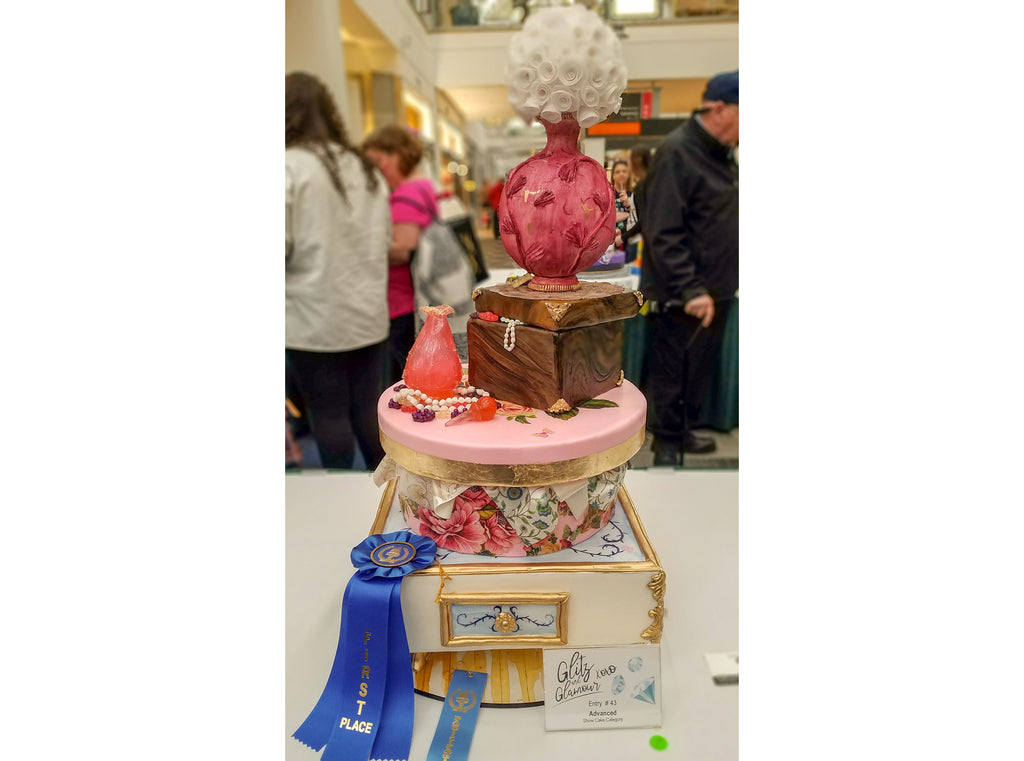
I entered a local cake show competition where the theme was “Glitz and Glamour”. Glitz and glamour… visions of glitter and shiny things everywhere! But then reality set in. I had to face it – I’m not a glittery, fancy, embellishing kind of girl. It didn’t speak to me. That left me in a bind – what on earth was I going to do??
Well, like all internet addicts, I turned to Pinterest. However – here is a tip – don’t EVER (I really mean ever) search for cakes on Pinterest when you’re looking for inspiration. I have gotten that advice from other cake artists as well. Get your inspiration from art, fashion, pottery, paper crafting – anything but other cakes. It will open things up for you and give you ideas that will be uniquely yours as you envision your own designs.
Anyways…on to my Pinterest-ing. I searched for “glamour”, I searched for “Grace Kelly”, and that took me to looking at jewelry, which led to jewelry boxes, which led to vintage jewelry boxes, which led to perfume bottles, and in looking at all these pictures I started to form my concept. The image that solidified my concept was that of a vintage looking vanity table.
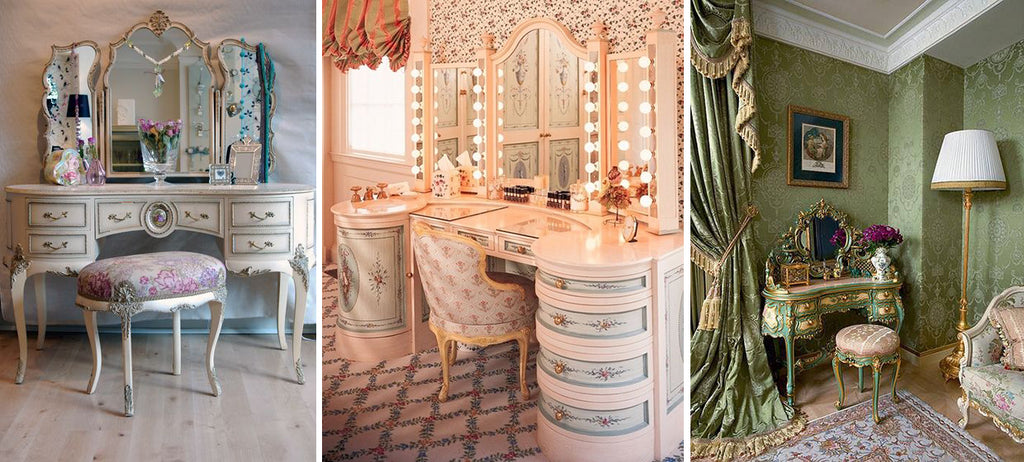
And from there, everything else fell into place. I could finally visualize what I wanted to create.
Initially, the concept was a table with a stack of things on it – a large jewelry box and an oversized perfume bottle with flowers. I did a sketch and started working, but as so frequently happens to me, I changed midstream, because the way the cake was coming together needed something else.
I’ll be honest here, some of the change came about because of the size requirements of the competition, the base HAD to be 14”, which is relatively big (which will lead to some of my equipment choices you’ll read about later, hint hint). I needed something that size-wise would fit between a jewelry box and a table. In thinking about my Grace Kelly pins from earlier, I thought about a hat box – I had the right size dummies ready and available! I started looking at pictures of hat boxes and found inspiration in ones that had decoupage on them.
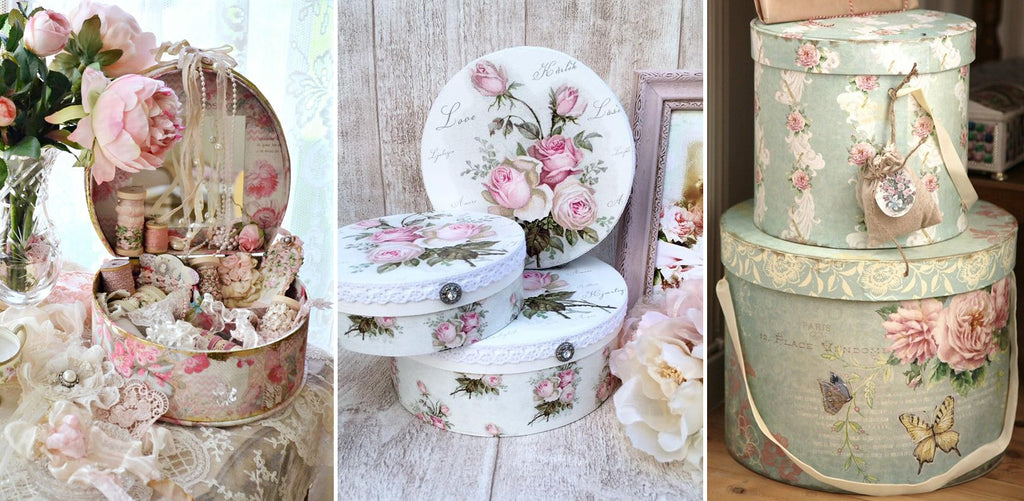
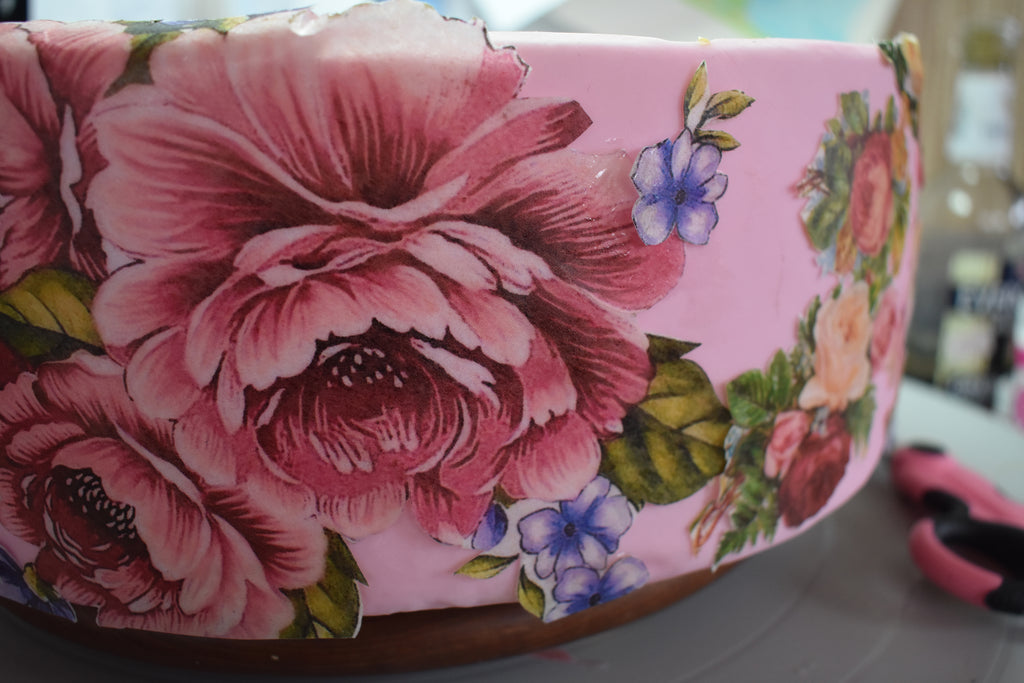
Decoupage is a form of collage that is usually used to cover items that are 3 dimensional, like boxes or even furniture. In the traditional form, you cut paper images out of thin paper and then paste them onto your item and coat everything with a layer of glue, or modge podge or other transparent adhesive that dries clear, and usually a bit shiny, but not always. I have enjoyed this kind of crafting before, so I thought – why not on my cake, and why not on a hat box tier? Poof, I had my idea!
Now I’m going to show you how I did it!
What you will need:
For any cake decoupage project, you will need the following: 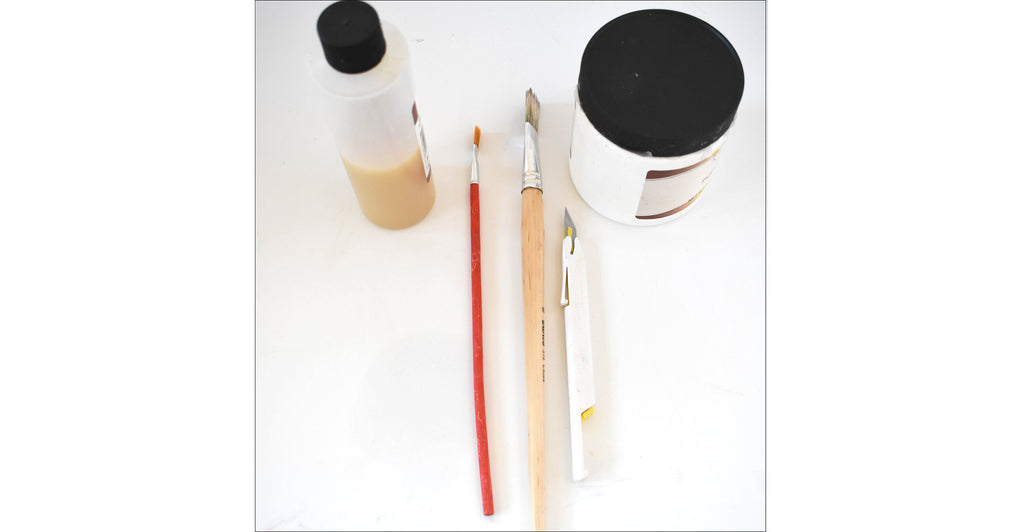
- Some sort of cutting blade or exacto knife
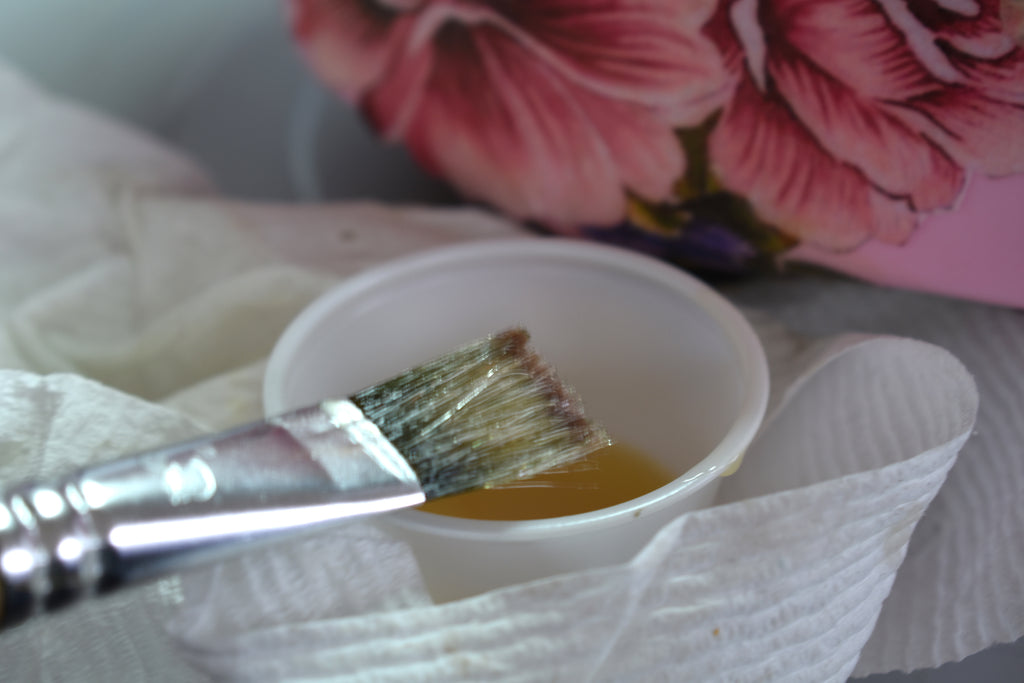
- Piping Gel
- Confectioners Glaze
- A small flat brush
- A large brush
- Wafer paper (not pictured)
- Edible ink printer (not pictured)
- Fondant Smoother (optional, not pictured)
To make life easier, especially for the size of cake tier I was creating, I also used my Innovative Sugarworks Artist Turntable, and my Innovative Sugarworks Turntable Expander.
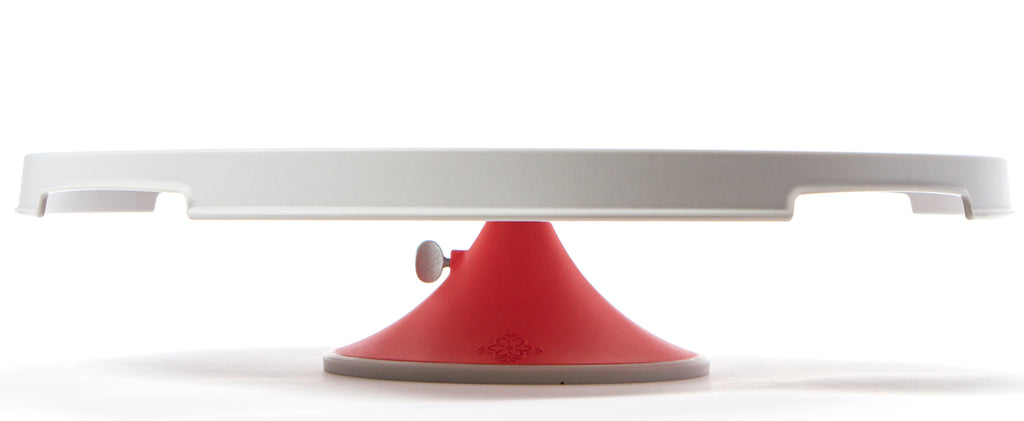
The fact that I could lock the turntable in place when working on small details and then loosen it to be able to rotate it was great. Never mind that the cake base was over 16” in diameter, so when I needed to work on the cake board or the vanity table tier, the expander was also a great help – no balancing acts needed!
Get prepped:
The first step here, is to cover your cake with fondant. In my case I covered a 4” high 12” dummy for the box and a 1” high 14” dummy for the lid. I recommend doing this step a little ahead of time from your decoupage project, so that the fondant firms up a bit. Otherwise, you may dent the fondant as you work.
Go online:
I’m going back to Pinterest again! I searched simply for “decoupage flowers” and a treasure trove of things showed up, like this one!
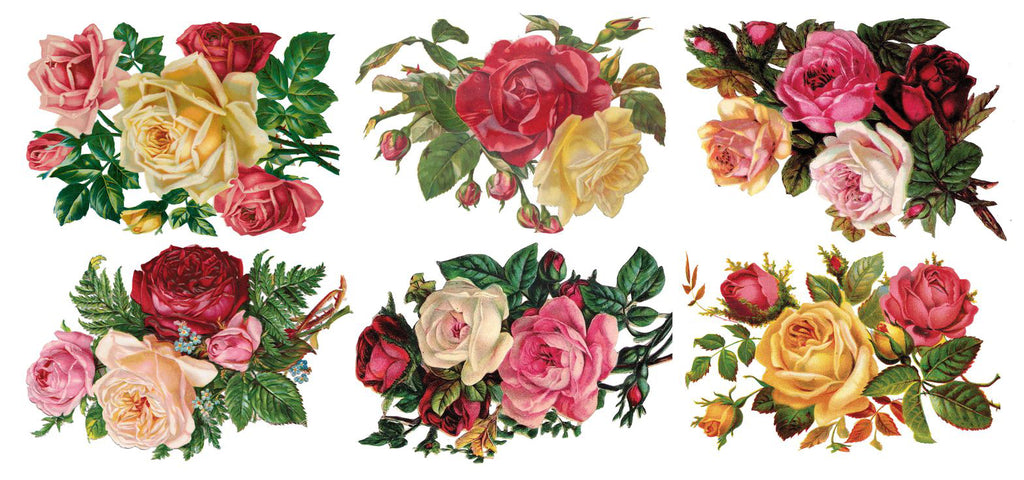
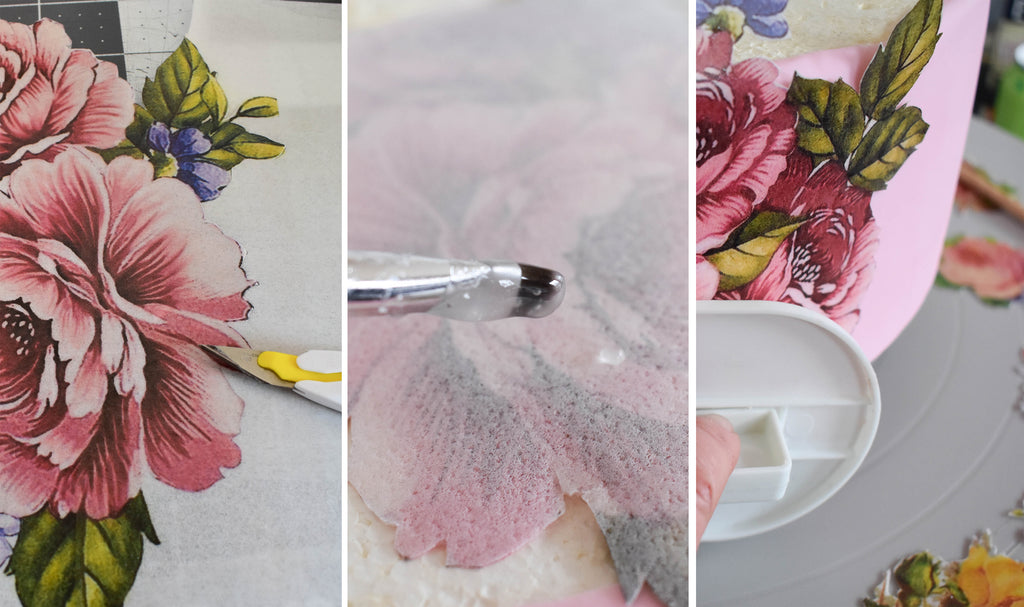
I searched for images that matched my color scheme, flower preferences and style (for me, peonies and roses with a Victorian or antique flavor) and found ones that I liked. I printed them onto wafer paper and painstakingly (although without any finger cuts!) cut out a whole mess of images! Look for images like these:
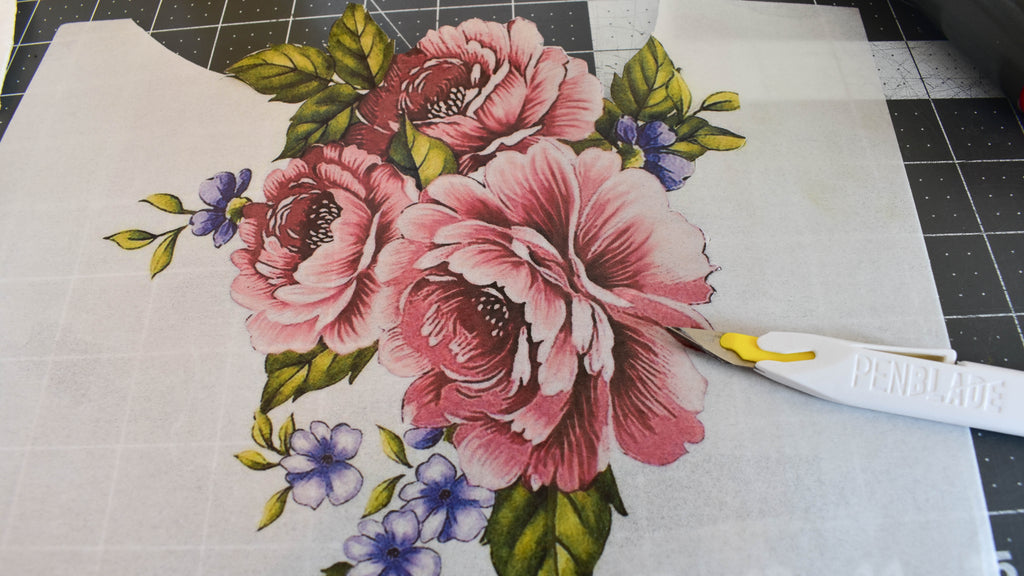
Start arranging and attach the images:
Now that I had all my paper cutouts ready, it was time to arrange the images and adhere them to the cakes. The Turntable Expander made it extra easy, because it gave me a ledge around the cake to place the cutouts and figure out where I wanted them.
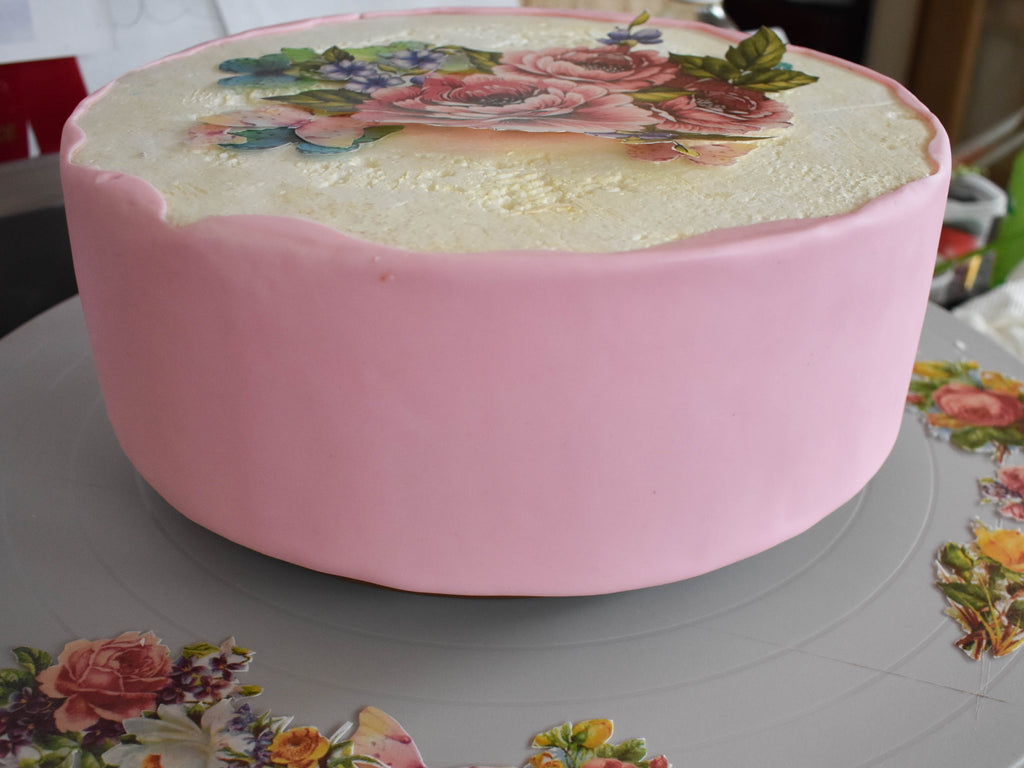
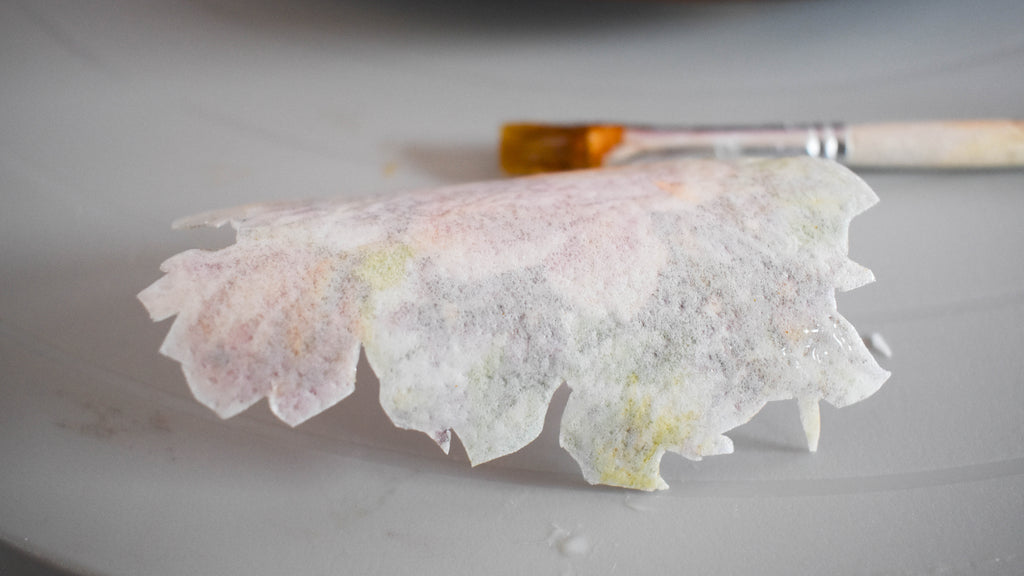
To attach the images, I painted a thin coat of piping gel to the back of each image. I used piping gel instead of water for a couple of reasons – water makes wafer paper dissolve, and it makes the ink run. I didn’t want either of these things to happen.
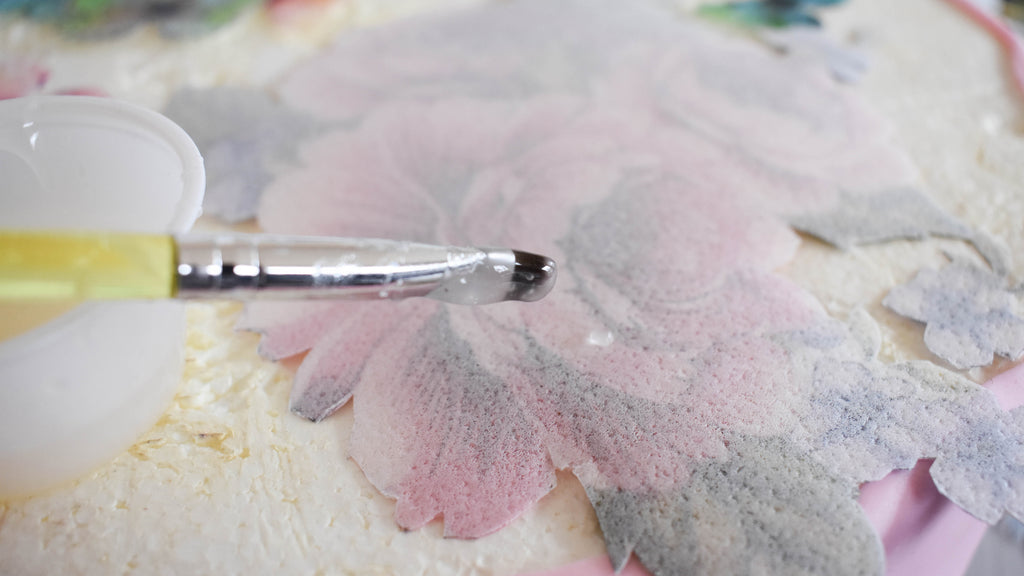
Once you coat the back of the wafer paper, it starts to soften, and then you can adhere the image to the cake, wherever you like. If the wafer paper feels stiff, use a little more piping gel or just use your paintbrush to massage the gel into the paper more, it will loosen up.
I attached the sticky side to the fondant and used a fondant smoother to help me press the images against the side of the cake and keep my fingers away from the fragile wafer paper.
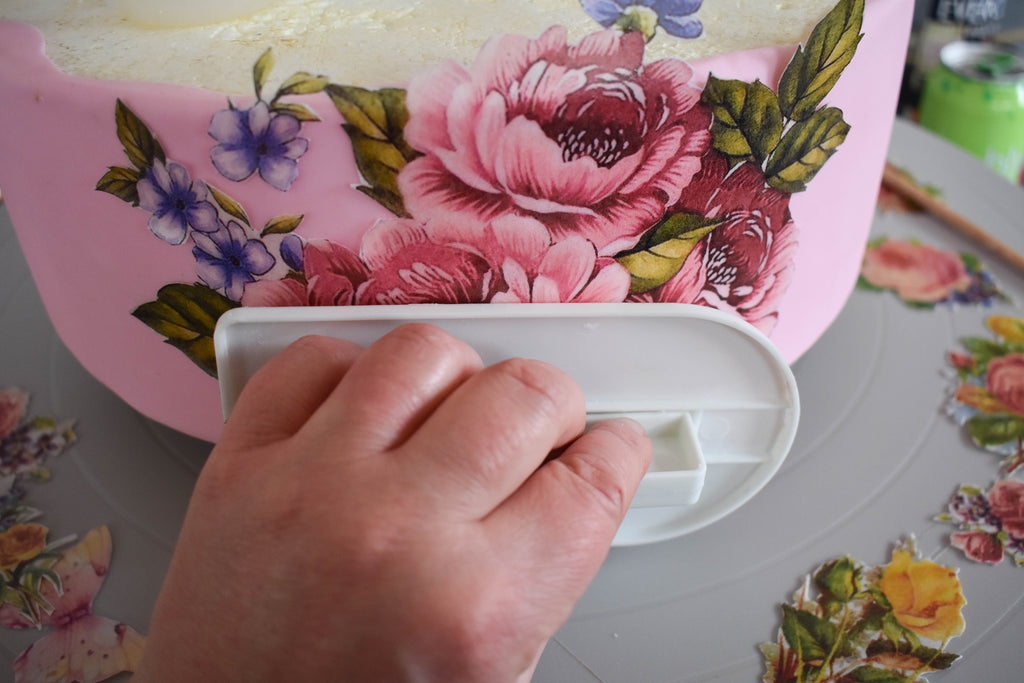
If you look at other decoupage art, usually you will find that images are overlapped, creating a new look from the existing image. This is where you can get creative – making your own garden, for example, made up of mixed images. In my case, I chose to spread the images out, because although I wanted the decoupage to stand out, I also wanted the color of the box to show through.
Shine it up:
Once the images were all adhered, I went around and made sure that all the edges were stuck down well. Once they dried a bit, I took my larger brush and some confectioners glaze, and I covered the whole cake and all the images with a coating of glaze.
I tested the glaze on the front of the images before I did this to ensure that the image ink didn’t run, and although it ran a teeny bit, it did not distort the image, and gave it more of a vintage, aged look, which I liked. I recommend that you test your images with the glaze first as well, because there is nothing worse than you brushing on a whole mess of glaze and it ruining your hard work!
Notes about Confectioners Glaze:
This stuff is mega sticky and hard to get off of things like clothing, tables, etc. Invest in some glaze thinner as well so that you can rescue your brushes afterwards and clean up any stray drips. I also recommend using a disposable container to hold your glaze while you’re painting, unless you already have a designated glaze container.
Also – never put left over confectioner’s glaze down your sink, always dispose of it in the trash instead – your pipes will thank you.
Finishing touches:
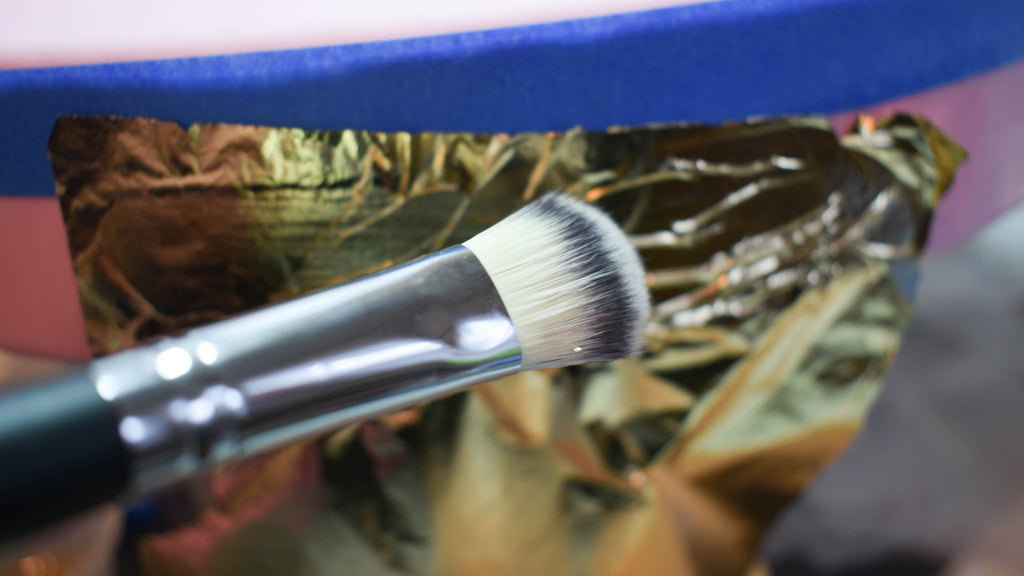
To add a little more “glitz” (remember that theme?), I adhered some imitation gold leaf around the band of the box and covered that with some glaze as well. (My soft brush from Innovative Sugarworks was wonderful for smoothing down that gold leaf!)
I also printed out some patterns I found (yes, on Pinterest) onto fabric icing sheets and cut those up to look as if there were scarves trying to escape out of the box. You can use your imagination here and do all sorts of fun things to have peeking out of the box.

All done:
Now that the hat box was complete, it was ready to stack onto the vanity table base and have the jewelry box, perfume bottle and vase sit on top of it. I’m thrilled to tell you that even though I was originally stumped by the competition theme, there is a very happy ending to this story – my cake won 1st prize in my division! Wow…that was a shock and surprise, and I was so honored.
I hope you give this technique a try. It’s lots of fun to do, and it really makes an impression!
We hope you enjoyed Rose's tutorial on cake decoupage! It's a beautiful and striking visual technique that we don't see used very often. Maybe now that you've all seen it done, our Instagram feed will light up with decoupage!
If you want to see more of Rose's gorgeous work, follow her on Social Media:
Facebook: Shinyball Creations
Instagram: @shinyballcakes
Twitter: @shiny_ball
And make sure you keep an eye on her blog - ShinyBallCreations.com - for more great tutorials, instructions, and caking advice!
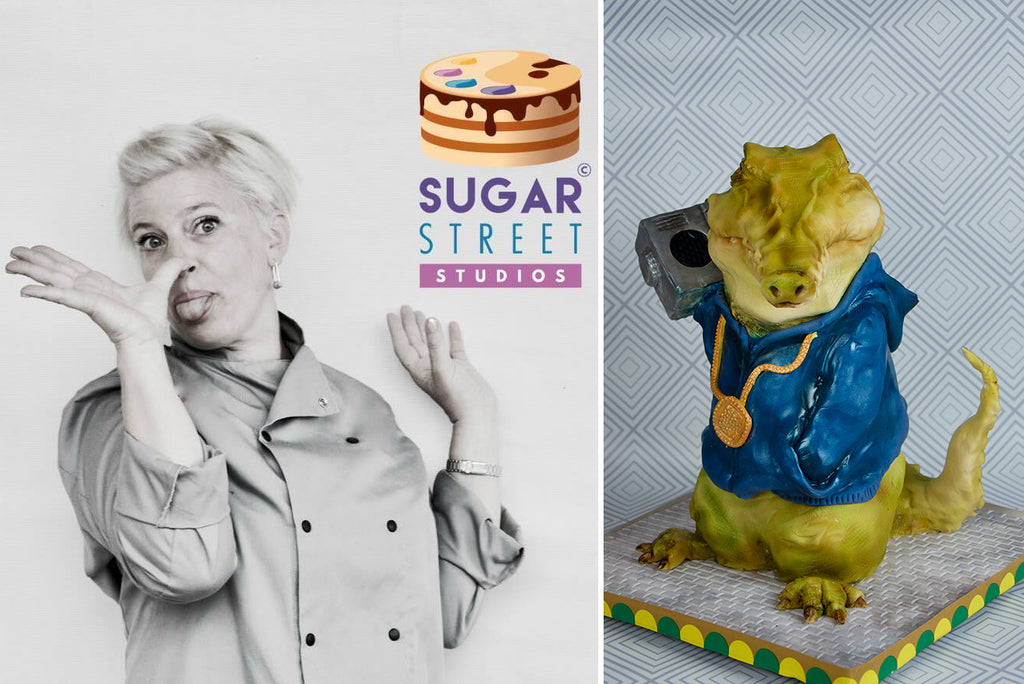
Zoe Burmester's Hip Hop Croc
Zoe Burmester is an internationally recognized, multi-award winning cake artist based in Somerset, UK. She is known for her highly detailed, realistic sculpted cakes, and a style defined by precise skill and a touch of whimsy.
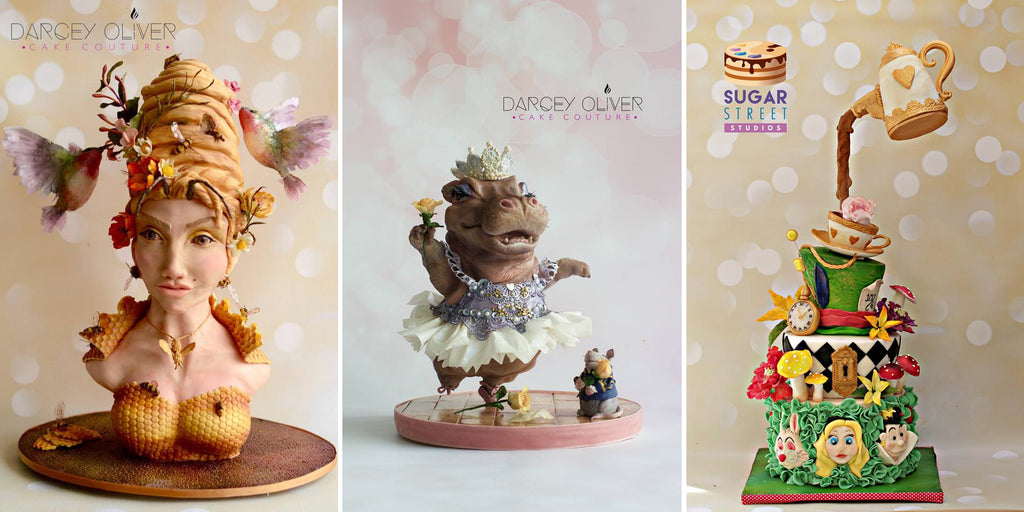
In addition to running her own cake shop- Sugar Street Studios, Zoe has had her work featured on television, in magazines, in online collaborations, and at international cake shows. She is a regular contributor to Cake Decoration and Sugarcraft Magazine and a sugarcraft tutor.
Today Zoe is showing how she made this awesome Hip Hop Croc cake!
We hope you enjoyed Zoe's tutorial! If you want to learn more about Sugar Shapers, check them out in our shop here.
And make sure you keep up with Zoe's work!
Follow her on Facebook: @sugarstreetstudio
And Instagram: @sugarstreetstudios
And Sugar Street Studios has a brand new website coming soon! Bookmark this page and check back soon to see when it's up: www.sugarstreetstudios.com
Brad Jarman and the Art of Design
March is a unique month for us in the Sugarworks Blog. Rather than reaching out to artists whose work we were familiar with, we held a contest for people interested in blogging. We were curious to see if anyone would respond who might be a little off our radar. And boy were we impressed with the submissions! It was so hard to choose that we ultimately went with 2 bloggers for this month, and we are super excited to introduce our 2nd March Artist- Brad Jarman!
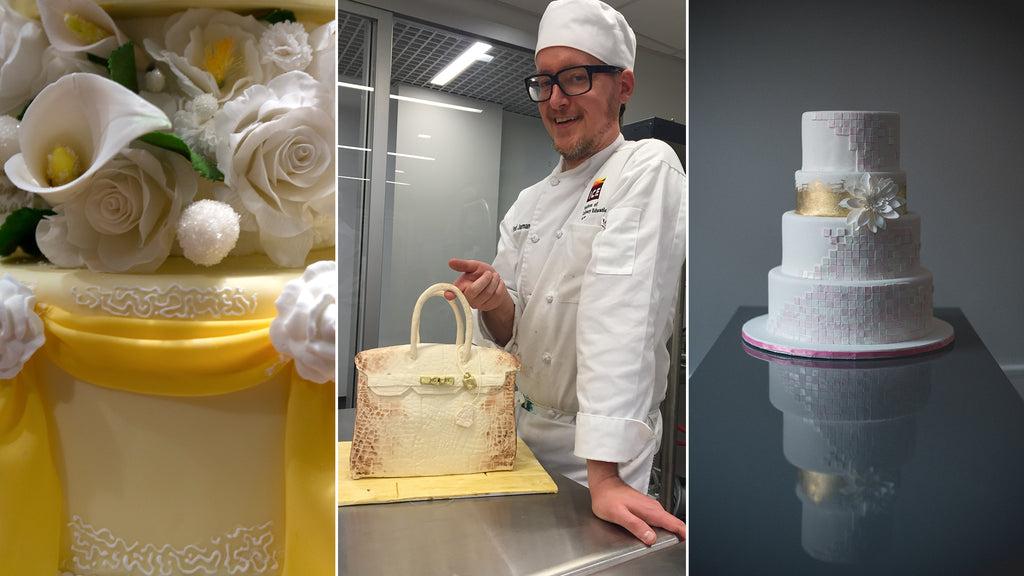
Brad is having a wonderful time exploring the world of cake, cookie and cupcake decorating. Several years ago he began this journey with the Techniques and Art of Professional Cake Decorating program at the Institute for Culinary Education, where he had the incredible good fortune to study cake design under the legendary Toba Garrett. He is currently enrolled in the school's Introduction to Pastry and Baking course and is having a fabulous time playing with food and continuing to learn about the cake and baking arts.
Brad comes to the world of sugar from a decade of practice as an attorney. Being a lawyer is fun in its own way, but it is definitely not as sweet! Today, Brad is going to teach us how thoughtful design is as important as well-developed skill.
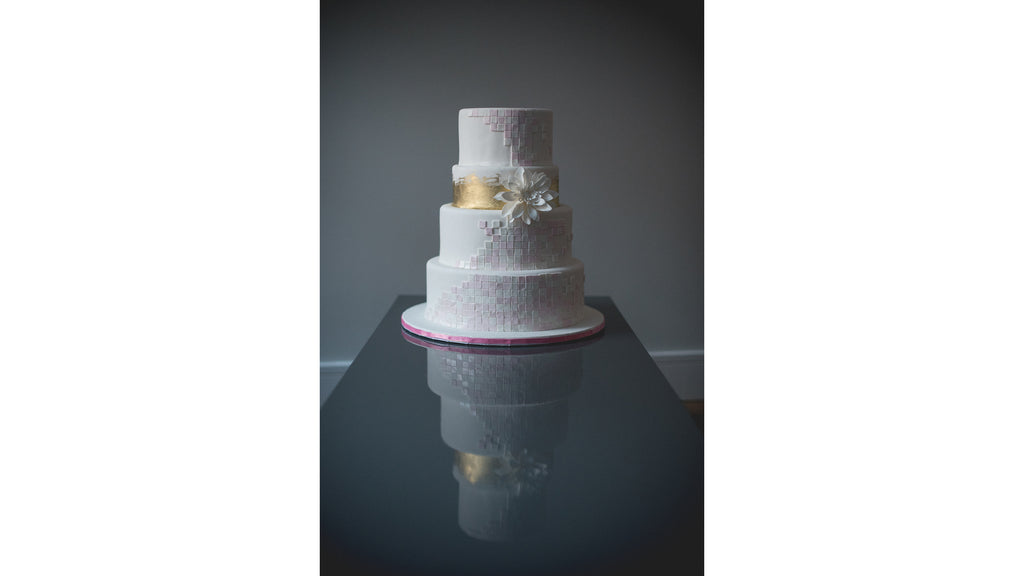
I want to talk a bit about cake design. I come to cake decorating after a decade spent practicing as an attorney - transitioning from that structured, organized setting into cake decorating, a craft of creation and creativity, was a stretch for me in many ways. In particular, I discovered that coming up with a workable cake design is not as easy as it seems! I still recall a cake I designed several years ago. In my mind it would be a towering celebration of my skills. A show-stopping extravaganza. An extravagant statement piece.
I wish I could tell you that’s how this story ended. In reality, when all was said and done? Child, it was a mess.
Techniques clashed, there was no coherent theme, and it generally looked like multiple tiers from different cakes were stacked at random. So what went wrong?
The problem was not technique. I had the skills I needed to produce quality work. The problem was my approach to my design - in my mind, only the most complicated, elaborate work would do. I felt like this was my only chance to show everything I had learned.
In reality, the designs that I most often find inspiring are simple, with components that complement each other gracefully (think of white tiers with draped fondant and a handful of sugar flowers - stunning!) In my previous life as an attorney I learned that legal arguments are best presented in an organized way with a coherent theory - couldn't I use that way of thinking for designing a clean and uncomplicated cake?
Don’t get me wrong - a complex design executed thoughtfully can be truly beautiful. For me, though, as I continue to learn about the craft of cake decorating, part of my growth as a cake artist means being open to cake designs that are simpler, with attention to the details that make the project feel clean.
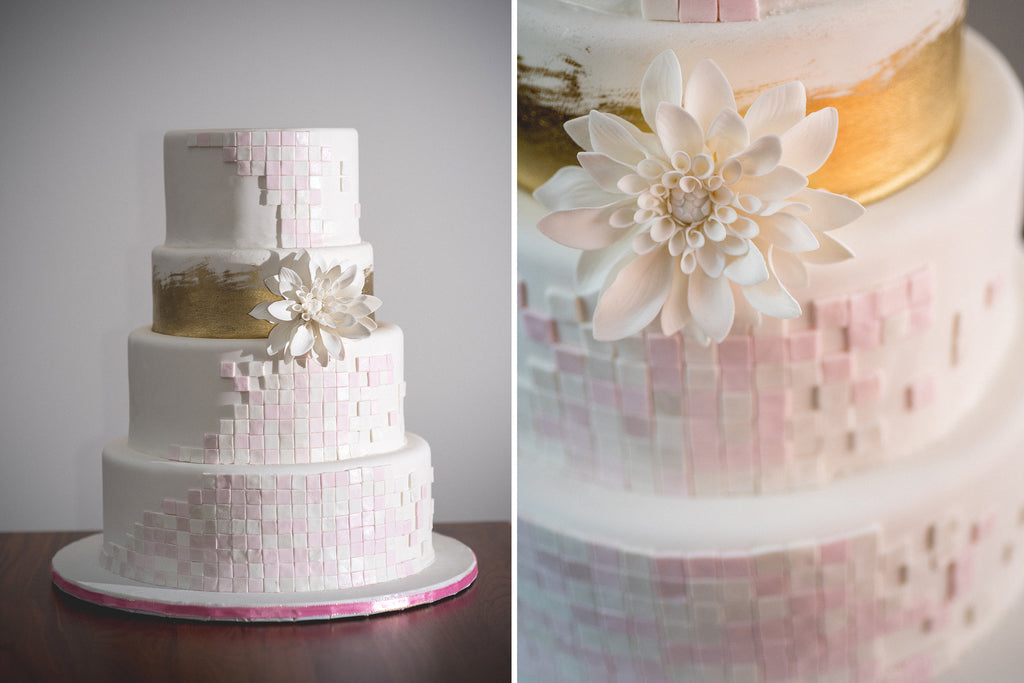
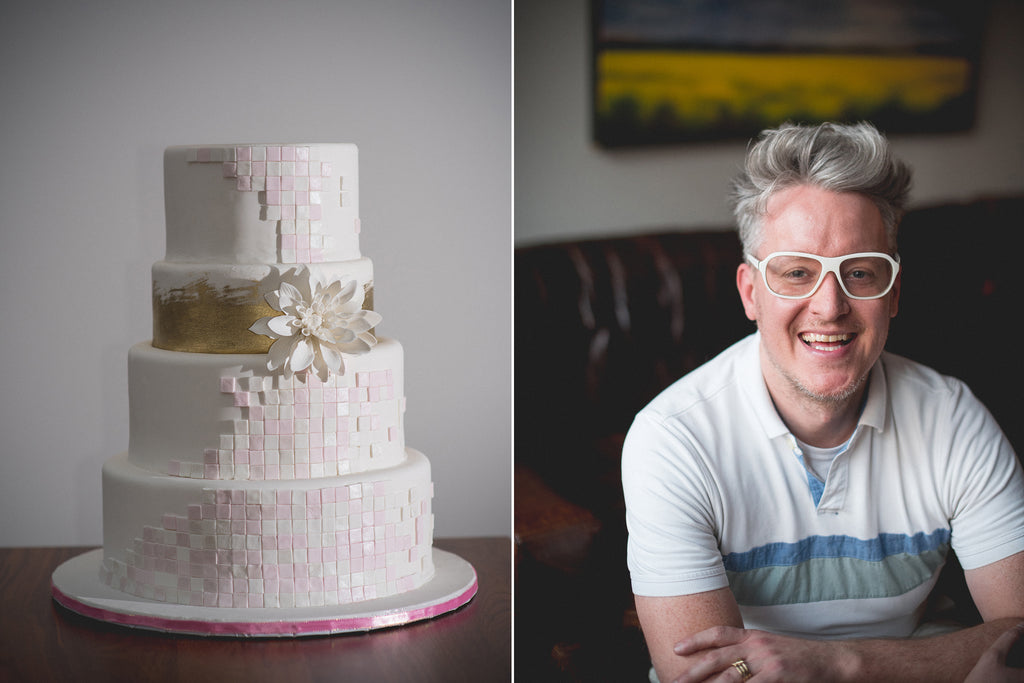
I recently made this tiled cake, and using that piece as a backdrop I'd love to share my process for creating a simple cake design with you. While I am focusing on the design process here, and not the mechanics for creating this cake, I have to note that my Sugar Shapers were instrumental in making this cake. I used them for cleaning up edges around my tiles, and also for filling in the gaps between tiers (this is called "gunging" and Kaysie Lackey has a great video on it which I found super helpful!)
Cake design is truly personal, but hopefully my process will be useful to you as you come up with your own approach and clean designs.
- Limited colors. Creating and complementing colors is a wonderful part of cake decorating. However, just like a painter doesn’t use every color in every single painting, cakes with just a few colors can be gorgeous - a white cake with all white flowers never goes out of style. For my work, I used white tiles, soft pink tiles, and gold - that’s it. I considered an ombré effect because I am apparently obsessed with making things complex. However, multiple shades could have felt busy, so I resisted, and I’m glad I did.
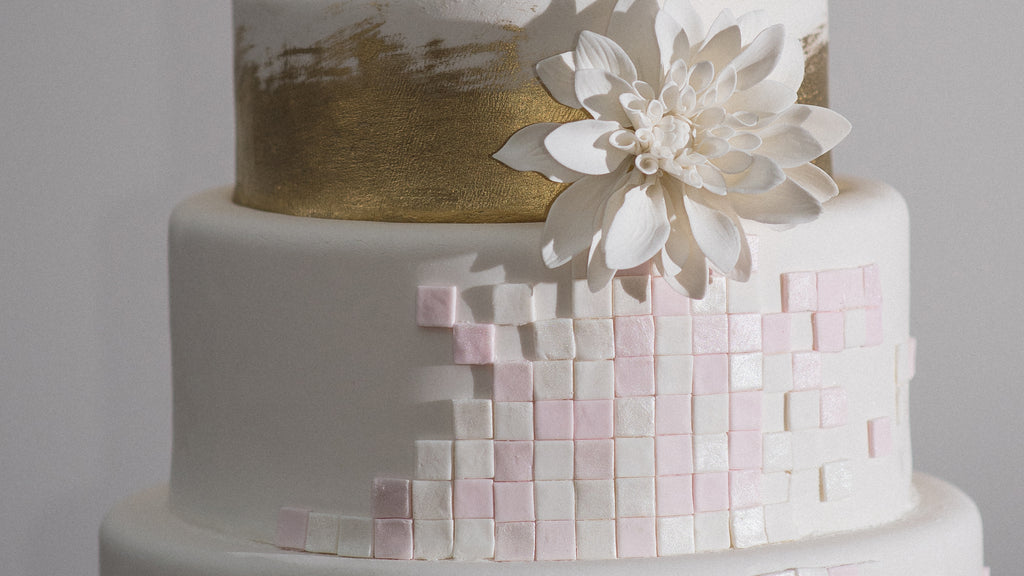
- Embrace the space. If you’ve ever been in a room with too much furniture it makes the walls feel like they’re closing in. I hate that. One of the hardest things for me to learn was that empty space on a cake is not necessarily unfinished - it can often add a great deal to the overall design. Just like interior design, with cakes sometimes less is more. For this cake half of the bottom tier is undecorated, with more blank space as the tiers go up. I wanted a cake that was not busy or distracting, and this space is crucial.
- Limited elements. Don't try to cram every technique into a single work. No one wants to listen to a song where all of the notes are being played constantly - we like music when notes and rhythms are arranged in ways that are pleasing, and cakes are no different. For my tiled cake, I used three elements. The tiles, uniform in shape, represent the first element; these are combined with a gold-brushed tier, element number two, and topped by a single dahlia (many thanks to Innovative Sugarworks for making this great Dahlia cutter set, and the awesome video on how to use it!) I felt an urge to make the design more complex with a spray of flowers...I told you I have a problem. I decided not to, though, because it felt finished without it.
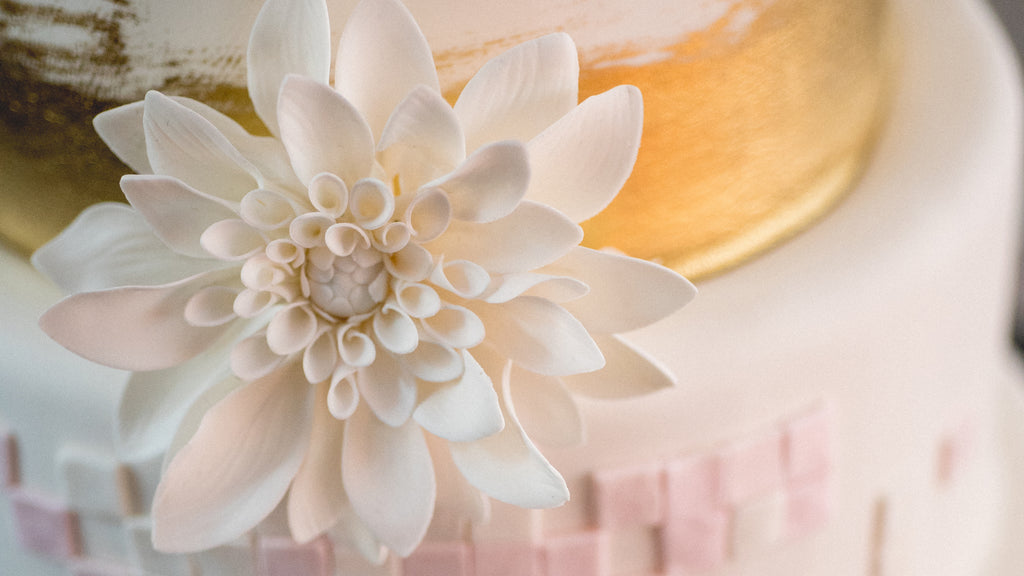
- Gentle movement. Cakes invite the eye on a journey. Think about a cascade of sugar flowers spiraling around multiple tiers - the eye naturally follows the cascade, taking in the sights along the way. For this design I arranged the tiles in a soft arc curving right and then back to the left. The dahlia sits in the non-tiled space and keeps the eye moving along. Aim for gentle, relaxed movements, like ice skaters (the parts where they are gliding and twirling ethereally; not the movements they make when they attempt a jump and fall to the ice.)
None of these are hard and fast rules. A cake with numerous colors can feel quite simple if the design leaves most of the space on the cake undecorated, just as a cake with no blank space could feel elegant with a simple design repeated on every tier. While I will probably always struggle with being a complexaholic, the projects I've been most satisfied with are those that are clean and timeless.
I'd love to hear your thoughts - learning from each other is one of the most fun parts of this field! Feel free to email me at bradandbuttercream@gmail.com or connect with me on Instagram: @bradandbuttercream .
We're super impressed with Brad's discussion of design and aesthetic! It's so easy to be so excited about all the new techniques you've learned that you want to cram them all into your next cake, but elegance is often achieved through subtlety and simplicity. We hope you found this as helpful as we did!
We also like to give a little shout-out to photographer Rob Yaskovic who photographed Brad's bio pic and his stunning tiled dahlia cake. Check out some more of Rob's work on his website, www.yaskovic.com.
Elisa Strauss's Life-Size Cake Baby
This month we've got two amazing artists sharing the spotlight at the Sugarworks blog! Our first is noted cake artist, author, and fashionista Elisa Strauss!
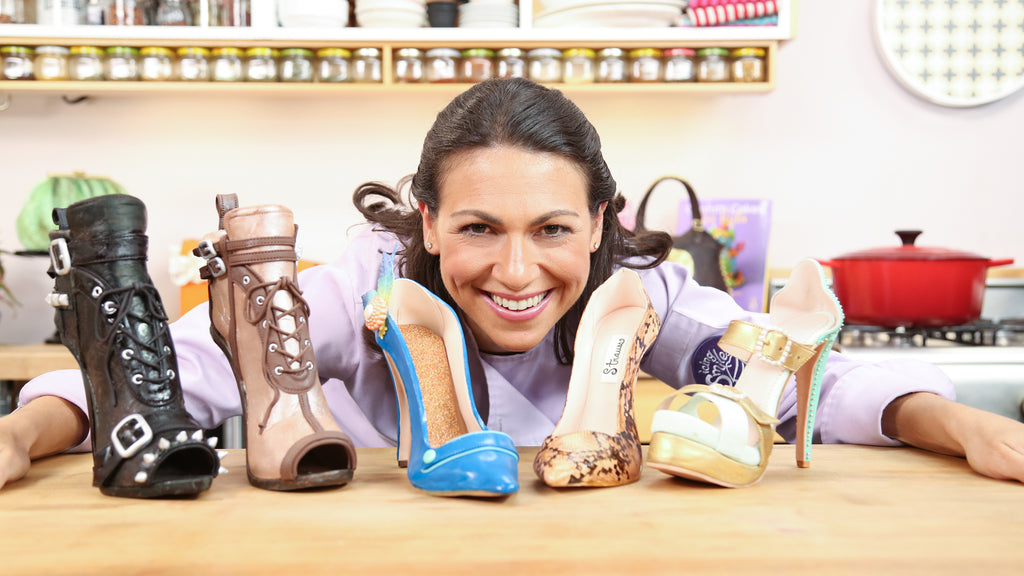
Before shaking up the NY cake scene, Elisa worked as a designer for Ralph Lauren. In fact, it was a cake she made for Ralph (in the shape of a Bugatti, his favorite sports car) and the heaps of praise it received from fashion industry notables that inspired her to bring her design talents to the kitchen full-time.
Elisa founded her bakery, Confetti Cakes in 2000 and has since published 2 cookbooks and appeared several times on Food Network shows, including Extreme Cake Challenge where she won the grand prize. Her creations have appeared on the Today Show, Sex and the City, The View, and Martha, and her bakery has been featured in InStyle, Martha Stewart Weddings, Marie Claire, Seventeen, Elle, Vogue, Modern Bride, New York magazine, BRIDES, Elegant Bride, and The Knot. In 2008, Elisa was even selected as one of America’s Top Ten Pastry Chef’s in Pastry Art and Design.
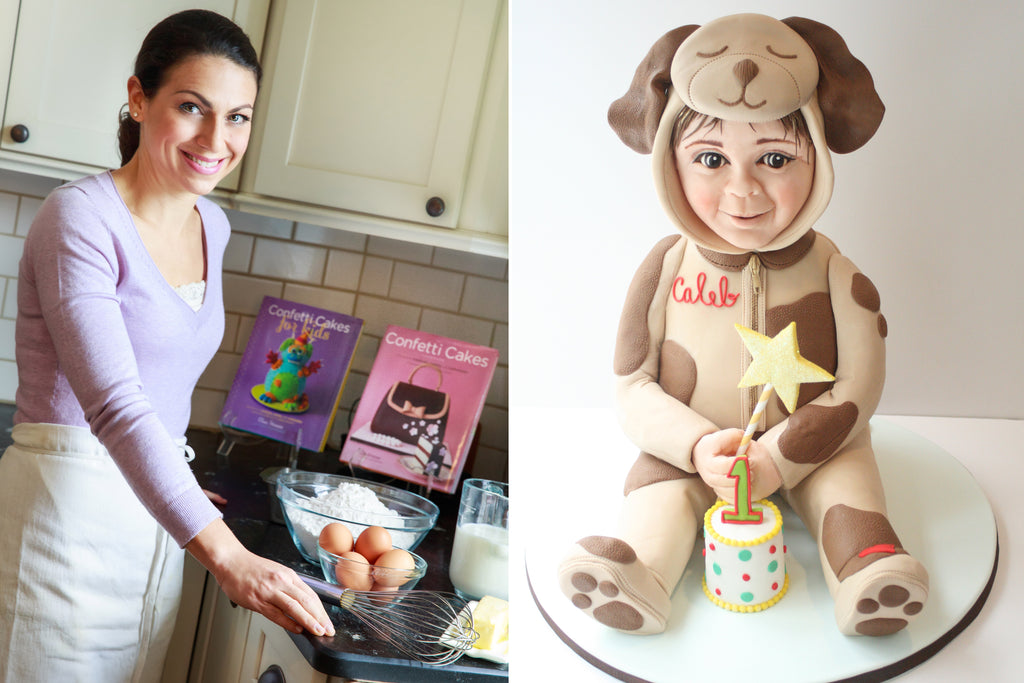
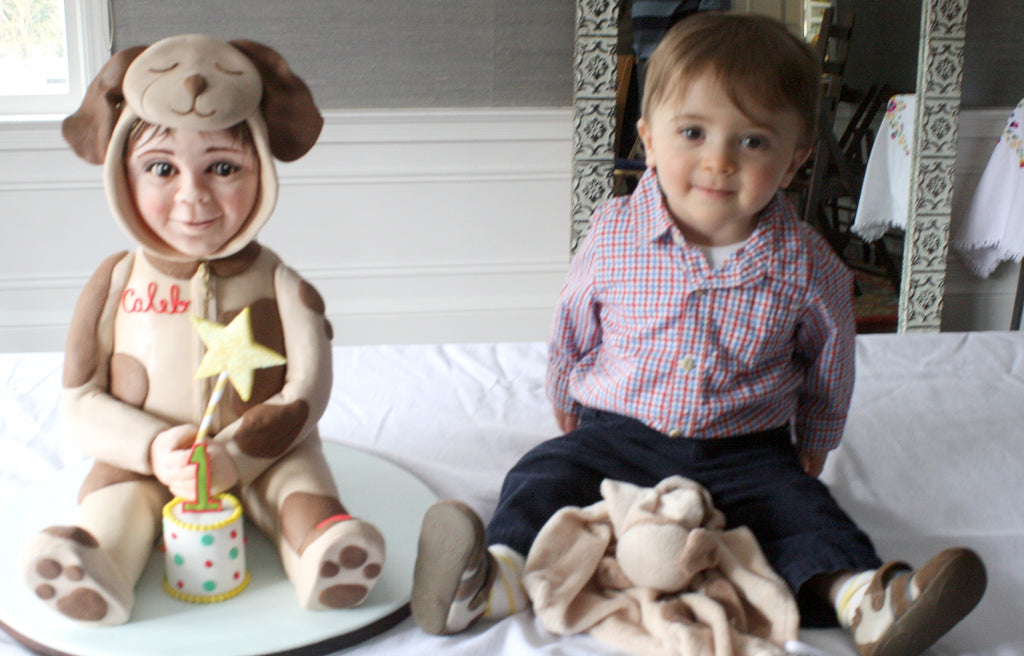
Today, Elisa is going to walk us through how she sculpted a life-size replica of her son for his 1st birthday cake!
I was planning on making a cute little cake for my son’s first birthday- perhaps his favorite lovey or the car he likes to play in, but then I saw a photo on my friend Sachiko’s Instagram feed from Mimicafeunion.
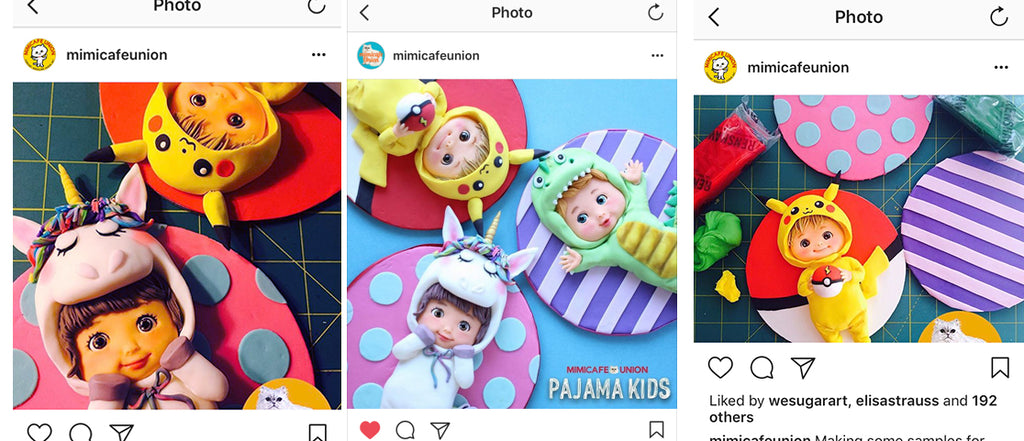
I told my husband I wanted to challenge myself. He looked back at me wide-eyed and in silence; I can only imagine what he was thinking. Most likely, “Oh, no” or “Here she goes again: shirking household and child-rearing duties on me.”
I had never sculpted a human head before and I thought this was the perfect opportunity…since I was the client. I have sculpted many animals in my time: dogs (check), cats (check), dinosaurs, monsters, even an alien, shark and fish (check,check,check,check, and yes, check)- but never a human. Plus, I thought it would be fun to look at my cute baby boy all day.
So I plopped him down in my studio and asked him to turn to the side so I could snap his profile. Luckily, he cooperated :-). I also took a photo of him in the position I wanted for the cake and blew it up based on the size (and amount of cake) I needed.
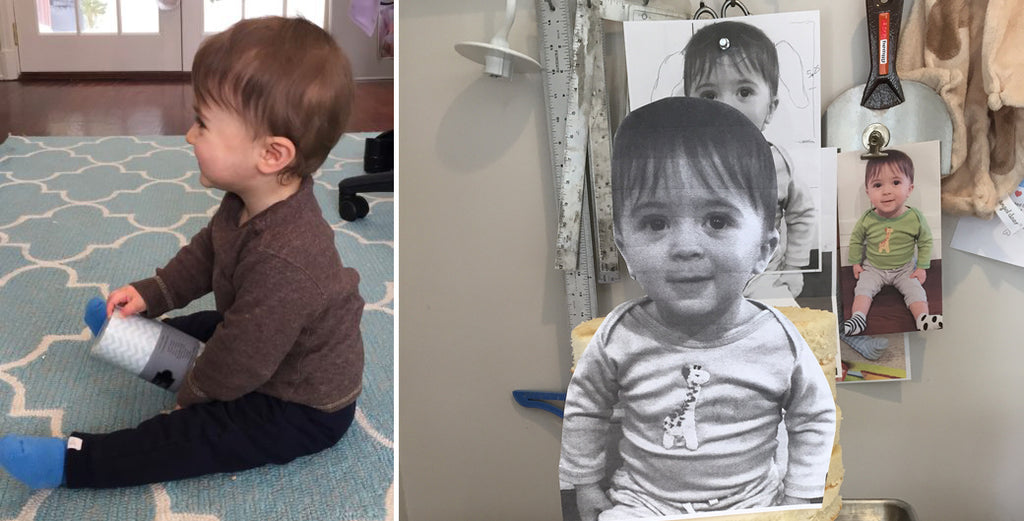
This cake took lots of planning. Aside from just the size and amount of cake to make, I needed to make a base for the bottom of the cake, a middle support board, a board for the bottom of the head, and cut holes through ALL the boards AND cake. I cut a hole through everything because I glued a dowel through the cake drum to hold all the cake together (in addition to internal support dowels).
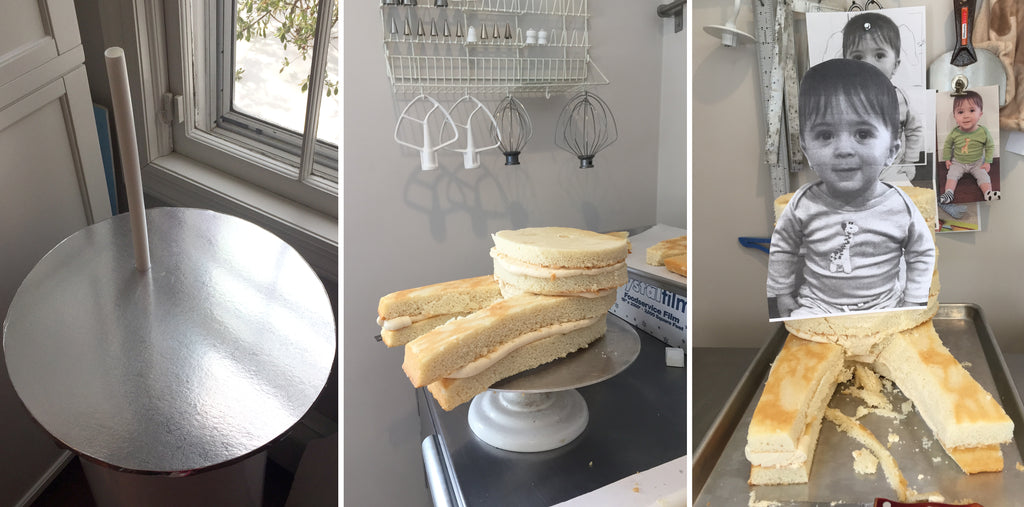
Once the cakes were all doweled, sculpted, crumb-coated and finally iced with buttercream I was ready to start on the head. I will admit this part WAS VERY EERIE.
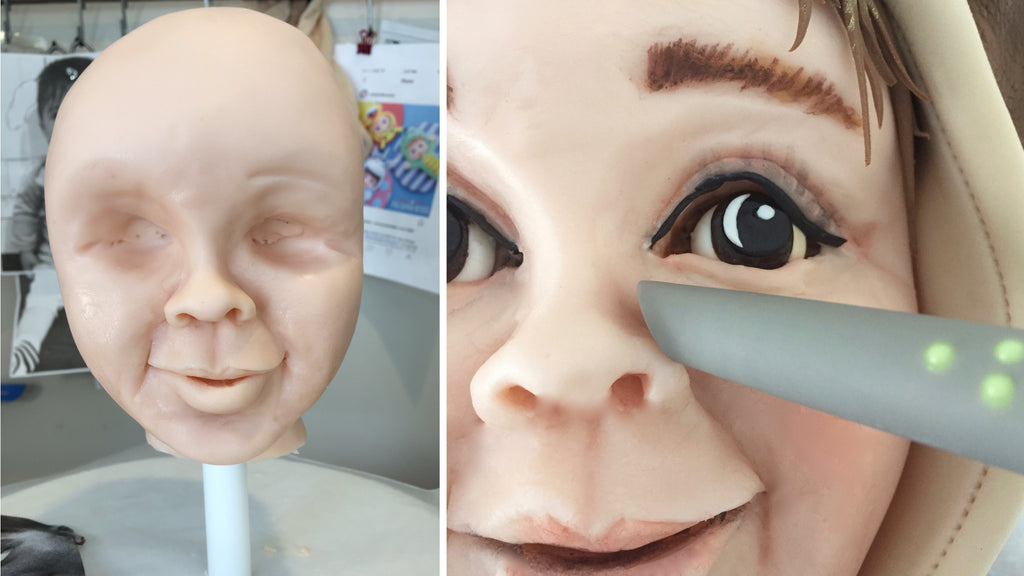
After carving the head, I decided it was going to be too heavy. I had enough cake to feed my guests (I baked a red velvet cake, too, because it was my cousin’s birthday and that’s his favorite!) so I opted to make the head out of styrofoam (I find Rice Krispie treats too heavy). I covered the head and made all the features out of Fondarific’s sculpting chocolate, and thank goodness for Innovative Sugarworks' Sugar Shapers…not sure how I would have done it without them! I also love my small ball tool and veining tool.
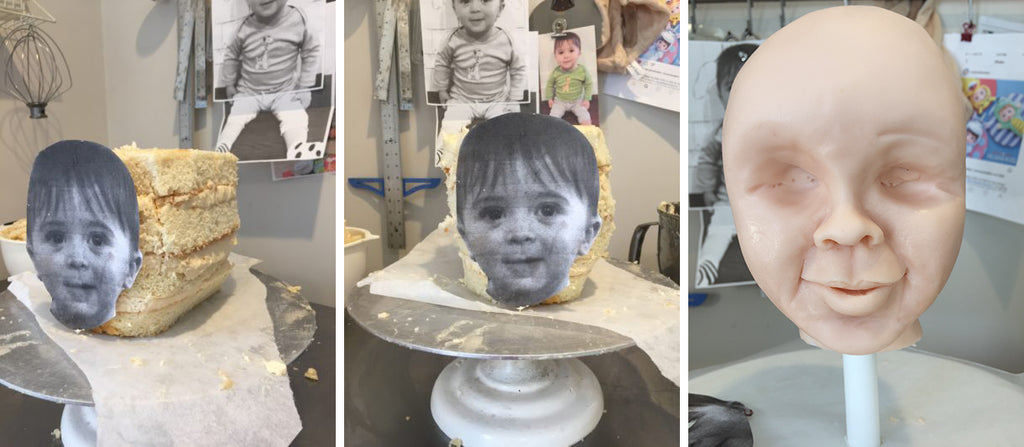
I covered the body with a combination of Satin Ice’s chocolate fondant and Fondarific’s sculpting chocolate. Then I THREADED the cake through the dowel and attached the cake to the board covered in pale blue fondant. Once I got the head pretty close to the shape I wanted then I attached everything together, the head was also threaded on dowel.
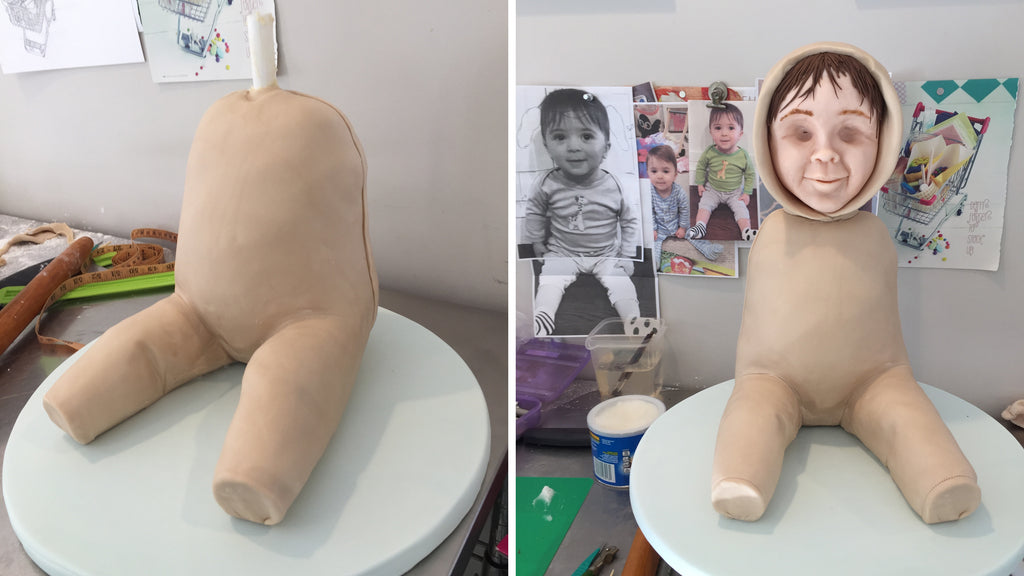
After a snow storm, a couple of sleepless nights, I finished the cake ONE HOUR before the guests arrived. And luckily for me, my awesome cousin, Jordan Pique arrived just in time to take professional photos.
I used an extruder to “embroider” his name onto the cake with Satin Ice’s pre-dyed gum paste.
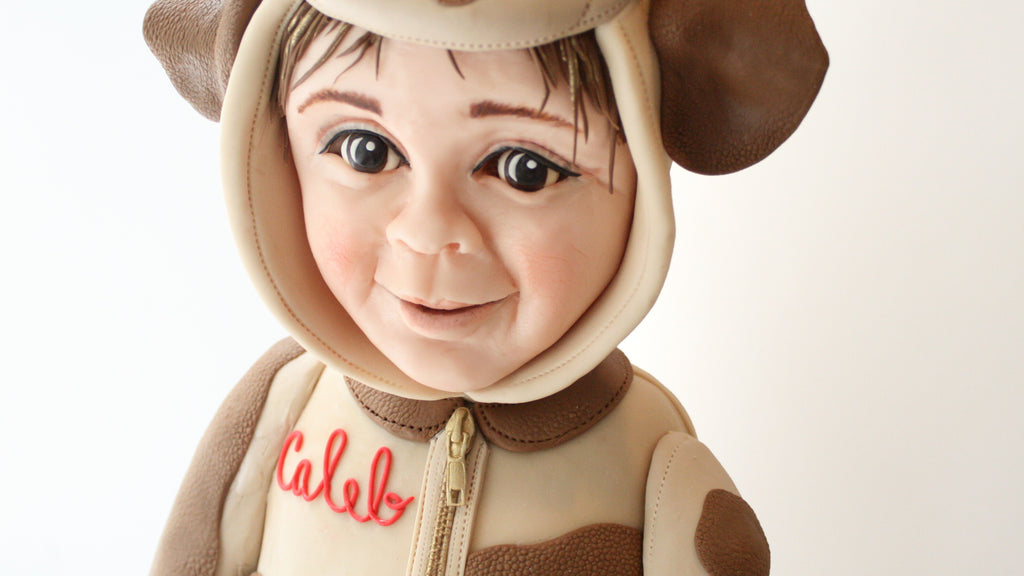
On this detail shot you can see the texture I created on the “spots” with my Marvelous Molds impression mat and the zipper painted with gold dust and vodka.
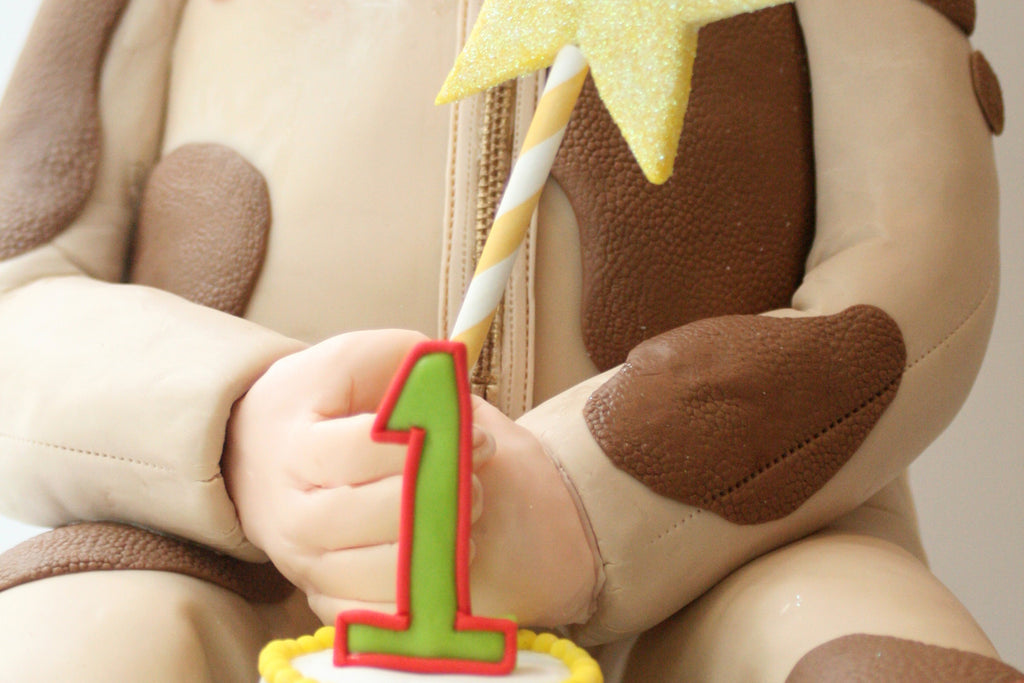
My poor baby boy didn’t know what to make of the cake! I’ve already started thinking about his cake for this year.
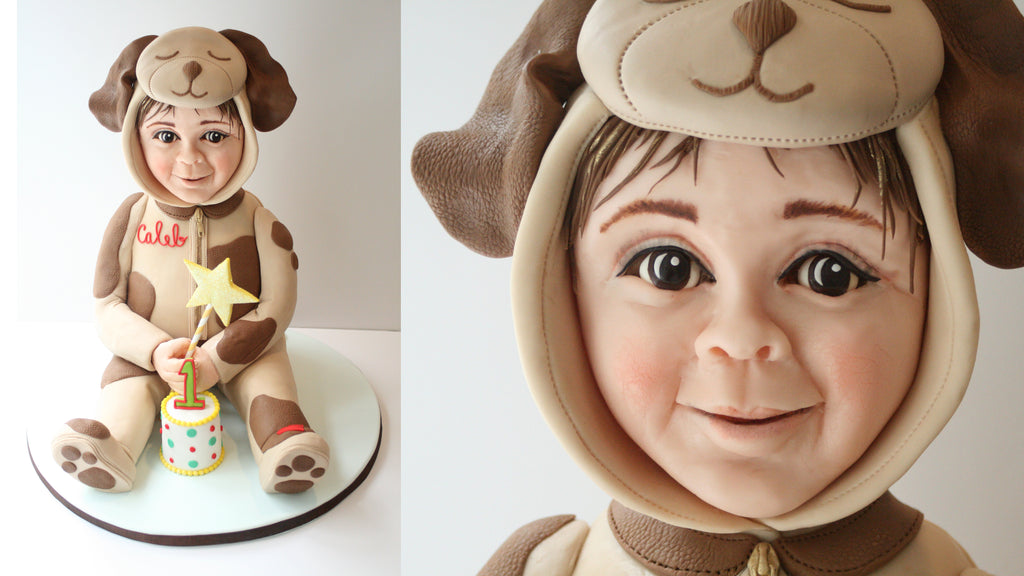
We hope you've enjoyed this look into the challenges of sculptural cake making and how to overcome them! We can think of no sweeter tribute than to sculpt your loved ones out of cake, and Elisa did a phenomenal job with her son's likeness!
If you want to see more of Elisa's work, you can visit her website, www.elisastrauss.com or follow her on social media:
Facebook: Confetti Cakes
Instagram: @elisastrauss
YouTube: Confetti Cakes
Twitter: Elisa Strauss
And if you'd like to learn more from Elisa, she has classes available on Craftsy, including one free course! Take a look online here!
Kaysie's Killer Bacon Cheddar Scones
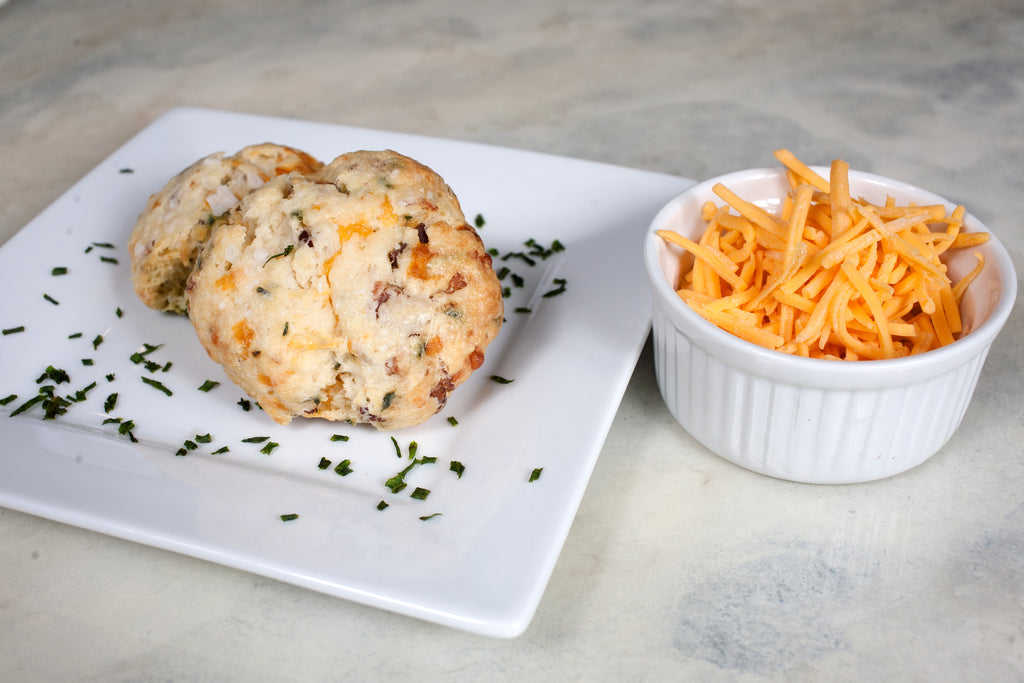
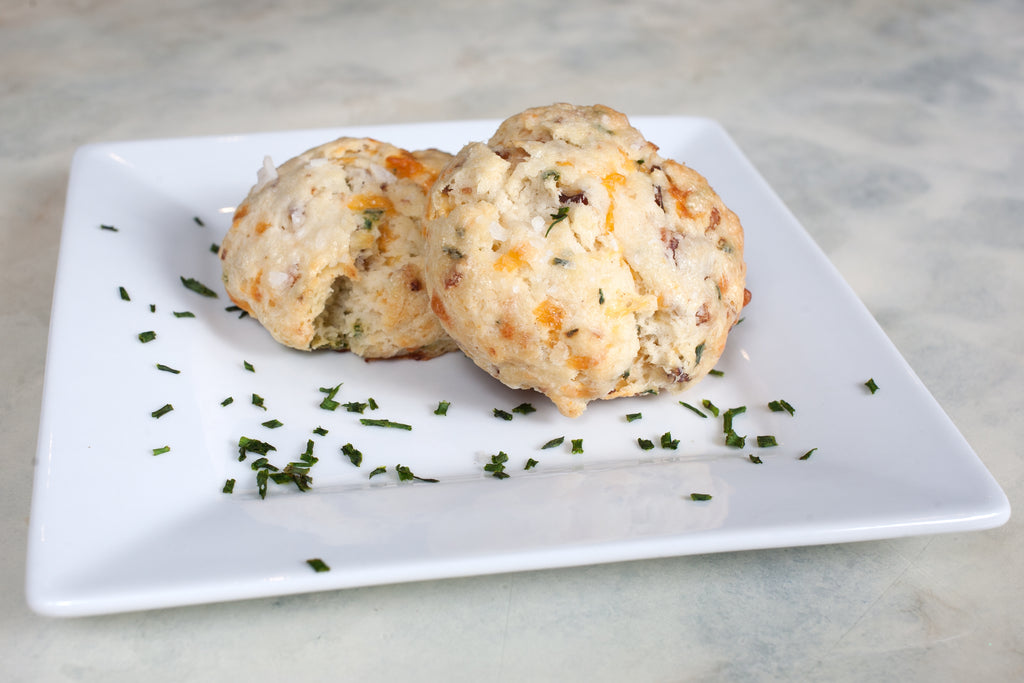
We give you a lot of recipes for sweets, desserts, and confections (for obvious reasons...), but sometimes you just crave something savory, yet still rich and indulgent. Clearly, bacon must be involved. So today we're giving you Kaysie Lackey's to-die-for Bacon Cheddar Scones. Breakfast just got dangerous.
Ingredients
- 1 3/4 cups all-purpose flour
- 3 teaspoons baking powder
- 1/2 teaspoon salt
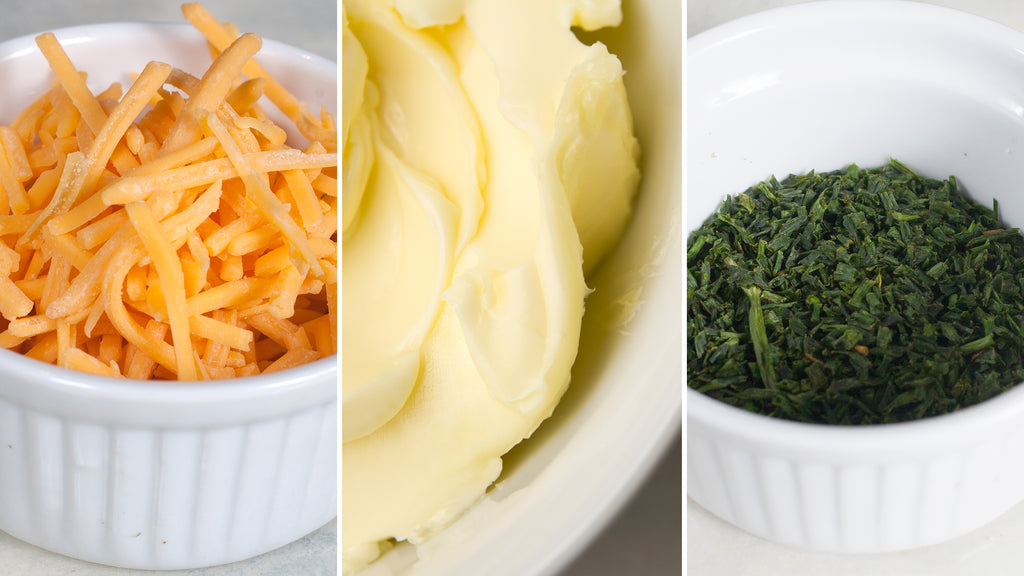
- 5 tablespoons unsalted butter (frozen)
- 1/2 cup buttermilk
- 1/4 cup sour cream
- 1 egg
- 1 tablespoon milk
- 1/4 chives
- 12 pieces of bacon, cooked & chopped
- 3/4 cup extra sharp cheddar, with additional to sprinkle over tops
Directions
Preheat the oven to 400 degrees F (200 degrees C).
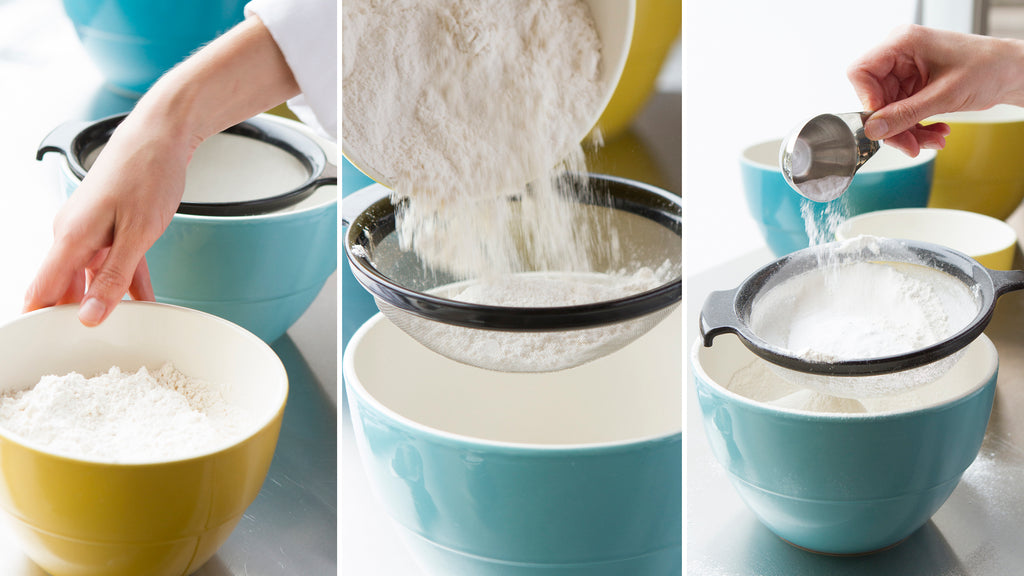
Sift the flour, baking powder, and salt into a large bowl. Take the frozen butter and grate it into the dry ingredients. Combine using a pastry blender or rubbing between your fingers until it is in pea sized lumps. Cut in cheese.
Place back in freezer while preparing the fillings and wet ingredients.
Mix together 1/2 cup buttermilk, sour cream, and chives in a bowl. Pour all at once into the dry ingredients, and stir gently until well blended. Fold in Bacon.
You want your dough well-blended, but don't overdo it. Overworking the dough results in terrible scones!
With floured hands, pat scone dough into balls 2 to 3 inches across, depending on what size you want. Place onto a greased baking sheet, and flatten lightly. Let the scones barely touch one another.
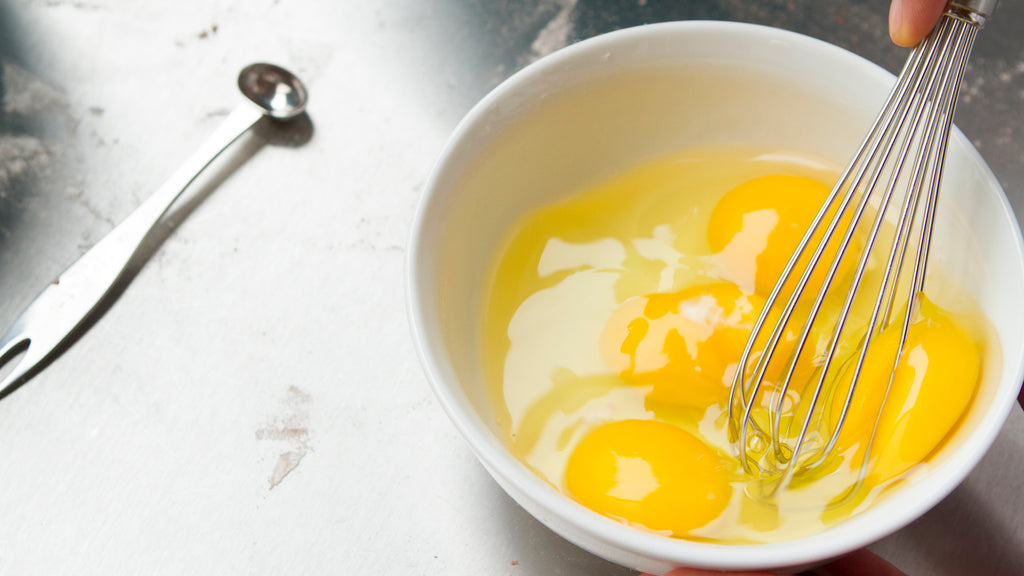
Whisk together the egg and 1 tablespoon of milk. Brush the tops of the scones with the egg wash and sprinkle with cheese if desired. Let them rest for about 10 minutes.
Bake for 10 to 15 minutes in the preheated oven, until the tops are golden brown, not deep brown.
Now sit back and enjoy this decadent, savory delight.
Cake Serving Cakes by Kass!
It's February- the month of love! And we are excited to feature an artist we absolutely love as our guest artist this month- Kassy Jimenez of Cakes & Crafts by Kass!
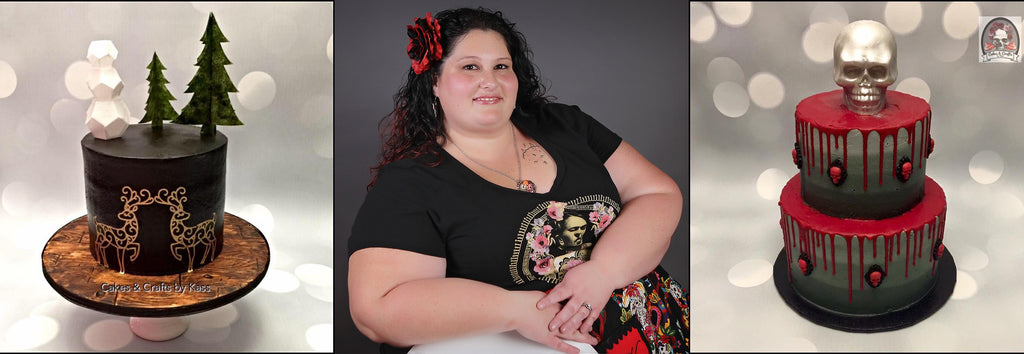
Kassandra Jimenez AKA Kassy is a self taught home baker from California and is currently located in Central Texas. She prides herself on being upfront to her followers, enjoys connecting with her “peeps” on social media and always being there to help anyone who may need it. From running Sweets University with her Cake Sister Wife (just go with it), Joyce of Toxic Sweets Shop to blogging about all things cake, running a popular YouTube channel, and putting on a Cake Show, she is always working on something! Her style is very much her own- modern, bold, rustic and detailed cakes. Kassy has been featured in magazines, has appeared on Food Network's Cake Wars, and is a brand ambassador for Icing Images! She is a wafer paper addict and buttercream is second nature to her.
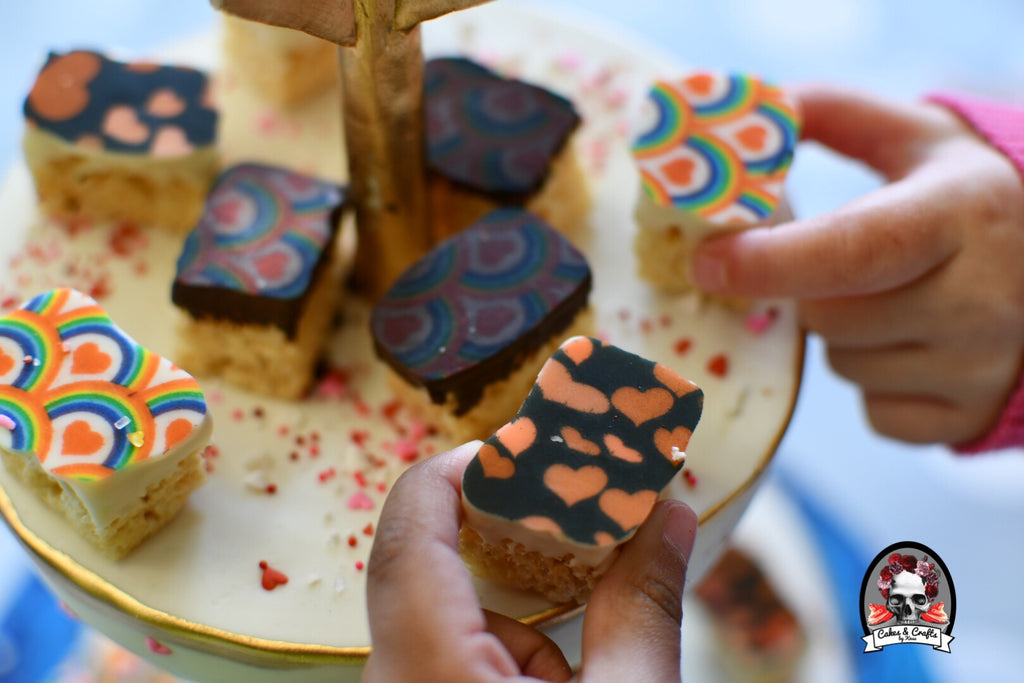
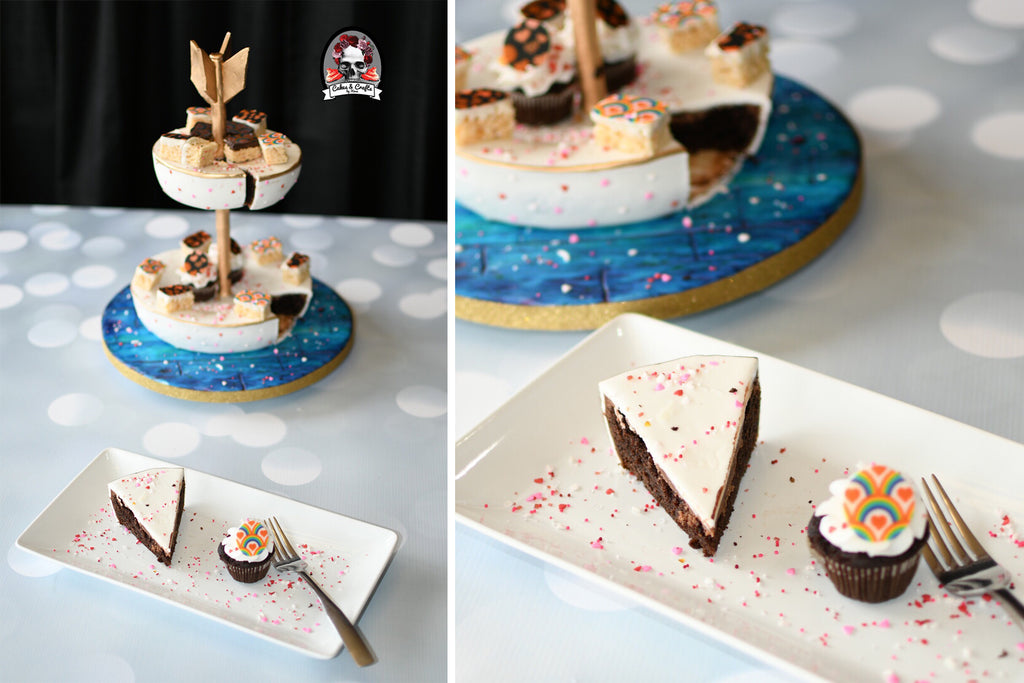
This month, Kassy has invented something meta- a way to serve your cake... on cake. We'll never use a silver platter again!
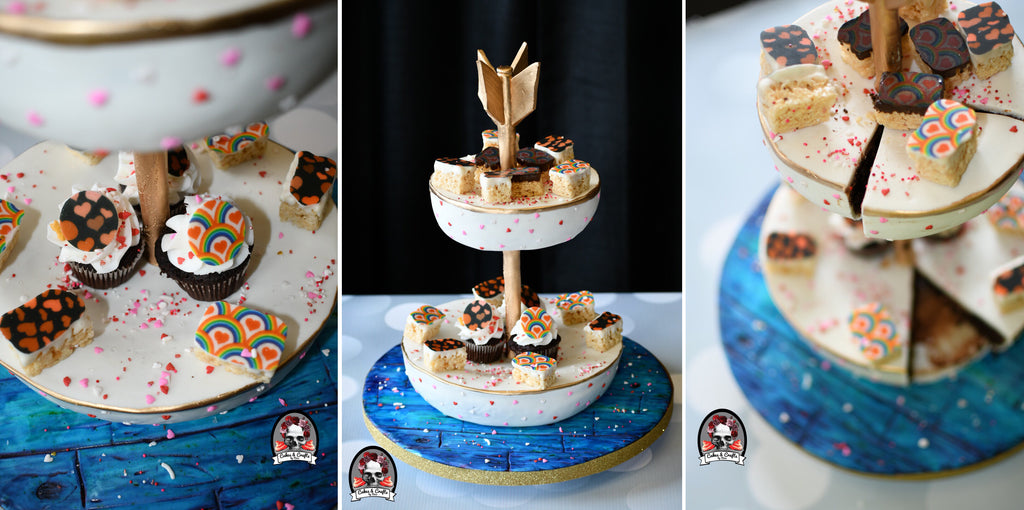
Kassy has used Innovative Sugarworks Sugar Structures to build a central armature to turn two cakes into a 2-tiered serving platter, which she then piled high with delicious treats. This is truly the cross section of innovation and decadence!
In the video below, Kassy shows you how she made the whole thing, from the wood paneled base board to the armature construction and cake making. Check it out!
And if you liked that, be sure to subscribe to Kassy's YouTube Channel for more awesome tutorials and crazy cake ideas!
www.youtube.com/c/CakesCraftsbyKass
You can also follow her on Facebook:
www.facebook.com/CakesandCraftsByKass/
And on Instagram:
@cakesandcraftsbykass
And keep up with own cake blog on her website:
www.cakesbykass.com


