Sugarworks Blog
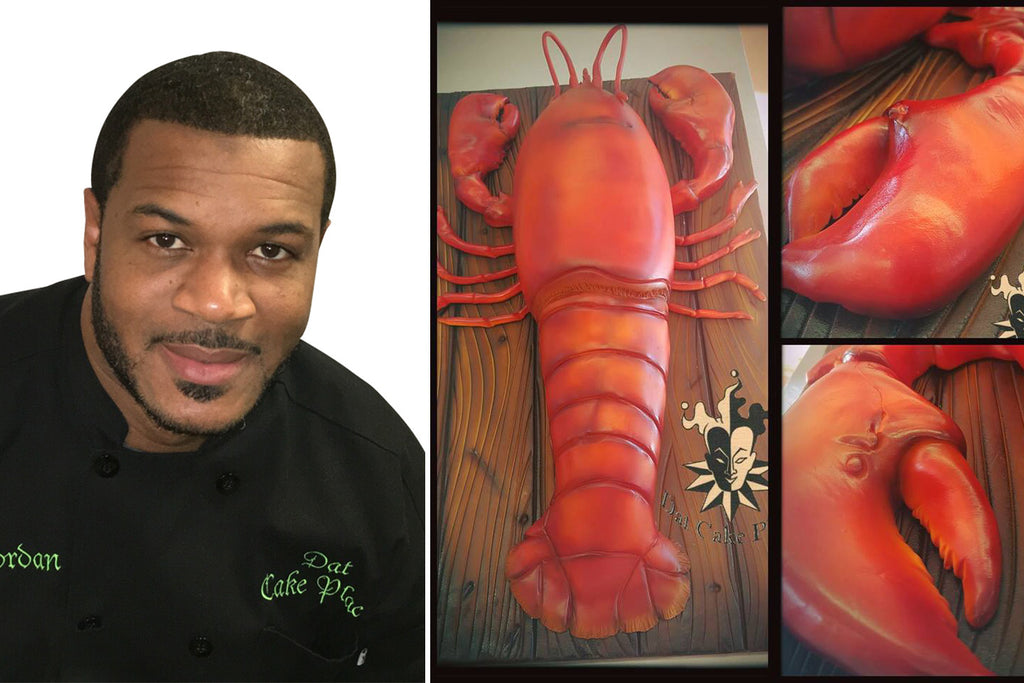
Lobster Claws by Dat Cake Place
Jockan Jordan is the owner and founder of Dat Cake Place in New Orleans, LA. With a background in architecture and interior design guiding his artistry, Jockan has made a name for himself as a creator of stunning sculptural cakes featuring vivid colors and movement.

A self-taught artist with no formal culinary training, Jockan has rocketed to cake fame with appearances on television shows like Food Network's Cake Wars and WGNO 26's News With A Twist, features in publications like Cake Masters, The Times Picayune, and Nola.com, and participation in cake competitions as both a winning competitor and a judge. He's even made an edible dress worn by a runway model on Battle of the Instructors in Jacksonville, FL.
Today, Jockan is showing us how he made these incredibly realistic lobster claws using fondant and Sugar Shapers.
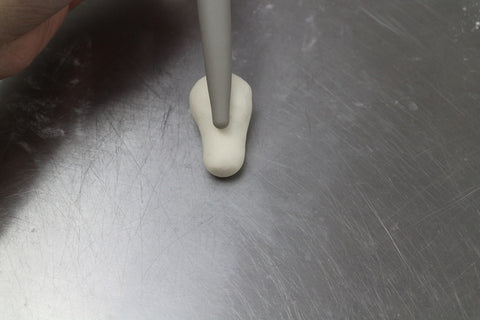
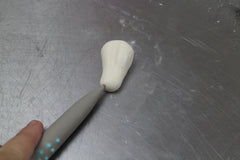
First, start of with a ball of fondant. Roll it into a drumstick shape.
Now, flatten the larger side of the drumstick. Take your Exacto knife and cut an L shape out of the flat side- one split down the center of the flat side and one cut from the edge to the center, creating an L shape. 
Set aside the small piece that is cut out. It will be used later for the bottom claw.
Next, use your Bone Chisel Sugar Shaper (the orange one) and create a well in the claw by pressing the shaper into the area where you removed the smaller piece of fondant.
Now, take the palm of your hand and further flatten the outside edge of the flattened piece and the inside edge of the flattened piece where you cut your L shape. Do the same thing to the small piece that was cut out of the L shape- flatten the inside and the outside edge.
Next, take the yellow Square Tip Chisel and make the claw teeth by pressing individual lines into the inside edge of your claw.
Do the same to the inside of the small piece that you cut out of the L shape, which will be the bottom portion of your claw.
Now take a little dab of water on a brush and pat inside the hole that was created on inside of the claw and insert the bottom portion of the claw that was cut out. Take the Tri-Tip Sugar Shaper and make a v shape indention in the long portion of the claw. Set that aside for a second. 
Now take a small ball of fondant. Roll it out into a bean shape- one end slightly smaller than the other. On the smaller side, Press down to semi -flatten.
On the larger side, take the orange Sugar Shaper and make a well. Make sure the well is large enough to attach to the elongated portion of the claw.
Dab a little bit of water on the inside of the well , and attach that piece to the bottom of the claw. And there you have it!!
I would then air brush the top portion of the claw, leaving the bottom fairly white. I add a little darker color in the indentions and where everything connects to give it a little more realism.
I hope this was extremely helpful and fun!! If you try out this lobster instructional, I would love to see the results! Please send me your photos!!
We hope you enjoyed this tutorial by Jockan Jordan of Dat Cake Place. Keep up with Jockan's latest creations on his social media pages:
You can also catch Jockan live at Sweetfest Con in Atlanta, GA September 21 - 24, 2017 and at Confetti Fest Cake Show in Seattle, WA October 5 - 8, 2017.
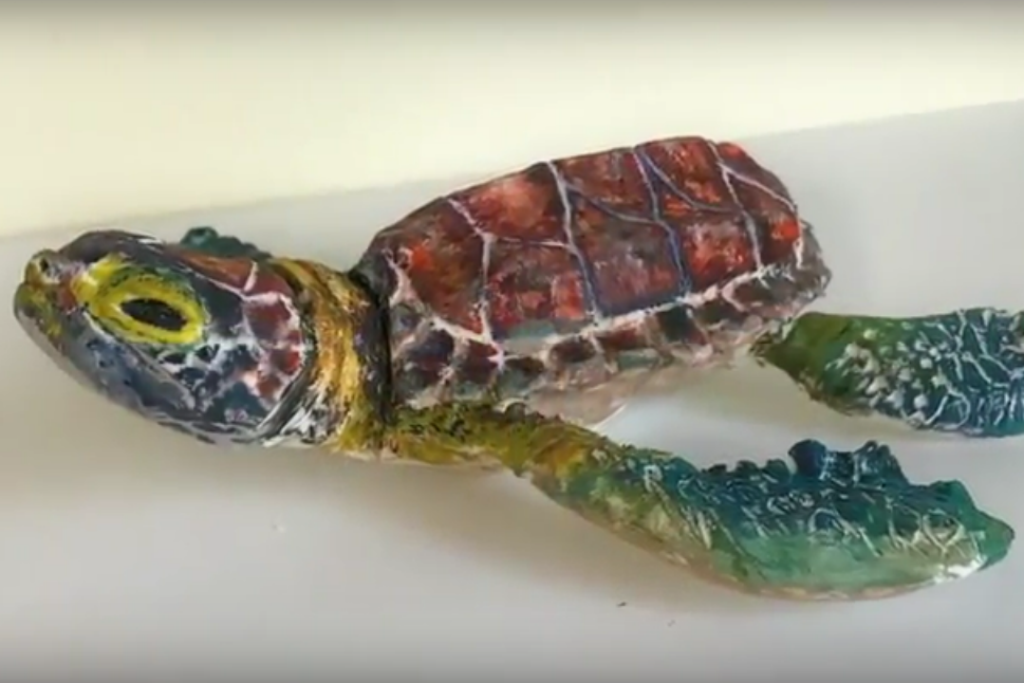
Liz's Turtle Baby
Liz Kraatz is the mastermind behind Liz's Cake Art in St. Louis, MO. Liz has been running her design studio for 6 years and has made a name for herself as a skilled sculptress, teacher, and creative artist. Today, she's going to show us how she uses Sugar Shapers for her detailed, realistic sculptures.

I started my business, Liz’s Cake Art, about six years ago and I really wish I would have these Sugar Shapers from the beginning. These tools make my sculpted cakes much more realistic and accurate.

I love each tool for a different reason, but I can say I use the firm and the soft tips equally. My Sugar Shapers give me the ability to get those super fine details that other sculpting tools can not achieve.

I’ve created this sculpted baby sea turtle and you can find this little cutie as part of Liz Marek's mermaid installation at the SoFlo Cake and Candy Expo in Miami, Florida, April 28-30! This turtle required very fine details in the shell, skin, and head. Thanks to my Sugar Shapers, they were easily achieved!

I put together a time-lapse video to show you how I used each tool and to show what amazing things you can create with the most innovative sugar sculpting tools available… the Sugar Shapers!
Find more videos on my YouTube channel, Liz’s Cake Art
Instagram: @lizs_cake_art
Facebook: Liz’s Cake Art
We hope you enjoyed this baby sea turtle by Liz Kraatz. If you decide to make your own baby turtle, Liz would love to see them! Email photos, or post them to social media and tag Liz's Cake Art and Innovative Sugarworks!
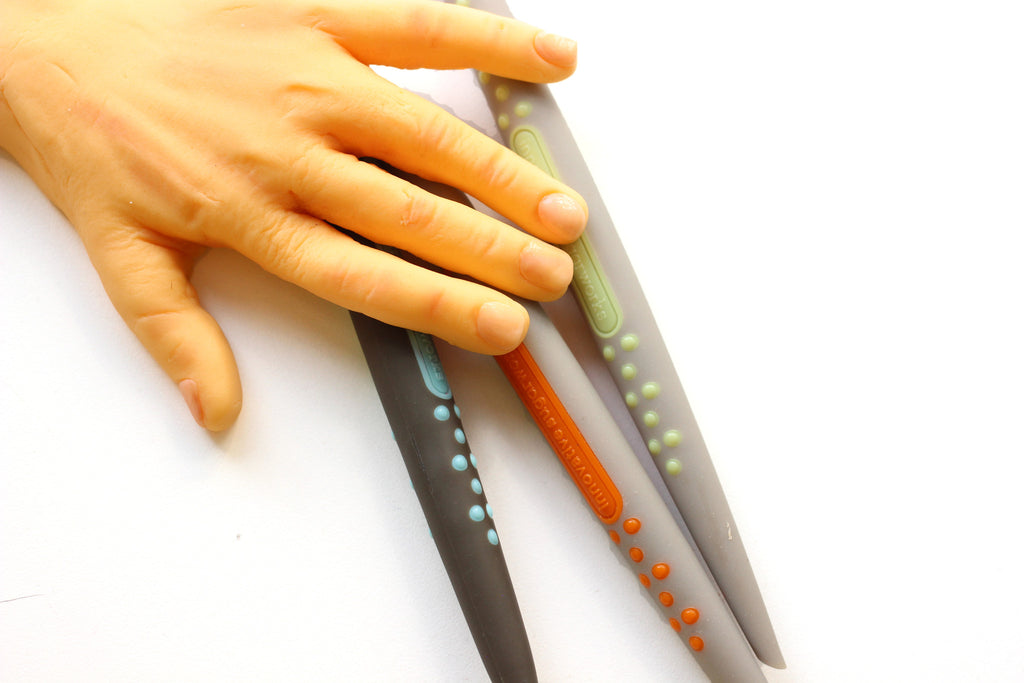
Sachiko Windbiel's Human Hands
Sachiko Windbiel grew up in Japan and relocated to New York in 2008 to attend culinary school. While originally specializing in vegetarian and healthful food trends, the charm and whimsy of sugarcraft eventually won her over.
Sachiko now runs Mimicafe Union in New York City and has made a name for herself as a master of edible art. With a style that is cute, light-hearted, and fun, Sachiko is most recognized for her fondant figures and cake toppers.

Today she is going to teach us how to make convincingly realistic human hands using fondant and Sugar Shapers!
Life Like Fondant Hand Step By Step Tutorial
My work is all about Fondant Figures… my main tools are my fingers, but thanks to Sugar Shapers, I was able to realize some fun new techniques!
Let's get started!
First, we need to color the fondant. It's best to start with white fondant and add color so that you can get exactly the tone you want. Color a handful of fondant to the skin tone that you would like by adding AmeriColor Gel Color. I use AmeriColor Flat Gold Gel Color.

Once you have a color you like, shape the Fondant into a form resembling a wooden spoon as shown.
Using your own hand as a model, cut the fingers in the fondant wooden spoon with an X-Acto Knife. Then, smooth out the squareness of the fondant fingers by smoothing and shaping them with your own fingers.
Now let's start using our Sugar Shapers to add shape and contour to our hand. Use the Orange/ Bone Chisel Sugar Shaper to create web area between each finger by pressing inward toward the wrist with the edge of the shaper. Then, use the same Bone Chisel tool to push up small mounds of fondant to create knuckles. Smooth the knuckles with your fingers to keep them looking organic.
Next, use the Light Blue / Pointed Chisel to create the wrinkle lines of the middle joint on the back of the fingers. Then use the Green/ Round Tip Chisel tool to gently press down on the fondant at the end of each finger to create the nail beds.
Now, add a little bit of Red AmeriColor Gel to some excess skin toned fondant to create a pinker tone for the nails. Pinch a ball of this pinker fondant, place it on the nail bed and smooth it into place with your fingers. Use the Green/ Round Tip Chis to add definition to the shape of the nail.
Use your fingers to add body / muscle tone and roundness to the fondant fingers. Then use the edge of your Pointed Chisel to lightly indent lines on the back of the hand to indicate the hand’s bone structure.
To create shadows and depth on the hand, use Petal Color Dust. I combined Light Brown Dust with a little bit of Pink Dust- you can test the dust tone on some spare fondant to make sure you are getting the color you want. Once you have your desired color, just touch the brush to the main knuckles and to the mid finger joints. Also touch the brush along the back of the hand structure lines and on the side of the fingers to add tone. 
If you would like to create interesting positioning of the fingers, place the fingers on your shapers in whatever positions you would like them to have. Then, allow to dry. You can also use just a touch of confectioner’s glaze to add a sheen to the fingernails. 
The fondant dries quickly. If you would like to add more life-like wrinkles to the fingers, you can very gently bend the fingers a little bit after they have dried out some.
And there you have it! A life-like human hand made of fondant!
Sugar Shapers are wonderful tools for creating many exciting details, textures, and forms. Adding realism to your creations is a pinch with these tools in your kit.

We hope you've enjoyed this tutorial by Sachiko Windbiel of Mimicafe Union in New York City. If you want to see more of Sachiko's work, you can follow her on Facebook and Instagram.
You can also watch Sachiko in action at the Innovative Sugarworks booth at That Takes the Cake in Austin. Video of her live demonstration is posted on our Facebook page here.
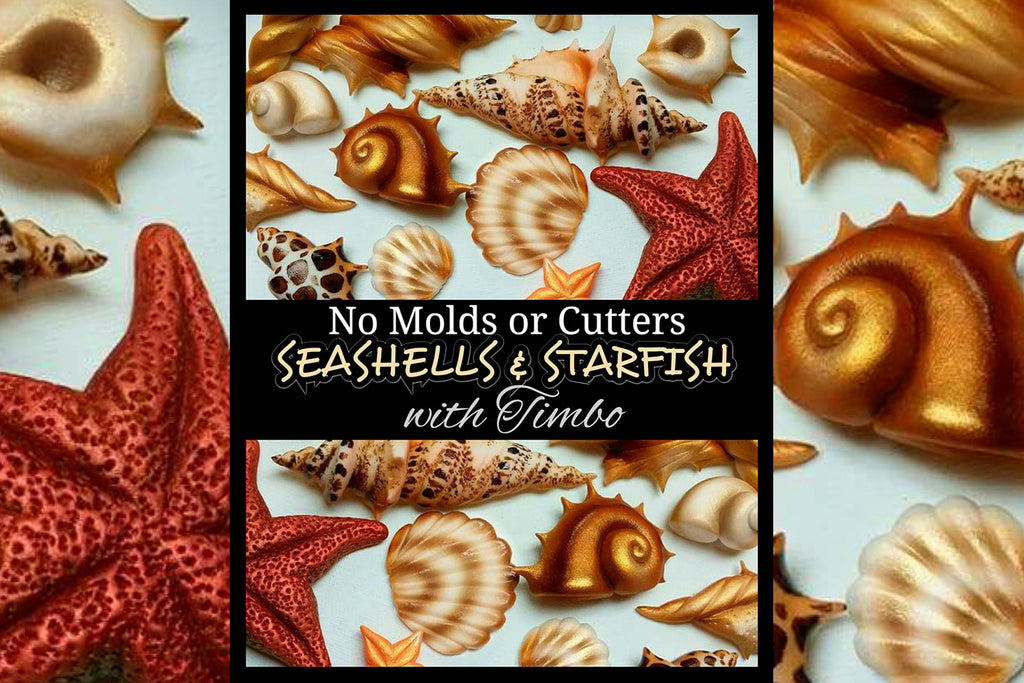
Seashells and Starfish with Timbo!
Timbo is recognized for his complex sculpting, intricate detail work, and a hyper-realistic special-effects style. Today he's demonstrating how to make these incredibly convincing seashells and starfish completely by hand- no molds needed!

Everyone is either always asking me how I make my seashells, or not asking me because they're assuming I just use molds....I don't! I'm going to show you all the quick and easy way I make some of my seashells and starfish.


Hope you all find this useful, and if you do, SEND ME PICS!!!!!
We hope you're as excited as we are about Timbo's Starfish and Seashells! If you want to see more of Timbo's work and hear about his upcoming classes, follow him on Facebook and Instagram.
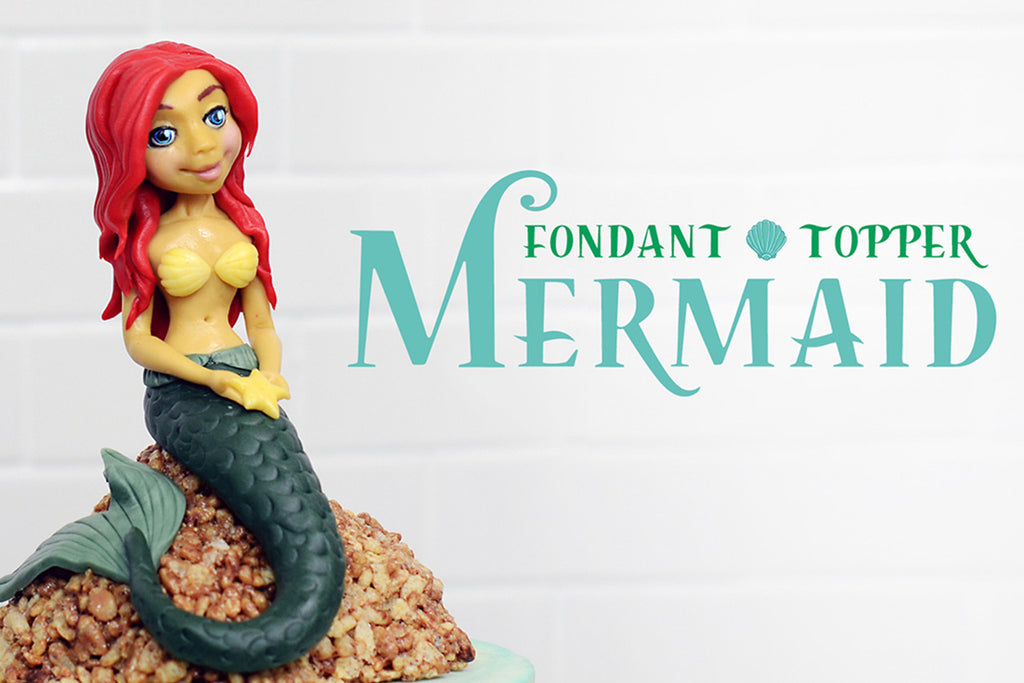
Liz Marek’s Mermaid 2.0

Liz Marek is the owner of Artisan Cake Company in Portland Oregon and runs the online cake decorating school Sugar Geek Show. She specializes in sculpted and special effects cakes, and enjoys making tutorials, teaching classes around the world and coming up with new and innovative cake techniques.

Liz is the author of the highly acclaimed cake decorating book, Artisan Cake Company’s Visual Guide to Cake Decorating. Her work has been featured in many magazines such as BRIDES, Oregon Bride, Portland Bride and Groom, Cake Masters, American Cake Decorating Magazine and more. She has competed and won on Food Network's Duff till Dawn (2015) and her work has been televised on Food Network's Outrageous Cakes series and news stations.
Liz is also an early adopter of Sugar Shapers as her professional go-to tool for sculpting and modeling. Today she delivers an update on one of her first highly popular tutorials. The original mermaid cake topper tutorial was made before Sugar Shapers were developed. This new one reflects her current sculpting habits, as well as her growth as an artist. We adore this mermaid and we know you will, too! Check it out!

One of the very first videos I ever made for my YouTube channel was a fondant mermaid topper tutorial. It quickly became very popular and was one of the reasons I began making more videos for youtube.

That was four years ago! I have learned a lot about making figures and the tools that I WISH I had when I first started sculpting. Yep, I'm talking about those amazing Sugar Shapers!

It would have been a lot easier to get those face shapes and little details with Sugar Shapers and I'm not just saying that! I use mine so much, I even found one in my purse the other day! My favorite sugar shaper is definitely the pointed shaper!

I use it for everything from shaping lips, eyes and making my signature smiles.
I love the rounded wedge for making perfect scales or fingernails. The knife is great for making wood grain texture or soft lines without tearing the fondant. The ball tool is invaluable for all kinds of textures but I especially love it for making eyes on my toppers faces.

I have put together an updated (timelapse) version of my popular mermaid topper tutorial her for your enjoyment! And you can learn more about sculpting figures and making awesome cakes on my online tutorial school Sugar Geek Show.
This time-lapse video should give you a good idea of how to use Innovative Sugarworks Sugar Shapers to sculpt your own mermaid, or another figure using similar techniques. To see the full step-by-step video, click this link to Sugar Geek Show!
We hope you've enjoyed this mermaid topper instructional by Liz Marek! If you want to see more of Liz's work, visit Artisan Cake Company and follow her on Facebook. And if you're interested in learning more and crazier cake decorating techniques, go to Sugar Geek Show and check out its extensive library of tutorials. With skill levels ranging from beginner to advanced, Sugar Geek Show has something for everyone!
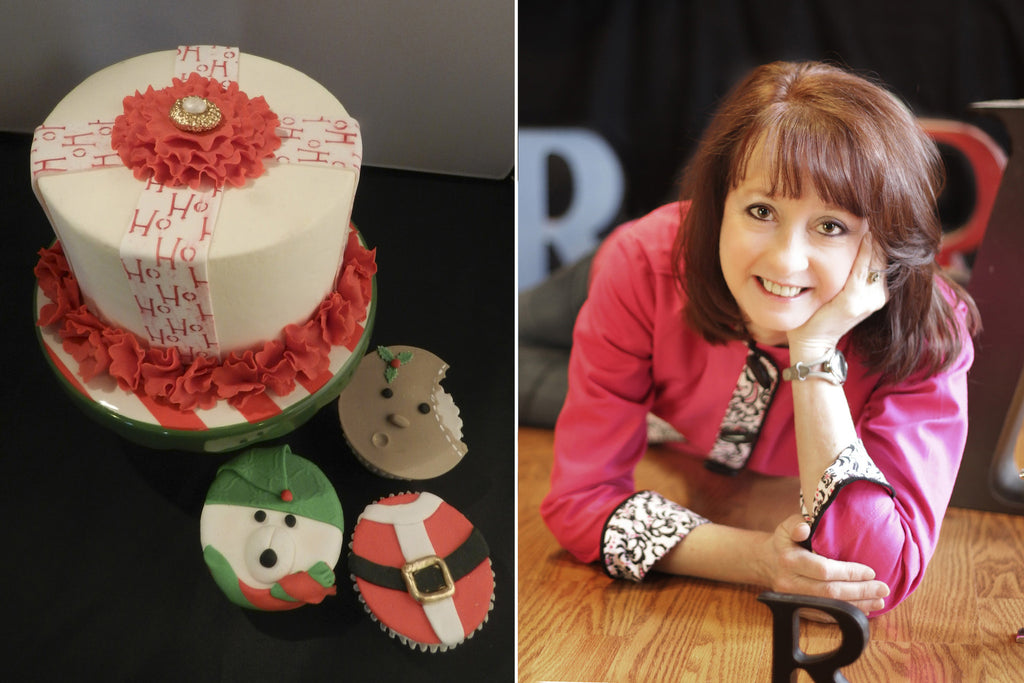
Ruth Rickey’s Holiday Ruffle Cake

Ruth Rickey is a former lawyer, administrative law judge and bakery owner. Ruth was named the top Bakery Manager in the world for the IGA stores (3200 stores in 31 countries) in 1999, then opened Ruth’s Sweete Justice Bakery in 2000. Ruth closed the bakery at the end of 2011, so that she could focus strictly on teaching and judging. Ruth began a custom product line of cutters, veiners and dusting powders under the name Sugar Gypsy and has started an educational blog called SugarZen.
Ruth has been seen on all 3 networks that have cake programming. She won WE tv’s Wedding Cake Wars, she assisted Pat Jacoby’s team twice in their victories on TLC’s Ultimate Cake Off and she has been featured in 3 different Food Network specials about the Oklahoma State Sugar Art Show. Her cakes have graced the pages of national and international publications for years.
Ruth was given The Sweet Life Hall of Fame award at the National Capital Area Cake Show in Virginia and the Cake Support Award at the Cake Masters Awards in Birmingham, UK. She is also one of only a few dozen ICES Certified Master Sugar Artists in the world!
Ruth has taught all across the US and is now teaching and demonstrating internationally.

Today, Ruth is going to teach us how to make this stunning holiday cake using stenciling, ruffling, and hand painting techniques.
Start with a cake in your chosen size already covered in fondant. You can use Sugar Smoothers to smooth the fondant and get crisp edges.
Put a thin layer of shortening on a non stick mat and roll out your fondant or gumpaste on the shortening coated mat. I used Sugar Gypsy's Silicone Baking Mat.
Trim the fondant and turn the paste sticky side up. Then, place your stencil on the sticky paste. I used the Ho Ho Ho stencil from 2T Stencils.
Using a soft brush, dust the stencil with petal or luster dust. Luster dust grabs better and is less likely to smear. I used red petal dust.
Remove the stencil and trim the fondant into strips. Attach the strips to the cake, like ribbons on a gift box.
Next, cut out scalloped circles in red gumpaste. I used Choco Pan red gumpaste and a standard plastic circle/scalloped circle cutter set.
Using the pointed Sugar Shaper, ruffle the edges of the scalloped circle. I used the light blue sugar shaper, regular size, in soft. To ruffle, use your dominant hand to turn the shaper quickly back and forth, while using pressure from a finger on your non dominant hand to maintain consistent pressure.
Repeat with three smaller scallops. Attach each scallop, larger to smaller, in the center where the ribbons meet. Use a brooch mold to make a decorative sugar brooch to place in the center of the cake. I used Brooch 4 from my Brooch collection at Sugargypsy.com. Paint the brooch as desired. I used non-toxic gold metallic luster mixed with lemon extract on the facets of the brooch and used Super Pearl luster dust mixed with lemon extract for the stone.
For the border, cut out small scalloped circles in red gumpaste and ruffle as before. Scrunch the circles and place at the base of your cake.
Now stand back and admire your creation! This cake is an elegant and festive addition to any holiday event!

We hope you enjoyed this instructional by Ruth Rickey! You can follow Ruth on Facebook, subscribe to her Sugar Zen blog, or visit her online at RuthRickey.com and SugarGypsy.com.
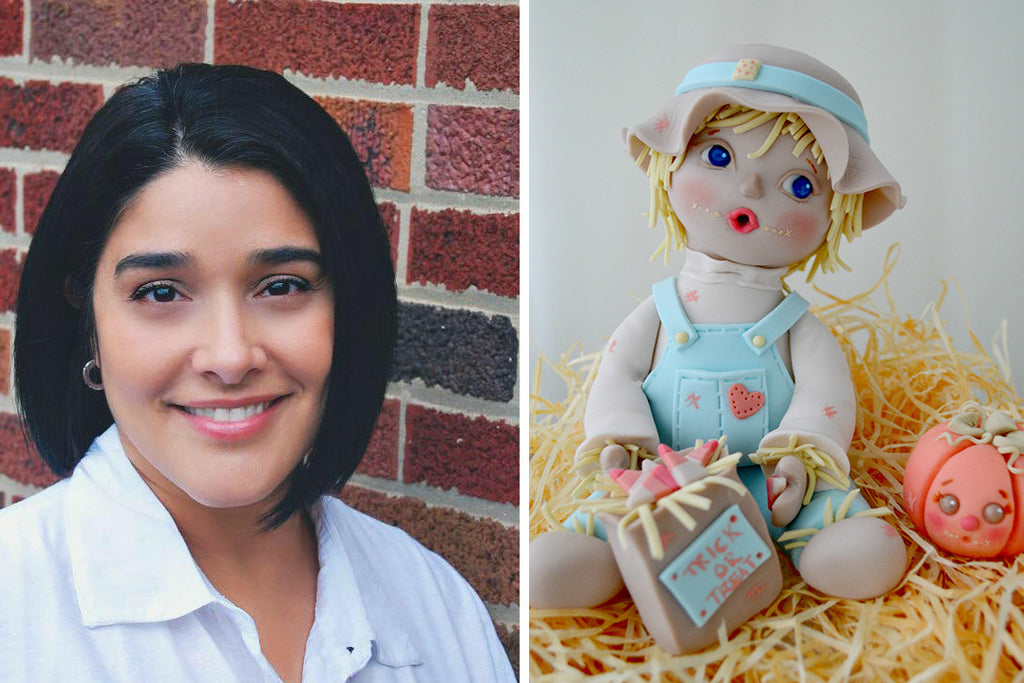
W.E. Sugarart Melts your Halloween Heart!

Nayda Hernandez is the self-taught talent known throughout the cake world as W.E. Sugarart. After leaving a successful career in the medical field to spend more time with her children, Nayda stumbled into the world of cake art while attending a birthday party. The party's beautiful fondant cupcake toppers inspired her to seek out online classes and tutorials and try her own hand at the craft.

Nayda's work is is often described as whimsical and playful. She specializes in sculpted child figures, often incorporating costumes and props reminiscent of childhood folly. Nayda frequently shares her work on her Facebook page and her Instagram.
Just in time for Halloween, Nayda is joining us at Innovative Sugarworks to teach you how to make this adorable fondant Scarecrow and its Jack-O-Lantern companion!
Supplies/Tools Needed:
- Gumpaste/fondant in pastel colors: 3 shades of tan (very light, light, & medium), light blue, pale yellow, salmon, watermelon, white
- Gel paste colors: baby blue, white, tangerine, ivory, khaki
- Watermelon petal dust
- Soft Mini Tip Sugar Shapers
- Cutters: 4” & 2.25’ circle cutters, mini heart cutter, mini diamond cutter, mini square cutter
- detailing paint brushes
- dotting tool
- wood skewer
- 1.4” floral foam ball
- Shortening
Part 1: The Scarecrow

Step 1:
Start with 130g of light blue gumpaste/fondant and roll into a sausage shape with tapered ends. Fold your sausage in half to form an inverted ‘V’. This will be your scarecrow's pants. Cut off the ends so you have 3” from the top to the end of each leg. Then use the smaller end of the bone chisel sugar shaper (orange) to create creases or folds in the legs. Set aside to firm up before adding the torso.

Step 2:
Take 84g of your gumpaste/fondant in the lightest shade of tan (ivory) and roll/shape into a teardrop shape. Flatten the bottom so you can place it on the pants after it has dried. Set this aside.

Step 3:
Roll out a 2” x 4” piece of light blue gumpaste/fondant and cut off the corners as shown in the photo (this will be the upper part of the overalls). Place the torso on the light blue altered rectangle (make sure to flip over your light blue piece so the nice side is the side that will be showing). The torso should be slightly closer to the back so that when you fold them up the front portion will be higher than the back. Once you are happy with the placement, moisten the torso & attach the front/back of the overalls.

Step 4:
Cut out a small rectangle of the light blue gumpaste/fondant that you will use to make a pocket for the front of the overalls, moisten the piece then attach to the front of the torso. Use the smaller end of the square tip chisel (yellow) to make some stitches around the edges of the overall along the front & pocket as shown in the photo. Use the chisel to pull out the pocket so it will look like it is slightly open.

Step 5:
Take the wooden skewer and rub some shortening on it so you can insert it easily through the center of the torso/legs, then cut the skewer so you have about 1.5” above the torso to place the head once it is ready. Once you are happy with the placement of the body, remove the skewer and set aside both pieces to dry overnight.

Step 6:
Grab the 1.4” floral foam ball & 72g of the light tan gumpaste/fondant. Flatten the ball of gumpaste/fondant and rub some shortening on the side that will be against the ball. Wrap the gumpaste/fondant around the ball and roll until you get all the cracks out and end up with a smooth ball.

Step 7:
Press gently with your thumbs at the eye level in order to obtain cheeks. Using your little finger, gently press to form the jaw/chin and neck of the face. You can cut off any excess gumpaste/fondant but make sure to leave just enough for the neck.

Step 8:
Using the smaller end of the round tip chisel (green) make two holes where the eyes will be. Place a small ball of white fondant in each eye socket.
 Step 9:
Using the large end of the bone chisel make a hole where the mouth will be. Roll a small piece of the watermelon colored gumpaste/fondant to place around the mouth to form the lips as shown in the photo.

Step 10:
Cut out two small circles of the light blue gumpaste/fondant and place on the eyes, then color the edges with the blue gel paste (you can thin it out with a bit of water or Everclear). Apply some of the watermelon color petal dust to the cheeks. Take a piece of the darkest shade of tan gumpaste/fondant and form a small triangle/pyramid shape for the nose, moisten and place it on the face. Then mix a bit of white/ivory gel colors to achieve a cream color. Take your dotting tool and make three dots along each side of the mouth. Then with the fine detailing brush make two “X” as shown in the photo.
I like to take a skewer to make the hole in the head at this stage, so that once it is dry I don’t have to worry about damaging the face when placing it on the body.

Step 11:
Roll out four cone shapes (2 small & 2 large) to form the top and bottom eyelashes for your scarecrow. Moisten the top and bottom of each eye at the lash line, place the lashes as shown in the photo, and cut off the excess.
Step 12:
At this point, your pants and torso should have had time to dry over night. Assemble your scarecrow by re-inserting the wood skewer in the hole and stacking pants, torso, and head.

Now, take the ivory gumpaste/fondant, roll it out, and cut a thin strip that will be used to form the collar of the shirt. Moisten, then place the strip around the neck. Using the smaller end of the bone chisel, make some creases/folds in the collar.

Step 13:
Cut out a mini heart in the watermelon colored gumpaste/fondant, moisten and attach to the front pocket of the overalls. Use the pointed chisel (light blue) to make holes along the edge of the heart.

Step 14:
Roll two cone shapes (19g each) in the ivory gumpaste/fondant for the arms. Use the pressure of your little finger to give the arms a bend at the elbows. Pinch the end of each sleeve so they flare out slightly. Moisten the inside part of the arms and attach to the torso so the forearms are slightly resting on the thighs.

Step 15:
Cut out several pieces of gumpaste/fondant in several colors and shapes, they will be used as patches on the overalls and hat of your scarecrow.

Step 16:
Roll out and cut two 3” strips of the light blue gumpaste/fondant for the suspenders and roll out some of the pale yellow gumpaste/fondant to cut in very thin pieces of various lengths for the straw. Attach the suspenders to your figure's overalls and moisten the the ends of the sleeves and pants to attach some pieces of the pale yellow “straw”.

Step 17:
Roll two small balls of the light tan gumpaste/fondant for the hands. Flatten one end of each ball and cut a small triangle so you have two pieces that look like mittens. Clean/smooth out the edges and then moisten and attach the hands to the end of each sleeve.

Step 18:
Cut a round piece of the pale yellow gumpaste/fondant, moisten and attach to the back of the head. Then moisten and attach more of the yellow straw all around the head for the scarecrow's hair.

Step 19:
Roll out the medium tan fondant and cut a 4” circle for the brim of the hat and use the tri tip chisel to give it some texture. Moisten the top of the head and attach the hat to the top of the scarecrow's head.

Step 20:
Roll two teardrop shapes of the medium tan gumpaste/fondant and flatten the smaller end to make the shoes, moisten and attach to scarecrow.

Step 21:
Roll a thick piece of medium tan fondant and cut a circle using your 2.25” round cutter for the top of the hat. Roll and cut another thin strip of light blue gumpaste/fondant for the sash of the hat, moisten and attach to the hat. Now you can place some of your patches onto the hat, elbows, and along the legs of the scarecrow.
Part 2: The Jack-O-Lantern Friend and Bag of Treats

Step 1:
Take 38g of the melon colored gumpaste/fondant and roll into a smooth ball. Start with the tri tip chisel (red) and create 6 indentations from top to bottom, trying to space them out evenly. Use the pointed chisel (light blue) to soften/clean up the indentations you created on your pumpkin. Next take the large end of the bone chisel to make the eyes and the small end to make the mouth.

Step 2:
Using the mini heart cutter, cut out two hearts to use as leaves in the khaki colored gumpaste/fondant (I took a bit of the ivory and added just a touch of the khaki gel paste). Then roll out two very thin pieces for the tendrils and another small teardrop shape for the stem. Attach all your pieces to the pumpkin.
Step 3:
Roll two small balls of the medium tan gumpaste/fondant for the eyes and place in the eye sockets. With our fine detailing brush, paint some eyelashes & eyebrows with the ivory gel paste. Brush some watermelon petal dust along its cheeks and, if you want, roll a small ball of watermelon gumpaste/fondant for a nose.

Step 4:
Grab the medium tan gumpaste/fondant and form a 1” x 2” rectangle that will be a brown paper bag. Take your fingers and pinch all the edges of the rectangle to give it a worn look.

Step 5:
Moisten the top of the bag and attach some more straw.

Step 6:
Cut a small piece of the light blue gumpaste/fondant, moisten and attach to the front of the bag. Using a dotting tool, make a dot in each corner. With a detailing brush and peach gel color (I used white with a touch of tangerine) paint “TRICK OR TREAT” on the bag and use the dotting tool to apply color to the dots on each corner.

Step 7:
Next layer strips of the ivory, melon, and watermelon gumpaste/fondant and cut out several triangles to use as candy corn. Moisten the top of the bag and the left palm of the scarecrow and arrange/attach the candy corn.
And voila! You now have the most adorable edible scarecrow ever!

We hope you've enjoyed this tutorial and are inspired to try out some of these techniques in your own work! Nayda encourages all of you to customize your scarecrow to fit your personal vision. And she would love to see how people use her tutorial in their own art, so if you try out her lesson, go ahead and post pics of your creations on her Facebook page!
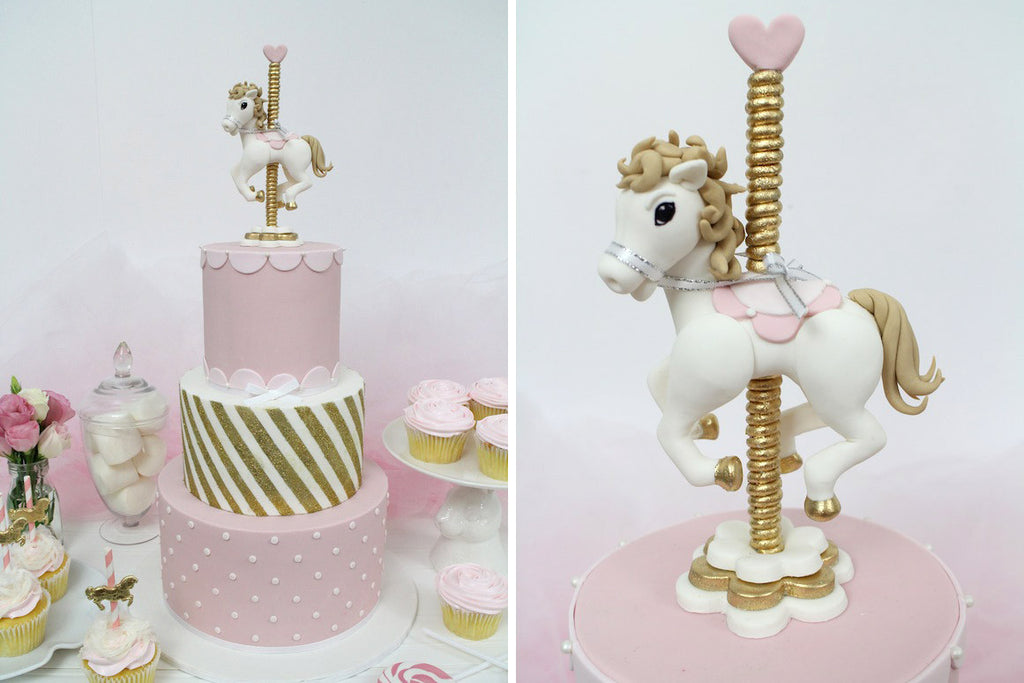
The Carousel Horse by Sharon Wee
This month we're spotlighting the work of  Sharon Wee who runs Sharon Wee Creations in Sydney, Australia. Sharon's work has been featured in magazines such as Hitched, Cosmo Bride, The Knot, and Modern Wedding. Her creations have been lauded on radio and television, and in 2013 the Australian Cake Decorating Network named her Cake Decorator of the Year. Sharon's work is often described as playful and whimsical. Today she is going to show us how to make a carousel horse cake topper.
The Carousel Horse
Tools You Will Need
- Innovative Sugarworks Sugar Shapers
- Small sharp knife
- Small scissors
- Small brush and water
- Long Skewer
- Black Edible Marker
- Circle cutter set
- Various sized blossom cutters
- Small heart shaped cutter
- Sugar Smoothers
- Styrofoam for holding the carousel topper
- White/silver 4mm ribbon (approximately 15in, for the reins)
Materials You Will Need
- 350g of white gum paste (horse topper)
- Small amount of light brown gum paste (horse mane and tail)
- Small amount of pink fondant (decorations)
- Small amount of light pink fondant (decorations)
- Gold lustre dust and cake decorating alcohol
- Piping gel
- Crisco
When I was younger, I loved carousels. There was just something fun and magical about getting on the ride with the music and moving horses. I wanted to capture the charming allure of the ride with this cake.
Step One: We're going to start with the body of the horse. Use about 120g of white gum paste for the body. Shape it into a long teardrop then roll your finger about 1/3 of the way in from the bigger end.
Step Two: Bend the skinnier end upwards to create the neck. Allow the body to sit upright to dry slightly. If you find the neck area falling forward, place something heavier up against it to support it.
Step Three: For the head, use a small amount of gum paste to create an egg shape. Roll your finger along the middle and towards the smaller end to create the nose. Roll the nose area between your forefinger and thumb to further define the shape.
Step Four: Now we're going to go in and do some detail work to really sculpt the head. Use the Bone Chisel Sugar Shaper to define the head by pressing it against the bigger end.
Then use the Pointed Chisel Sugar Shaper to indent the nostrils.
Cut the mouth area with the small scissors and gently open it up slightly. Then, create the eye socket by pressing the Pointed Chisel Sugar Shaper in at an angle on opposite sides to create an almond shaped eye.
Step Five: Once the body has dried slightly (when the neck can stand up on its own), gently cut the top of the neck flat (so the head can rest on it better) and press in the chest area to create a more natural body shape.
Next, insert a skewer all the way through the middle section of the body to create a channel.
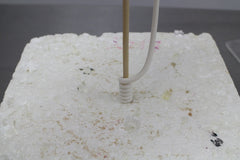
Step Six: Create the pole of the carousel stand by inserting the skewer at least 3 inches into the styrofoam and then apply piping gel approx. 3 inches up the skewer. Roll the gum paste into a long thin rope and start wrapping it upwards. Cut off any excess and allow this section to dry overnight.

When dry, attach the head onto the body of the horse and slide the body of the horse down the skewer.
Step Seven: Now we're going to shape the legs of our horse. I found it useful to draw out a template of leg shapes as a guide in the shaping. The template I drew is included in my book Playful Party Cakes, but you can also draw your own. Place the sheet of acetate on top of your template and apply a thin coat of Crisco onto the acetate to prevent the gum paste from sticking.
For the legs, roll small amounts of gum paste into four long teardrop shapes. Place each teardrop within the template. 
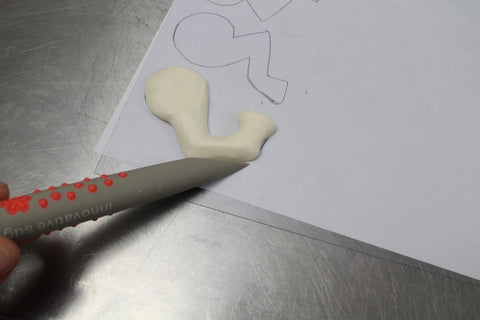
Step Eight: Once the limb area is firm attach the pieces to the body. If the weight of the legs starts to deform the body, prop the body up on the front and back until it is completely dry. Use a soft material such as foam or rubber so it does not leave a harsh mark.
Step Nine: For the saddle, cut out a blossom shape approx. 2 inches wide and a circle 1.5 inches wide and poke holes towards the side of the shapes.
Attach the saddle onto the horse. Then, apply piping gel to the rest of the skewer and wrap a thin rope of gum paste around it to the top, leaving just a small amount for the heart cutout.
Step Ten: Cut out the heart shape from a thick layer of fondant and attach it to the top of the pole. Then, cut out three gradual blossom shapes from a thick layer of gum paste for the base.
Step Eleven: Mix the gold lustre dust with a small amount of alcohol and gently paint the carousel pole.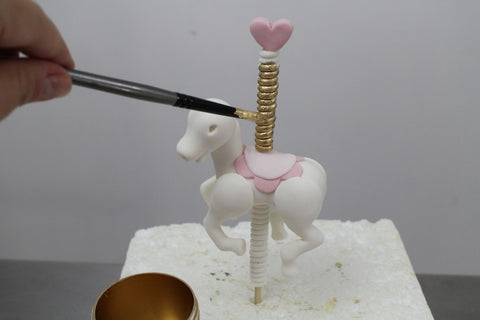
Step Twelve: Create two small-flattened teardrop shapes for the ears. Pinch the rounded end together and cut that end flat. 
Step Thirteen: For the mane, roll various sized small teardrop shapes and twist them randomly.
Attach along the neck area and work on positioning the pieces in various directions to create a curly mane.
Step Fourteen: For the tail, roll five thin sausage shapes and taper both ends. Place the pieces together and twist one end. 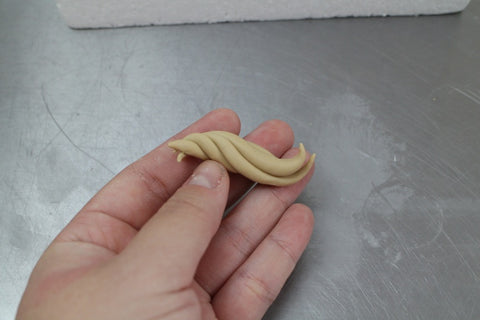
Step Fifteen: Use a black edible marker to outline the eye socket. 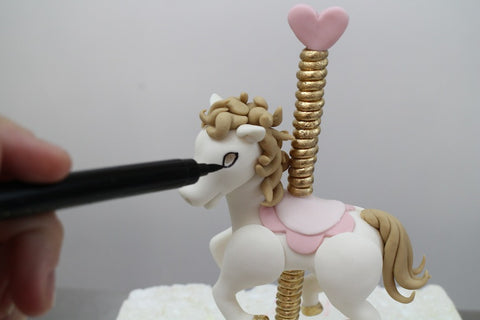
Use the Trip-Tip Chisel Sugar Shaper to adjust the placement of the eyebrows if necessary. 
Step Sixteen: Roll and place tiny balls of icing between the scallops of the saddle.
Attach the ribbon harness by applying some piping gel to the nose area. Loop the ribbon around in the middle and slide the loop over the nose.
Bring the side of the ribbon pieces around the neck of the horse and behind the pole. Gently tie a knot and a bow at the back.
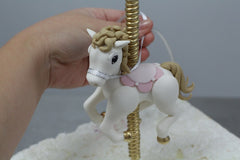
Step Seventeen: Attach the base of the carousel on a cake and insert the horse and pole.
Your carousel horse is now complete! This tutorial, and many other creative and imaginative sugar arts, can be found in Sharon Wee's new book Playful Party Cakes.


